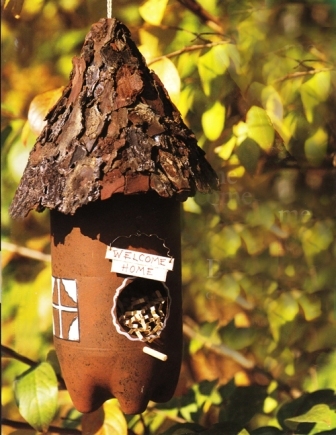
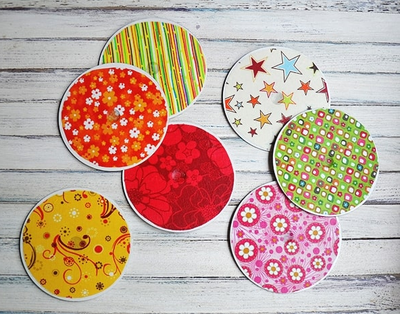
Plastic Bottle Birdfeeder
Instead of sending more plastic to the landfill, turn a plastic bottle into a fun and functional birdfeeder crafted like a birdhouse. This is a great green craft from Heidi Borchers for using the occasional plastic bottle.
.jpg)
Materials:
- Aleene’s® Super Thick Tacky Glue™
- 9” x 16” piece of lightweight cardboard
- 2-liter plastic soda bottle with cap, washed and dried
- Spray paint: black, brown
- Acrylic paint, burnt umber, black, beige
- Small sponge piece
- Craft knife
- 3/16” diameter hole punch
- 3” square white shrink plastic
- Paintbrushes: fine-tip ½” flat shader
- Drill with 18” and 1/16” bits
- 16” length of braided cord (for hanger)
- 2-1/2” length 1/16” diameter wood dowel
- Clothespins
- Aleene’s® OK to Wash it Glue®
- Pine bark pieces
- Wooden craft stick
- Fine-tip permanent black marker
- 26-gauge florist wire
- Bamboo skewer
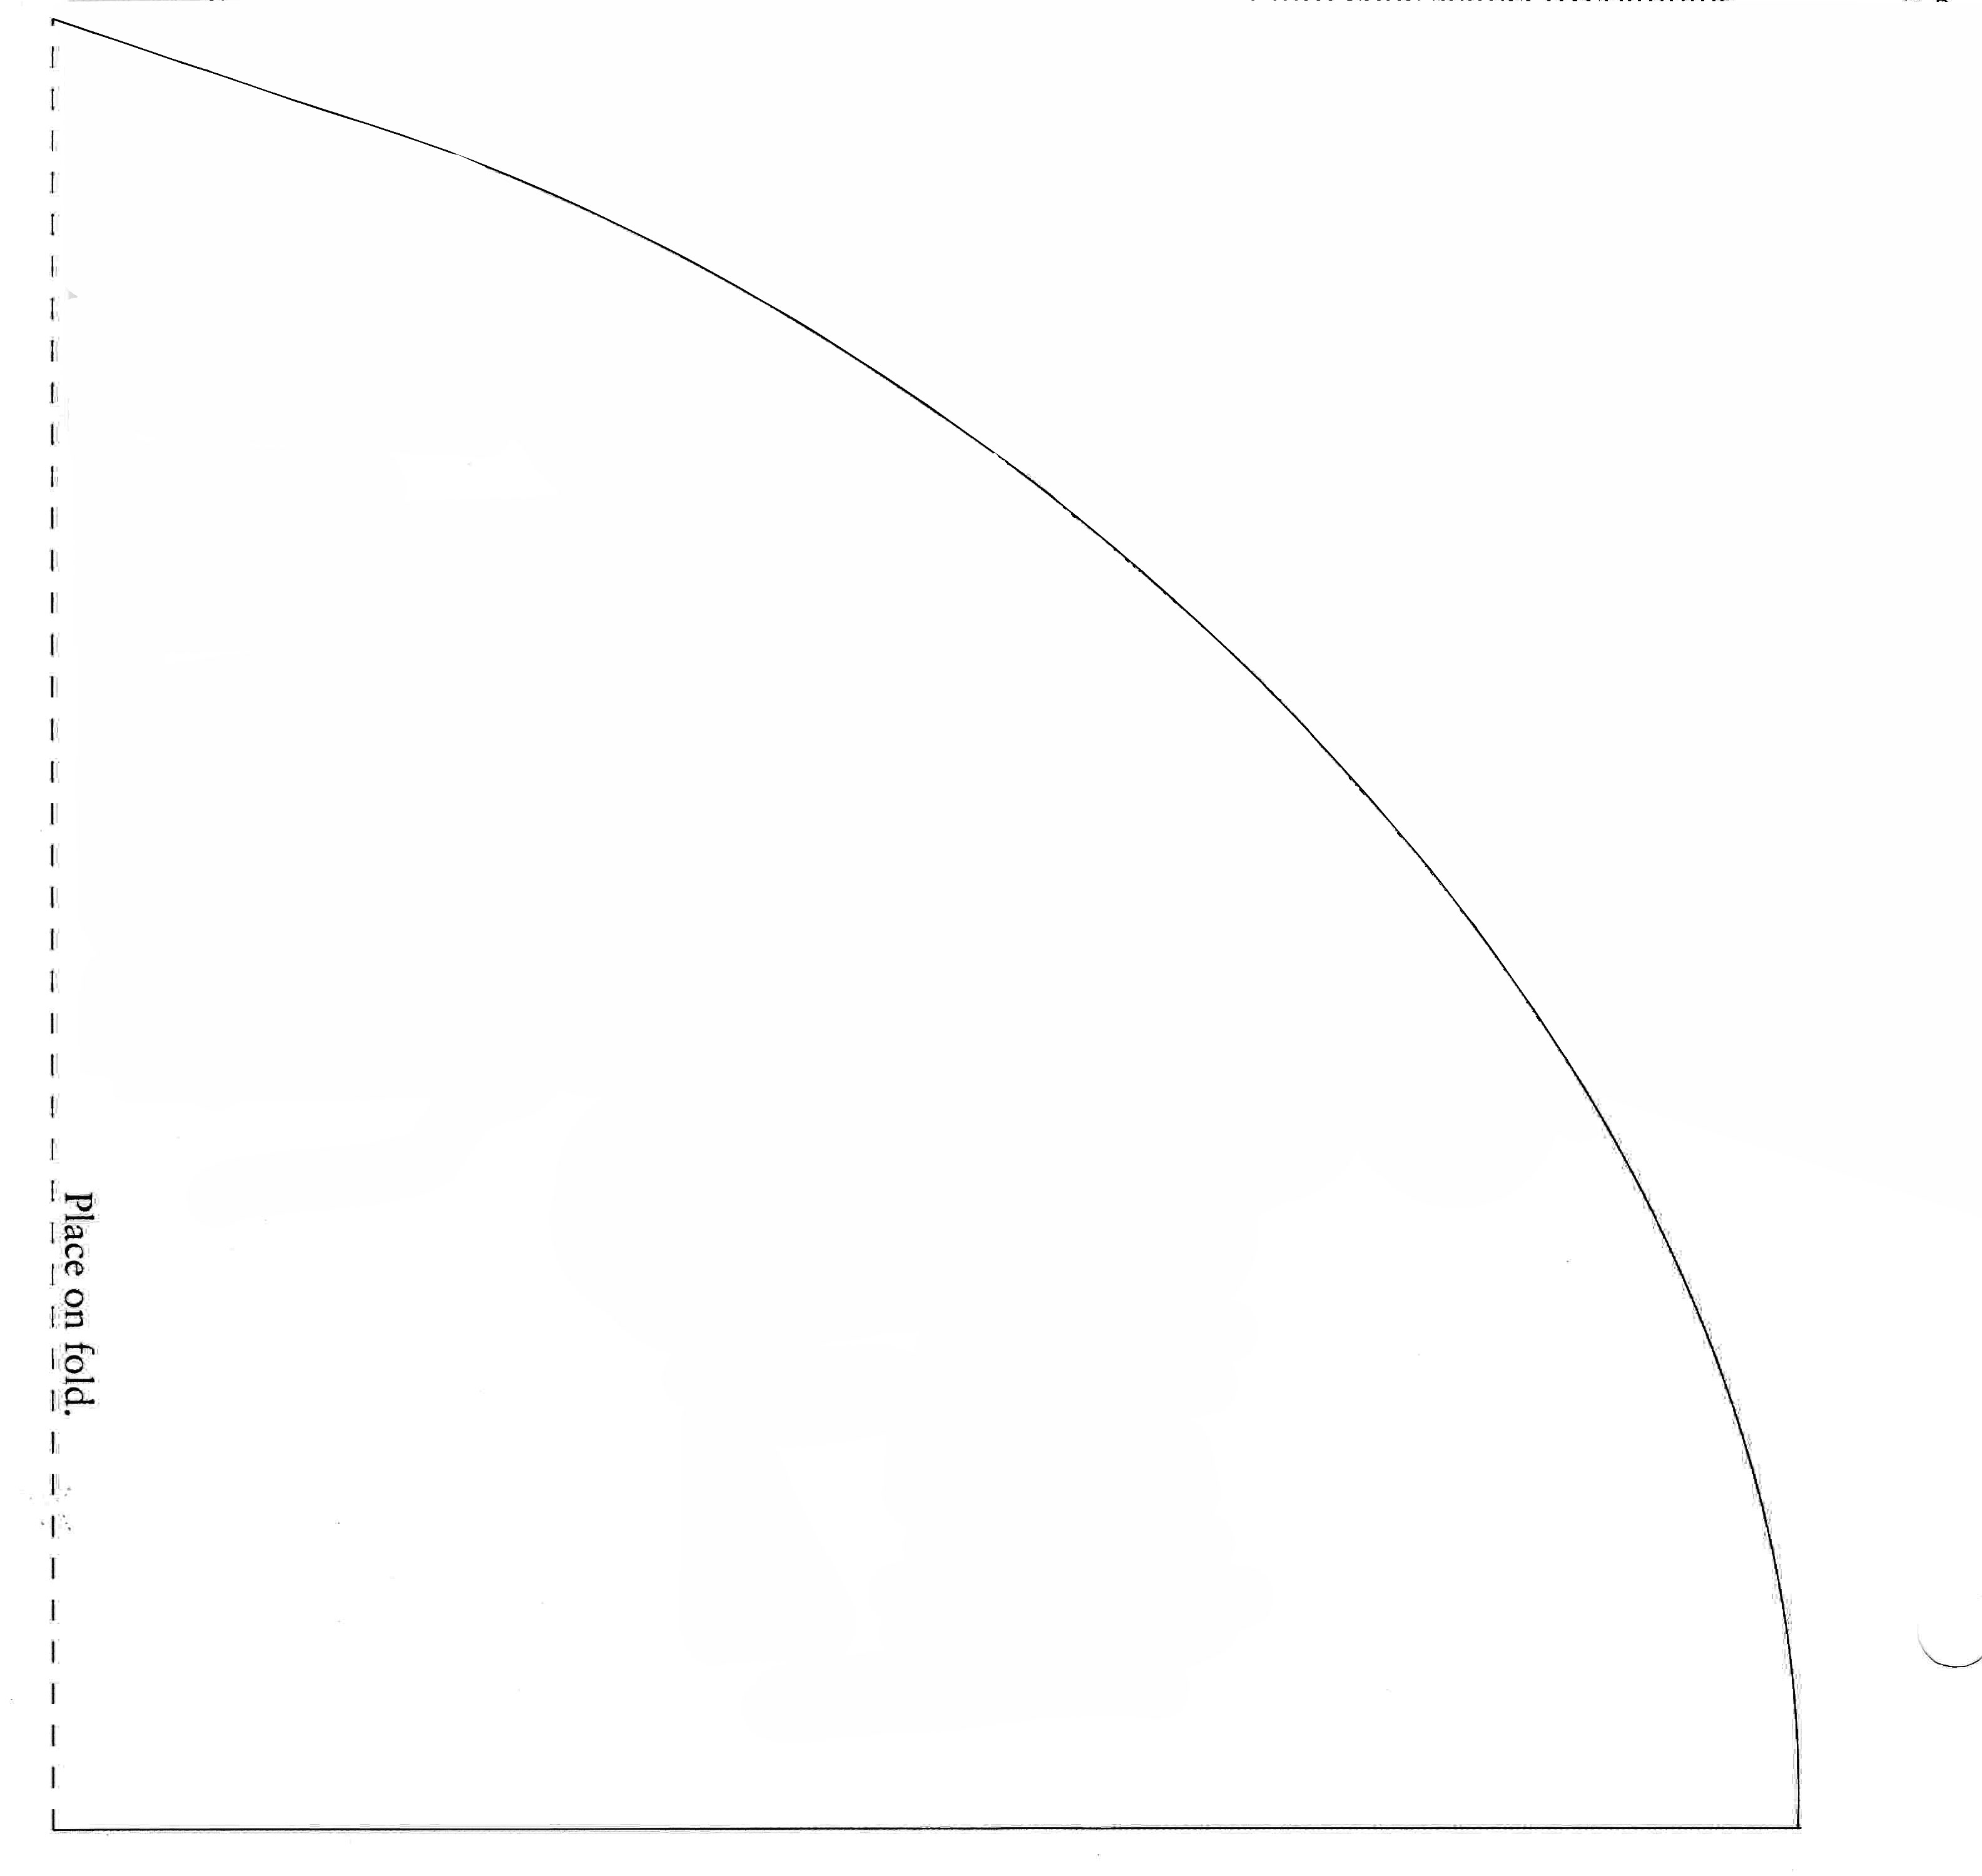
- Window Pattern
- Roof Pattern
Instructions:
- Transfer roof pattern to cardboard and cut out roof. Spray-paint both sides of roof and bottle cap black. Let dry. Spray paint bottle brown. Let dry. Working with 1 paint color at a time, dip dampened sponge into burnt umber and black and sponge-paint the bottle. Let dry. With craft knife, cut 1 (1-3/4” diameter) circle about 3” up from bottom of bottle for door. Punch 1 hole about ¼” below door.
- Measure approximately 1-1/4” to left and right of door and transfer window pattern onto bottle. Paint design beige. Paint outline details in black paint using liner brush on each window. Paint beige wavy line around door. Let dry. Push dowel halfway into hole below door and glue to secure. Let dry.
- Center and drill 1 (1/8” diameter) hole in bottle cap. Fold cord in half to form loop. Working from outside of bottle cap, thread cord ends through hole in cap. Knot cord ends. Pull knot up to cap and glue knot to cap. Let dry. Screw cap onto bottle.
- Curve roof into cone shape, overlapping straight edges and glue. Hold edges in place with clothespins until glue is dry. Snip off tip of roof to leave hole for hanger. To help weatherproof the roof, brush with coat of OK to Wash-It glue on each side of roof. Let dry. Glue pine bark pieces to cover outside of roof (with Tacky glue). Let dry.
- For sign, cut 1 (2-1/2”) length and 1 (1-3/4”) length from craft stick. With shorter piece centered along longer piece, glue craft stick lengths side by side. Drill 1 (1/6” diameter) hole in each end of longer piece of sign at top edge.
- Write “Welcome Home” on sign with marker. Cut 1 (5”) length of wire. Wrap center of wire around bamboo skewer to coil. Remove skewer. Insert 1 end of wire through each hole at top of sign, working from back to front. Bend up ends. Cut 1 (1-1/2”) length of wire. Bend wire in half to form hanger. Slip bent wire hanger onto coiled wire on sign. Working from outside, poke hanger wire ends through bottle about 1-3/4” above door. Bend wire ends to inside of bottle to secure hanger. Thread braided cord hanger through hole in roof, working from inside roof.
Heidi’s Designer Tip: If you don’t have the time to create your own “Welcome Home” sign, there are lots of cute ready-made “signs” with cute messages available in the scrapbooking section of your local craft store. If it’s made from paper, be sure to weatherproof it before adding to your birdfeeder.
Read NextPill Bottle Survival Kit
Your Recently Viewed Projects
Thanks for your comment. Don't forget to share!
The Designing Peng uin
Oct 11, 2016
I have fashioned several bird feeders from plastic bottles and other plastic recyclables - the cost of the commercial ones are prohibitive I would prefer to spend the extra on bird seed and suit and peanuts for my blue jay pals (35 the other day) and this way I can adapt the size to the birds so that everyone has a place at the table and a place that fits. This is so attractive and appealing that I shall have to make at least two, one for each bird-feeding station and a third for the other side of the house...delightful
uprosper2day 02913 68
May 10, 2015
Love this idea! I wonder how long it takes to make it and approximate cost. I'm trying to plan for group craft project for kids camp...need to get approximate time to make and cost. thank you so much!
The Designing Peng uin
Oct 11, 2016
The best way for cost and time estimates is to make one, then you have an example of what the campers are going to make
sterlingideas 8584 859
Aug 09, 2013
I have a couple of questions about this great project. First, the instructions call for a 3" square of white shrink plastic, but I can not find any thing in the instructions that tell what to use it for. And second, in the comments section some one mentions using foam instead of cd's yet the supplies do not call for either one. What are the cd's for? Thank you.
hollymsalamone 891 9797
Aug 01, 2012
Love it, the only thing is the squirrels in my neighborhood like it better, so I made it out of a 3liter soda bottle and made a bigger hole and added a plastic plant saucer on the bottom. They love it. The birds don't have a chance. Holly
karen608
Apr 20, 2012
I like the bark roof. Would make the roof out of plastic under the bark so more 'water proof'.
pinkbubbles1807 94 27750
Mar 26, 2012
i am currently making this with my guide group and they loved the example i made for them to see. they are making it as part of their science badge. we are using sheets of foam paper instead of cds for the roof and they work just as well. love this website and all its ideas x
m1331k 0002417
Jul 08, 2011
Just saw this bird feeders. I am be making one of these. They make spray paint for plastic and there is a primer for plastic so you should be able to use any spray paint and it won't peel. I like the idea of weighing it down with pebbles. It gets pretty windy at my house too. Thanks for the great idea.
agilholm 6872824
Mar 31, 2011
I really love this birdfeeder/house. This is real talent, I am going to attempt one of these. The rustic look is perfect and has given me an idea to try making a squirrel station starting with the same basic's to attach to my backyard fence. Thanks Heidi and favecrafts. Birdie Gee
tammie
Mar 31, 2011
i'd rather a birdhouse instead of the feeder. just have to figure out a way to make the top removable so it can be cleaned out if necessary (any suggestions?). the pebbles inside the bottom is a great idea to help weigh it down!
Tikatakawitha
Mar 14, 2012
Tammie - They do have a birdfeeder made out a soda bottle and by the same person who did this one. It is at this link... http://www.favecrafts.com/Cool2Craft-Videos/How-to-Make-a-Soda-Bottle-Birdhouse/ml/1
schatzee 4972653
May 21, 2012
Hi! Just came along your Question: Make the Top removable like drilling 2 holes opposite on the side of the bottle and also in the "roof". Loop a plasticcord thru it, so you can lift it up. The Cord can also be the Hanger, just make it long enough and make a knot in it, that creates a Hanging-Loop! Good Luck!
grammasmiles
May 27, 2010
If the diagram comes up at 150% then you can hit ctrl and -(minus) keys to reduce the size. If you need to increase the size you can hit ctrl and the (plus) keys.
Viktorija
May 27, 2010
For weighting it down in windy places (I live on top of a hill and its very windy here as well), I would suggest placing an inch or two of pebbles in the bottom of the bottle. These can just be placed inside or actually glued down. The only drawback for this being used outside is that the paint will probably peal off the plastic bottle in a short time. I would try priming it first, then painting it, and then adding a sealer. All of these being for exterior application, of course. Love this project! We don't use 2-liter bottled soda, but I am going to buy one just so I can make this! Thanks for sharing!
Tikatakawitha
Mar 14, 2012
Viktorija - Have you made one yet? We don't drink soda, but I'm going to ask some friends to save them for me. I thought about using an empty milk jug too.
crafting4others
May 15, 2010
That is a good idea, however, if you use one for a birdhouse, what did you put in the bottom of the bottle to weigh it down? If there wasn't anything (birdseed) in there, it would probably get "whipped around" by the wind. It's been pretty windy here where I live.
heavensbelle
May 06, 2010
This is adorable but for some reason the diagrams come up at 150% and even though I click it to take it down to 100%, it will not print at anything but 150% which is huge!
Member 3750563
May 03, 2010
Preciosa idea de reciclar las botellas plasticas, me encanto. Muchas gracias.
penny a
Mar 27, 2010
This is soooo cute! I am going to make one or two. I love watching the birds and always buying bird feeders.
FullMoon
Mar 27, 2010
I think this is a great idea ! I do the same with empty Domino sugar tubs (yellow). One can put the lid on the bottom which is easily removed for cleaning if the birds nest in them and they are waterproof ! Any designs will do as the birds really don't care just as long it is high enough from predators.
Bev
Mar 27, 2010
What a cute idea. I am planning on making at least 2 and using one for a bird house. But on a bird house, keep the door opening down to 1" so large birds can't get their heads in and eat the eggs. This would be a great craft for a cub scout or brownie group too.
Report Inappropriate Comment
Are you sure you would like to report this comment? It will be flagged for our moderators to take action.
Thank you for taking the time to improve the content on our site.
![Pill Bottle Crafts: Reuse Pill Bottles [15 Ideas]](http://irepo.primecp.com/2017/06/334076/PILL-BOTTLE-CRAFTS-Header_Category-CategoryPageDefault_ID-2274135.jpg?v=2274135)


