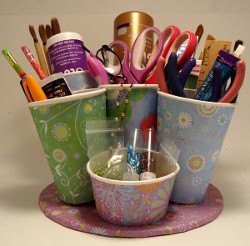
Coffee Cup Tool Carrier
Coffee lovers, this is the perfect project for you. Save your stash of (unused) paper cups and create a Coffee Cup Tool Carrier from Candace Jedrowicz. This is a great way to integrate Earth Day crafts into your everyday life. In fact, you can make this anytime of year!

Materials:
- Paper cups – 7 of varying heights
- Circle of foam core board – about 9″ in diameter
- Selection of colorful decorative papers
- Glue – I used Aleene’s Tacky Glue Original
- Colorful brads
Instructions:
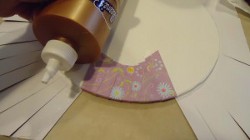
- Cover one side of the foam core circle with a thin coat of glue. Place it glue side down, in the middle of a the back of 12″ x 12″ decorative paper.
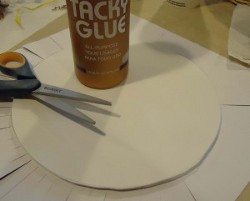
- Cut the paper in strips from the outside of the paper to the edge of the circle all the way around. Apply glue to each strip as you fold the strips onto the back of the circle.
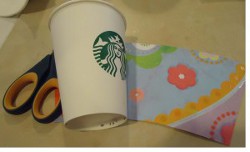
- To make a template for the paper that will cover the outside of the cups, take apart an extra cup, open the side and lay it down over the paper to trace. Trace enough to cover all the tall cups plus one. Use the plus one to wrap around one of the medium cups. Mark the paper at the bottom of the medium cup and cut off the excess paper. This one is your new template. Repeat for each size.
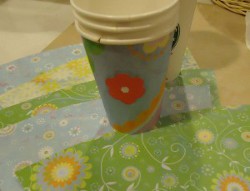
- Put a thin layer of glue on the back of the paper, wrap it around the cup and secure with clothespins.
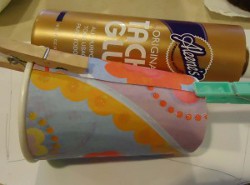
- Repeat for all the cups. I chose papers from one stack for over all unity.
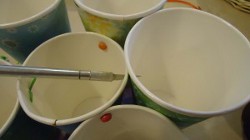
- To secure the cups together – Hold two cups together at the highest point of the shorter cup making sure that both cup bottoms are touching the work surface. Cut a slit through both cups with a craft knife. Add the cups one at a time, securing with brads as you go.
- The cups will be leaning, but you’ll compensate in the next step.

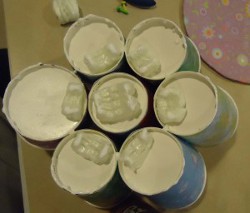
- Here’s where the foam peanuts come in! You want to have contact between each cup and the base so the construction is sturdy. Glue the peanuts in place then put glue on the peanuts and around the bottom edges of each cup.
- Put the bottom, pretty side down, on the bottom of the cups. Flip the whole thing over.
- Place heavy things in the cups as the glue dries to make the contact points secure.
- Fill with your most used tools. Make several and keep one for just glue, one for brushes, one for cutting tools, one for tools and one for…?
For a comprehensive video tutorial of this project, check out How to Make a Desktop Coffee Cup Pencil and Tool Caddy.
Read NextMesh Dishcloth Crochet Pattern
Your Recently Viewed Projects

Thanks for your comment. Don't forget to share!
The Designing Peng uin
Oct 11, 2016
A good idea - and simple really something a young person could make as a gift for an adult or two at Christmas
andersonnancy62 08 71646
Jan 04, 2012
This is a great idea and you can recyle most of it. Best I've seen in a long time and can I ever use it.
estar1018 7043090
Jan 04, 2012
Interesting idea. I might consider doing this but I would use an old carousel tray
Report Inappropriate Comment
Are you sure you would like to report this comment? It will be flagged for our moderators to take action.
Thank you for taking the time to improve the content on our site.