Fast Folded Card
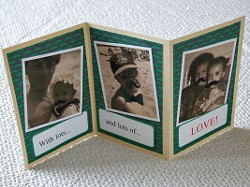
You would not be here if it were not for your father, so making him this Fast Folded Card on your computer is the least you can do to show him you care. It is an easy DIY Father's Day craft that should take you under an hour to make, thanks to modern technology. This accordion-style card can feature pictures of memories that you and your father share to remind him of the good times. This handmade fathers day gift could also make a great homemade gift idea for a birthday or going-away gift. It is a fun and easy paper craft that is appropriate for any occasion.
Materials:
- CraftArtist (any version) - including our free version
- The free 'Fathers Day 2012' kit from the Free Stuff page
For the card:
- 1 piece of cardstock measuring 4 x 12 inches
- Adhesive – I’ve used a glue roller
- Cutting tools – I’ve used a paper trimmer
- A ruler
- Photo printer paper and a printer
Instructions:
-
Open CraftArtist and select ‘blank project’. Choose a ‘Custom’ page and set the size as 3.5 x 5.5 inches (portrait).
-
Load the Father’s Day 2012 kit in the 'digikit browser' and click ‘add digikit’.
-
Select the green patterned background from the 'backgrounds' tab then drag and drop on to your workspace.
-
Click on the 'Photos' tab and add a selection of photos to use in your project (you'll need at least four). Drag a photo onto your workspace and adjust the size of the image using the corner handles.
-
If you have the Professional version of CraftArtist you can create a sepia effect to your photo by clicking on the Photolab tab and select the ‘Sepia’ lighting filter, to give your photo an ‘aged’ look. Click OK to commit the filter.
-
Using the 'colour' tab change the line colour to white and adjust the line size to 10 pt in the 'line' tab. This will give your photo a white border, you can then add a drop shadow using the 'shadow' tool. I have also rotated the photo slightly by around 5 degrees to the left.
-
Add some quirky embellishments such as mustaches and glasses to your subjects as well as any other embellishments you’d like.
-
Select the 'Shape' tool on the top toolbar and choose the rectangle shape. Draw a rectangle and create a rounded edge effect by moving the handle to the left of the shape upwards.
-
Using the colour tab change the fill to white and the line colour to light green (with a size of around 5 pts). Position this near the bottom of your layout and once again add a small drop shadow to your rectangle.
-
In the embellishments tab, drag the ‘Happy Father’s Day’ embellishment onto your layout and resize so it fits just inside your rectangle.
-
Insert another page to your project using ‘insert page’ button. Create three more layouts as before with your chosen captions, the third layout will be the final page so you may wish to add your personal message.
-
Print your layouts (you can print all four layouts on one A4 sheet).
-
Now you will need to assemble your card. To create your accordion card score 2 folds, one at 4 inches across and another at 8 inches across the width of your cardstock.
-
Cut out your individual layouts and glue them centrally on each panel of your card as shown (one for the front and the other 3 inside).
-
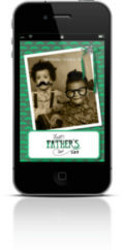
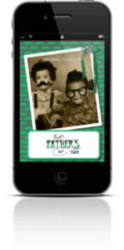
These small layouts are also a perfect size for creating a smart phone album.
-
Simply export your project by clicking ‘file’ > ‘export’. Select ‘jpeg’ format and ‘All pages (split)’ from the drop down menu. Navigate to where you would like to save your images (or create a folder) and save.
- Once you’ve done this you can email your layouts and they can then be uploaded and saved to your chosen smart phone!
Read NextGolf Ball Flowers for Father's Day

