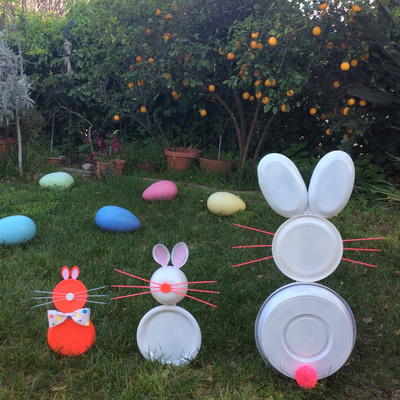
Easter's Artist Bunny Figure
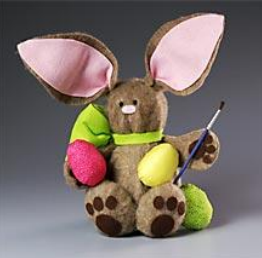
This Easter bunny decided to become an artist and decorate his own eggs this year. Create this figurine as a table or room decoration, or put it in a child's Easter basket as a special surprise.

Materials:
- STYROFOAM Brand Foam:
- Balls, one each: 3"; 1-1/2"
- Eggs: 5", one; 3", one; 2-1/2", two
- Felt: 45" light brown plush, 1/3 yd.; light pink, bright green, dark brown, 9" x 12" sheet each
- Cotton fabric, one 6" square each: bright pink; yellow; bright green
- Pink embroidery floss
- Heavy-duty sewing thread
- Black beads, 6mm, two
- Serrated knife
- Candle stub or paraffin
- Pencil
- Ruler
- Compass
- Paintbrush, for bunny to hold
- Scissors
- Needles: sewing; embroidery
- Extra-long straight pins
- Low-temp glue gun and glue sticks
- Powdered cosmetic blush (optional)
- Cotton-tipped swab (optional)
For pattern, click here.
Steps:
- Wax serrated knife with candle stub or paraffin. Cut and discard thin slices from bottoms of 3" (head) and 1-1/2" (tail) foam balls, and from wide end of 5" foam egg (body). Cut remaining eggs in half lengthwise.
- Use compass to draw one circle of each size on wrong side of plush felt: 12" (body); 9" (head); 5" (tail); 3" (base). Cut circles and patterns from felt as indicated; label lightly with pencil.
- Place 3" egg halves (feet), flat side down, on wrong side of remaining plush felt. Draw a line around each foot, 1-1/2" larger than foam. Trace second pair of 3" eggs, drawing line at foam edge. Cut out.
- To cover feet, center egg half, rounded side down, on larger plush foot cut in Step 3. Bring felt up to flat side. Pin felt at four opposite points; gather excess between pins. Glue felt to foam; let dry. Remove pins. Glue smaller plush feet to flat sides of egg halves; flat side of feet will point toward body when assembled.
- Using cotton fabrics, repeat Step 3 for 2-1/2" egg halves, reserving one half-egg for another project. Cover three remaining egg halves in same way as feet.
- To cover head and body, use heavy-duty thread to sew gathering stitch close to edge of felt circles. Place head and body, rounded side down, in circle centers. Tightly pull thread to gather felt around flat base of foam shapes; knot to secure. Glue 3" felt base to bottom of body.
- Using three strands of embroidery floss, insert embroidery needle into flat bottom of head. Push needle through center front of face, make 1/2"-long straight stitch "mouth", then push needle back through to bottom of head. Knot thread to secure.
- Using photo as guide, glue nose to face. Use scissors point to make two small holes for eyes. Glue beads into holes. Use cotton-tipped swab to apply blush to cheeks, if desired.
- Glue two arm pieces wrong sides together. Repeat. Glue arms to body at "X" indicated on pattern. Glue feet to front of body and tail to back of body so bunny sits steadily. Glue head to body.
- Using photo as guide, glue paw, finger, foot, and toe pads to appropriate pieces.
- Glue inner ears to wrong side of outer ears. Overlap opposite sides of ear bottoms and glue to top of head, 1-1/2" apart.
- Cut following pieces from bright green felt for bow: 4" x 12"; 1" x 8"; 1" x 2". Beginning at one side, wrap 8" strip around neck; glue to secure. Glue short ends of largest piece together, forming tube. With glued ends at center, pinch felt together and wrap with short strip of felt; glue to secure. Glue bow to side of neck.
- Glue paintbrush to paw and flat sides of Easter eggs to bunny.
®™ Trademark of The Dow Chemical Company ("Dow") or an affiliated company of Dow. For more project ideas, please see styrofoamstyle.com.
For more great Easter craft ideas, check out our free Easter craft eBook.
Read NextDecorated Wooden Crosses (4 Ways)

