This project was submitted by one of our readers, just like you.
Planner DIY Storage Crate
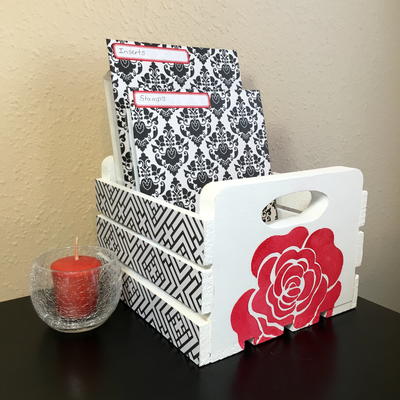
Use wooden crates and paint to createdarling DIY organizers you actually want to keep out.

Planner DIY Storage Crate
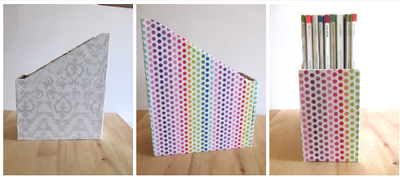
In the Designer's Words: "Custom designed to match the color scheme of my office decor, this crate holds all of my planner supplies. Using scrapbook paper and tissue paper as decorative elements gives this project almost endless design possibilities! This crate was very fast & easy to create (other than time spent waiting for paint to dry). For the dividers, I recommend using chipboard that is white on one side since the surface will somewhat show through the tissue paper decoupaged on it. For faster drying time, this project could be completed with acrylic paint in place of the stencil cremes. This project could also be used in a craft room to store craft supplies, or for a variety of other uses! "
Adding wooden storage crates to your home for organization is not a new idea. Pinterest has been loaded with stacking ideas for these convenient and budget-friendly containers for a while. The problem is that these wood craft ideas can be very boring and very dull. That’s where the idea for the Planner DIY Storage Crate. This wooden crate craft is stunning because it doesn’t stop at being useful, it is decorated, too! Learn how to make your own DIY organizer stand out by creating these paint craft ideas.
Estimated Cost$11-$20
Time to CompleteIn an evening
MaterialsPaint, Wood
Primary TechniqueDIY Craft

Project TypeMake a Project
Materials List
- Plaid FolkArt Home Decor Chalk Paint in White Adirondack
- Plaid FolkArt Stencil Creme in Rainbow
- Plaid FolkArt "30604 Single Rose" Painting Stencil
- Plaid Matte Mod Podge
- Decorative Tissue Paper
- Wood Crate
- Chipboard Sheets
- Heidi Swapp "Hello Beautiful" Patterned Paper
- Sakura Pigma Micron 02 Pen in black
- Martha Stewart for Avery file folder labels
Instructions
-
Prep the surface of the wood crate by sanding and wiping away dust. Paint the surface with chalk paint. Set aside to dry.
-
Trim strips of paper to fit side slats of crate. Decoupage onto the slats with Mod Podge.
-
Stencil the rose design onto the front of the crate using the stencil and stencil cremes. Set aside to dry.
-
Cut chipboard dividers the width of the crate's interior, and slightly higher than the items to be stored in the crate.
-
Cut a piece of tissue paper large enough to "wrap" each divider, and place face down on the work surface. Apply Mod Podge to the front of the divider, and place the divider face (glue side) down on the center back of the tissue paper.
-
Cut notches in the corner of the tissue paper to create "tabs" to fold back onto the back of the divider. Apply Mod Podge to the back of the divider and fold the tabs in. Both sides of the divider should be entirely wrapped in tissue. Place under a heavy object, like a book, to dry.
-
Once dividers are dry, write on file folder labels and apply to dividers.
-
Assemble your crate and dividers together, and start planning!

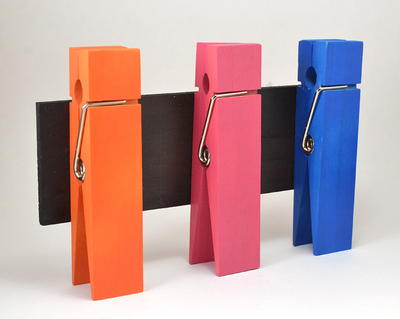
Read NextGiant Clothespin Memo Holder