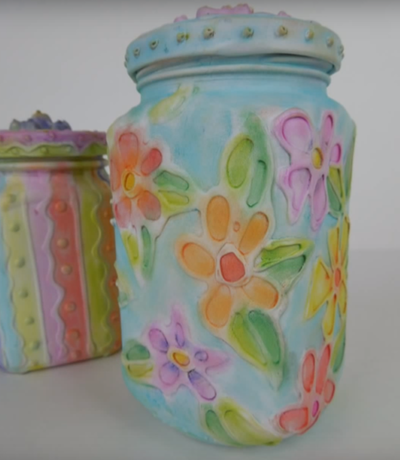
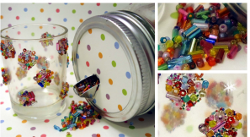
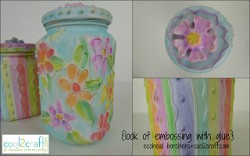
Faux Embossed Glass Jars
Don't throw away those empty, cleaned-out jars. Instead, use glue to create your own Faux Embossed Glass Jars from Heidi Borchers. This is a great project for anyone who loves the embossed look but isn't sure how to capture the look in their own creative projects.
Materials:
- Aleene’s Original Tacky Glue
- Aleene’s Spray Acrylic Sealer – Matte
- Glass jar with lid
- Craft sticks
- Transparent tape (to create nozzle for glue bottle)
- Hair dryer (for speeding up glue drying process)
- Rustoleum Flat White spray paint
- Craft chalks (colors of your choice)
- Stencil brush – small (cut bristles to 1/4″)
- Paper towels
Instructions:
-
Clean jar inside and out.
-
Apply tape nozzle to glue bottle.
-
To keep round jars from rolling, lay two craft sticks on worktable. Spread apart to hold glass bottle in between.
-
Working one section at a time, hold nozzle about 1/4″ above surface of glass jar and draw random floral designs or squiggles and lines. NOTE: you can also draw patterns onto paper and secure inside jar to follow pattern lines with glue.
-
To keep glue from dripping as you work, use hair dryer to speed up drying process on glue to form skin on glue. Then, you are ready to rotate bottle slightly and continue drawing pattern. You will need to let sections dry completely before moving on. You can also add glue lines to the lid. If desired, glue Cool2Cast embellishment in place on lid.
-
Let dry until glue is completely clear.
-
When glue is completely clear, with lid on jar, in a well ventilated area, spray entire jar and lid with white spray paint. Let dry.
-
To apply chalk colors, scrub brush into chalk and then scrub into pattern sections on jar. Blow off excess chalk dust. Clean off brush between colors by scrubbing onto paper towel.
-
Repeat until entire design and background are colored with chalk.
- Spray entire chalked surface with Matte sealer.
Read NextGold DIY Ring Dish