Kaftan Dress Tutorial
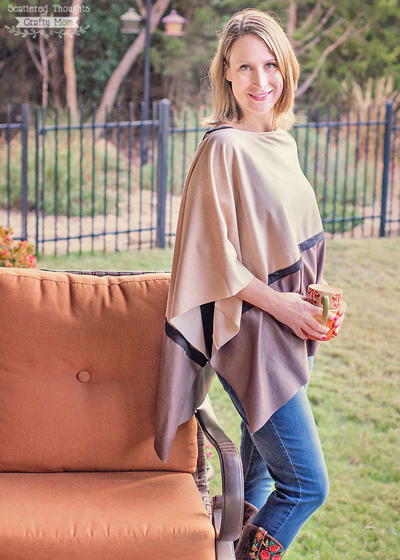
Instead of throwing out your old clothes, make your own clothes out of that old material with this Kaftan Dress Tutorial from Anshu Jain. This adorable dress pattern for sewing is an easy beginner sewing project and a great sewing tutorial for those who are new to the art of sewing.
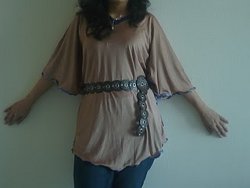
Materials:
- Fabric - For this project you will need a fabric which is 60 inches wide instead of the regular 36. Also quilting cottons/linen may not be the best the options. Try to go with a printed sheer fabric, or a soft silken fabric. The flowy the fabric, the better drape you will get because the dress/top in itself is not really close fit. - 60 inches
- Bias Tape: Matching or contrast to the fabric. Depending on the fabric, you may want to get a satin/silk bias tape instead of regular cotton ones: ~ 1yds
- Trim - Matching the fabric - Or you could also use the bias tape ~ 10 yds
- 10 Safety pins
Instructions:
- Spread the fabric evenly on a flat surface.
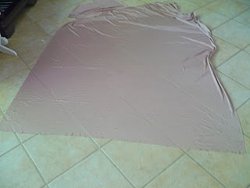
- Fold it diagonally such that you get the biggest square possible.
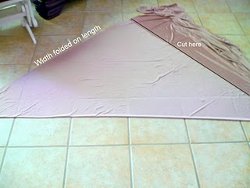
- Cut where this triangle ends ( shown in the pic). You're basically making as big a square out of this fabric as possible.
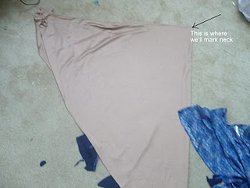
- Now fold this triangle into half again to get a smaller triangle.
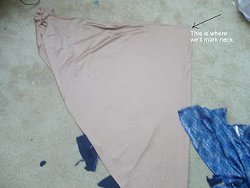
- Now get a top whose back neck is the shape you're comfortable with ( and smaller than front).
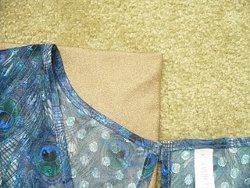
- Fold it in half lengthwise, mark the center of the back neck. For the top I had, the center of back neck was already known because of the opening. Just use it as a guide and cut the neck at the fold of triangle you just made.
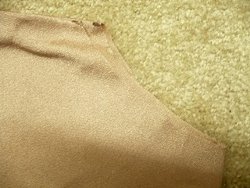
- Now cut it on the fold. Make some small marking where the shoulders of this neck are.
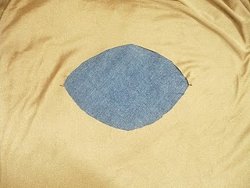
- This is how it will look like when you open it. Look at the small marks for shoulders.
- Now fold the whole fabric lengthwise and make sure the shoulder marks are meeting. Now measure a front neck depth you're comfortable with and mark it below the shoulder marks you have from the back neck. Also make another mark on the fold at the same depth, by making a horizontal line from the earlier mark Now draw a diagonal line from shoulder marks to the depth mark you just made on the fold and cut along this line.This will be your front neck. You can totally cut any other shape of neck but I felt V looks better in this style and its also easier to finish.
- Sew Easy Tip 1: while determining the depth of neck, err on the side of caution. If you're not comfortable with plunging necklines, take the depth a little less than desired. This is because its a loose fit and shoulder are not defined so the neck may shift a bit while you're wearing it, resulting in a plunging neckline.
- Now gently slip it over you head and try it in front of a mirror. Don't worry if it looks gigantic at this point. We'll work on that next. Right now just find out the right points where you want your armholes to end and pin it on both layers. Also get a point closer to the bust-line and mark it with a safety pin also. You don't want it to fit too closely, just keep it a little loose but shapely. Do the same on the other side. You may want a friend to help you with this step, because the fabric is slippery it may be difficult to find the right points while still maintaining the symmetry.
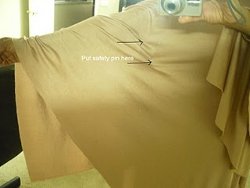
- Now carefully slip out of the fabric and spread it on an even surface.
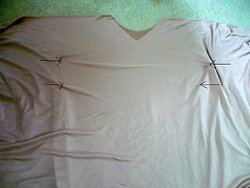
- See these arrows? Thats where we have our safety pins. As you can see they are not symmetrical, thats ok. We'll fix that now. Start with the side that is farther from the neck. In this case, left side. First mark all four points with a vanishing/washable marker and take out the pins. Now even out fabric, make sure that the shoulder markings we made are on the fold, the fabric is lying symmetrically and then safety-pin left side marks again on both layers. Now we have ensured that on left side the placement of pins is nice and even on both layers.
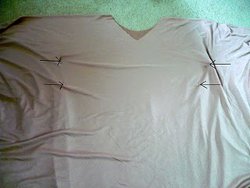
- Now add more pins towards the bottom such that it follows your body shape and a little flared at the bottom. Don't sweat it too much because we have already measured ourselves at the widest part of our torso so as long as you mark the last point outer than first one it will be ok. The pic above sort of shows my placement of pins, It just isn't very clear. You can also use a loose fitting A-line dress/top to mark these.
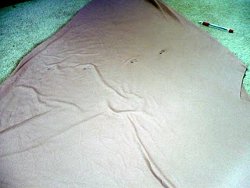
- Now fold this lengthwise such that the pins are sandwiched between the folds. Make sure the fabric is symmetrical. Now just feel the pins with your hand and mark the points where they are located, what we're doing is transferring the markings of th left side to the right side to make both sides even. Now open the fold and put safety pins on these marks.
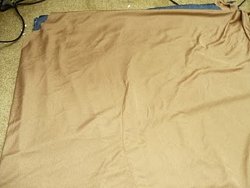
- Now just connect the pins on each side into a curvy line with a washable marker or tailor's chalk and sew along both lines Wrong sides together. Yes the seams are exposed in this style because seam allowance becomes sleeves. It's difficult to see the seam in the above pic because of matching thread but if you look carefully, you will see a curvy line at the center of the pic.
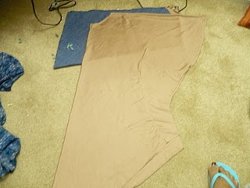
- Spread your favorite top (best results with a kimono sleeved top). Now try to follow the curve of this top. while still staying 3-4 inches away from the top. this would mean that your sleeves will be longer than this top and there will be ruffles hanging near the waist, but don't worry , we will try it again and trim it before we commit to anything. Just try to get closer to the seam towards the bottom but still with a 1.5-2 inch margin. Also shape the hemline if you want it to be more rounded than triangular as it is right now.
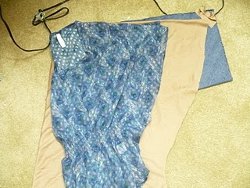
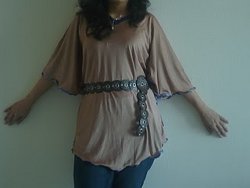
- Here's your top after cutting. Now try it and see if you like the fit, length of sleeves, depth of neck etc. Now, is the time to speak ( and adjust). If you would prefer to wear it with a belt, try that too now.
- So you like the basic structure of the top by now. Now lets finish it. First the neckline:
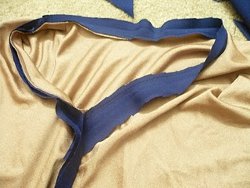
- Turn the top inside out - start from the bottom of the V in front and sew it around the neckline leave some extra tape at the ends. Turn the top inside out again.
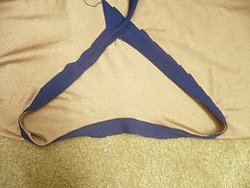
- Topstitch as close to the edges as possible. Now snip one en of the bias tape such that it just finishes under the other end. for the other end, just keep enough so it can be folded back and still maintains the shape of neckline. It will be clearer when you are doing it.
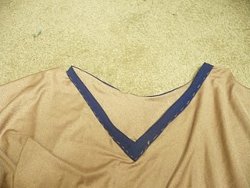
- Now fold the raw end of bias tape and secure with a running hand-stitch. Please don't rush this step, we're working with difficult to handle fabric and the neckline is the most important part of this particular top. So I highly recommend doing a running stitch top secure the bias tape in its place. Here's a close-up of mine.
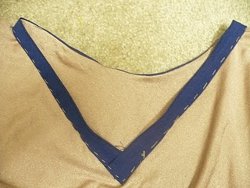
- Now slowly top-stitch over this hand-stitching. Once you are done you can pick out the hand-stitch by pulling the thread. Note: I usually avoid sewing pins until it is absolutely necessary, but you can choose them if you think they are more efficient. I usually hand-stitch to hold things in place while I sew.
- Hem all the way around sleeves and hemline. Start at the bottom corner of one hem and make your way across the whole length and width o the garment. If you do it right you will get back to the place where you started.
- Now sew on a pretty trim all around the hemline ( yes! all around ). I went with a narrow satin ribbon.Although this step is totally optional, I would still highly recommend it because this add to the visual appeal of the top/tunic/dress. Since fit is not its biggest pro, we need to add some other visual elements which can add to its charm, unless of course you went with a print so pretty that it didn't need anything else.
Read NextQuick Pillowcase Apron
Report Inappropriate Comment
Are you sure you would like to report this comment? It will be flagged for our moderators to take action.
Thank you for taking the time to improve the content on our site.

