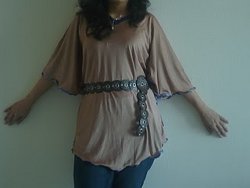
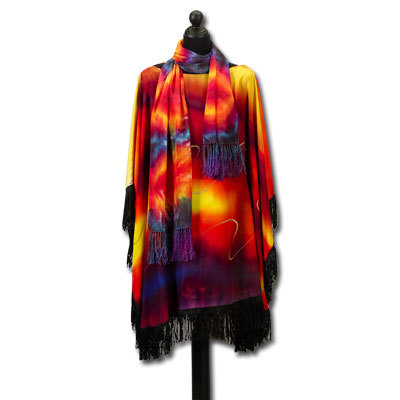
Colorful Sewn Poncho
Create an amazing Coloful Sewn Poncho that you can wear any time of year. Using One-Step Dye Kits you can make tie-dye crafts that really stand out. This will surely become one of your new favorite craft projects. In addition to tie dying the fabric, you'll have a chance to sew the piece together. Since you're building this piece from scratch, you'll feel so much pride when you wear it out and about. If you've ever wanted to know hoe to do tie dye crafts, this is the perfect craft to make. You'll learn so much and have a chance to test your craft skills at the same time.

Materials:
- Tulip One-Step Tie-Dye Kits
- Psychedelic
- Fringed trim, 5-1/2 yards of 3” black
- Scissors
- Plastic sheeting
- Paper towels
- Wooden blocks: 2” X 4”, 6-8” long
- Sewing machine
- Frame to stretch fabric, 36” X 44”
- Plastic tub or bucket
- Apron
- Viscose (rayon) challis, 2-1/2 yards
- Permanent fabric marker, gold
- Tacks or staple gun
Instructions:
- Cut length of fabric in half to create two equal pieces.
- Prewash fabric. Do not use fabric softener. Squeeze out excess moisture and air dry. Do not dry in dryer or iron.
- Choose a work surface large enough to hold the frame. Cover work surface with plastic sheeting.
- Stretch prepared fabric onto frame. Tack or staple fabric to frame to make taut.
- Wearing apron and gloves, prepare dyes according to kit instructions.
- Place blocks under each side of frame to elevate from table.
- Squirt yellow dye on fabric in a wavy line across the upper area and in a line across lower area. Colors will bleed and spread.
- Clean frame and wrap foil around sides to avoid any color from seeping into the next piece. Repeat process for remaining fabric.
- When both sides are dried and rinsed, wash warm in machine, air dry and press.
Assembling
- Place pieces of fabric together with the right sides facing in. If necessary, cut pieces to be the same size.
- Fold in half lengthwise. From fold, measure 3” down and 5” across top. Cut in a slight arc from 5” to 3” mark to create the neckline.
- Using remnants, cut two pieces 15-16” long and 2-1/2” wide. Fold the two pieces in half and trace long the neckline of poncho. The remaining ends will be the seams. Trim the bottom to follow the curve of the neckline.
- Tape one side of the poncho right side up on table. Using gold marker, draw a wavy line across top area of fabric. Draw a second line across lower area. Repeat with remaining piece of fabric.
Sewing
- Place the two sides of the poncho facing in and sew the top seams up to neckline.
- Turn poncho right side out and fit facing to raw edges of neckline. Mark where the seams will be and sew. Fit facing, wrong side up, and attach to neckline of poncho.
- Stitch bottom edge of facing as desired to finish. Round off the squared edges on bottom of poncho.
- Sew trim all along the edges of poncho.
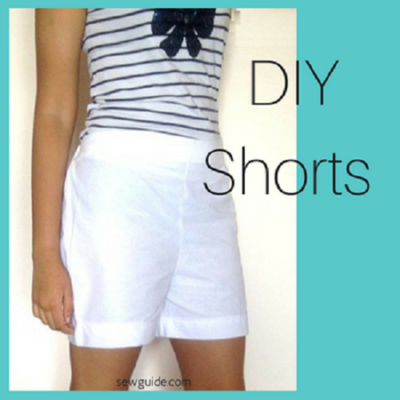
Read NextDIY Ruffle T-shirt
Your Recently Viewed Projects
Thanks for your comment. Don't forget to share!
Kelcey
Apr 13, 2013
Looks like the fabric is 2-1/2 yards of Viscose (rayon) challis, and it calls for 5-1/2 yards of 3 black Fringed trim. I think the frame is just something you tack together to hold the fabric taut while you dye it.
pompettimom 240123 0
Mar 25, 2013
how much material, is there a pattern for the ponch? this is very unclear so please help
MsFrank06
Aug 17, 2012
I rated this poor because of the instructions. I am unclear of what type of material (taking for granted heavy weight) how much material and type of pattern used. It's fine for tye-dying but not for the rest. For us (me) that don't understand, please elaborate.
lagreen11 9225920
May 20, 2012
I have to agree with you, I loved the poncho and i have been looking for something just like this but...when it came to the directions i was totaly lost, Im kind of new here and i have never heard of a frame??
koboclio
May 18, 2012
The photo of the poncho really grabbed my attention; however, I feel the instructions for the actual sewing of the poncho left something to be desired. In addition, the photo seems to show a scarf that is not referred to in the instructions, which leaves more questions regarding the amount of fabric and trim to be purchased, as well as some indication as to how long it should be cut. The actual sewing of the scarf should be relatively simple. All in all, I would love to make it, but I think I'll forego the tie dyeing until I make sure the sewing part comes out all right.
Julia L
Mar 08, 2011
Hi Amy, Thanks for letting us know. These are user-submitted projects, so there can sometimes be inconsistencies or errors in the directions. Thanks for the heads up.
AmyBaby
Mar 06, 2011
Just a Note: Steps 7 and 8 are exactly the same, shouldn't 8 say something about adding the other colors?
Report Inappropriate Comment
Are you sure you would like to report this comment? It will be flagged for our moderators to take action.
Thank you for taking the time to improve the content on our site.