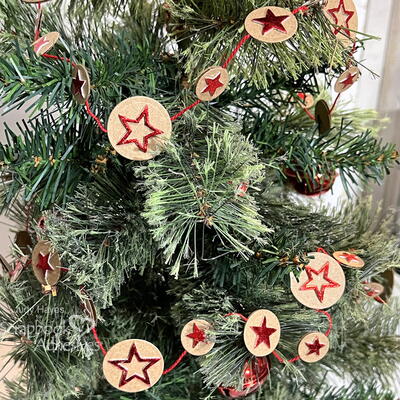
Foiled Stars Garland

Create a simple holiday garland without any tools or machines for a fun project to make with the kids! Pre-cut 3D Foam Star shapes and metallic craft foil sheets from Scrapbook Adhesives by 3L® are all you need. This DIY home décor can easily be added on your tree or anywhere in your home. We hope this idea inspires you to create a handmade garland to spark your holiday season! Let Judy Hayes show you how!

Materials List
-
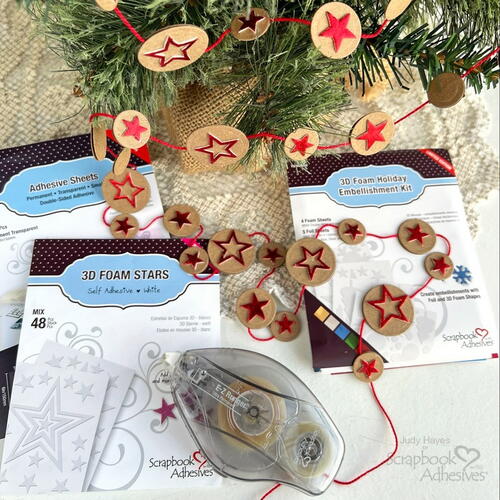
Scrapbook Adhesives by 3L®
3D Foam Stars
3D Foam Holiday Embellishment Kit with Foil
Adhesive Sheets 4×6 inch
E-Z Runner® Ultra Strong Refillable Dispenser
-
Other
Spellbinders Circle Dies
Kraft Cardstock
Red Pearl Cotton Cord
DIRECTIONS
Create the Garland Base
-
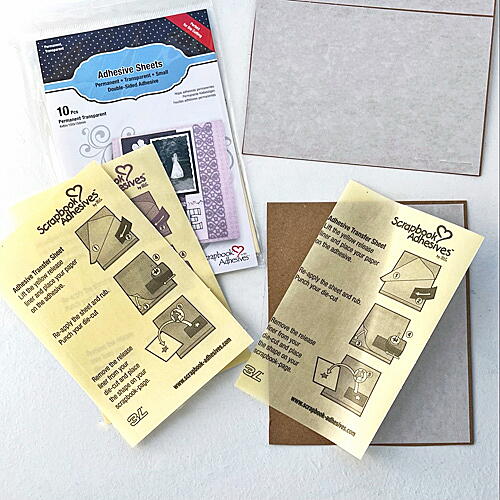
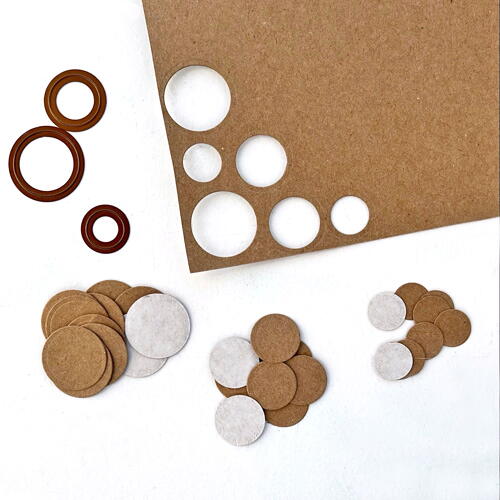
To create the circle garland base, apply three sheets of Adhesive Sheets 4×6-inch to cover the back of a piece of 8.5 x 11-inch Kraft cardstock.
-
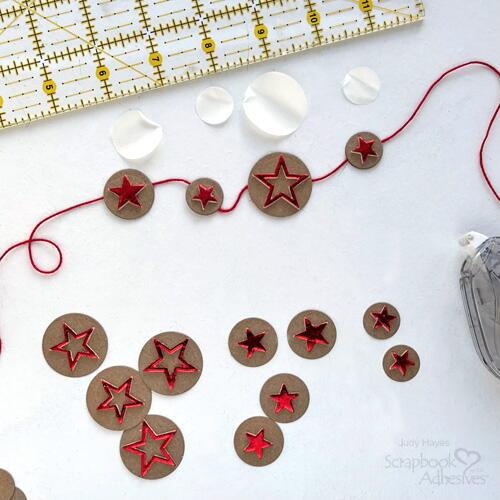
Next, cut three different circles sizes (0.75. 1.0, and 1.25-inches in diameter) in the following quantities: 27 small, 13 medium, and 13 large circles to make a garland about 85 inches long.
-
Also, cut the same number of circles from Kraft cardstock without adhesive on its back.
Wear Your Adhesive on the Outside with Stars
-
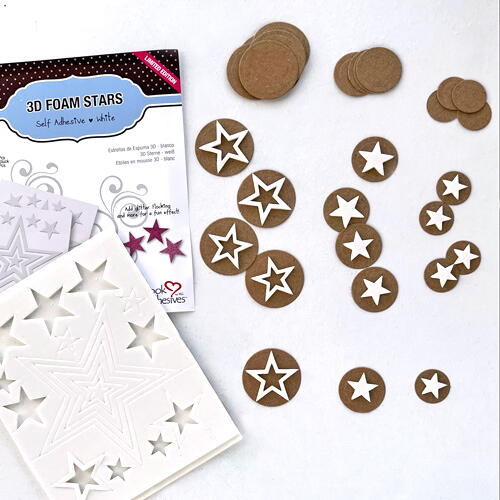
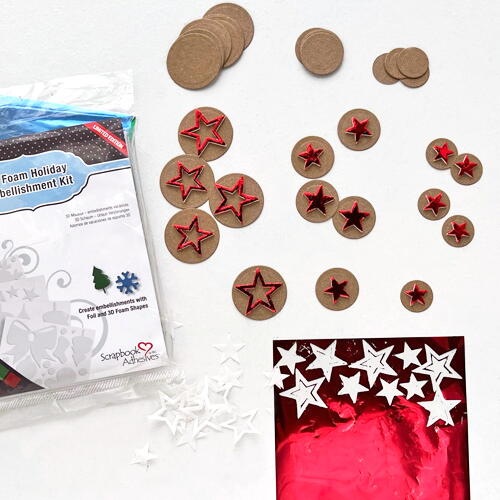
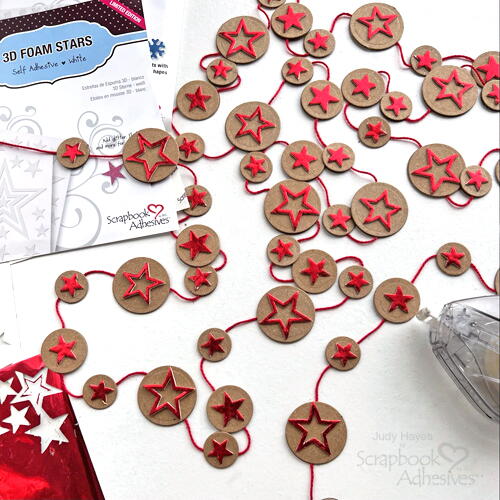
Use a sheet of 3D Foam Stars from the 3D Foam Holiday Embellishment Kit with Foil plus a package of 3D Foam Stars.
-
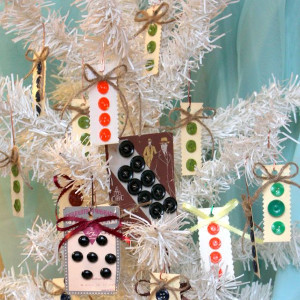
Using all the Kraft circle shapes with adhesive backing, adhere to the following 3D Foam Stars: the smallest stars to the small circles, the medium stars to the medium circles, and the bigger star frames to the largest circles as shown in the image above.
-
Peel the top liners off the stars, place the red foil from the 3D Foam Holiday Embellishment Kit with Foil over the star with the color side UP, press foil firmly to star, and peel the foil away. Repeat this process for the rest.
Adding Star Circles to Garland
-
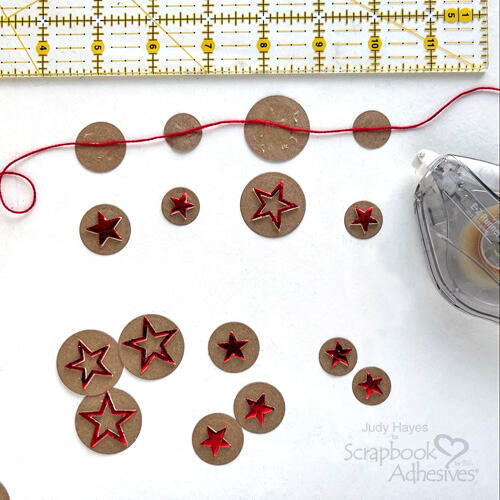
Lay red pearl cotton cord out on a work surface. I used enough cord to wrap around my tree. Apply the E-Z Runner® Ultra Strong Refillable Dispenser to the center back of a small Kraft circle. Slide it under the cotton cord and lightly press it against the adhesive to secure. Continue with a large circle, another small circle, and a medium circle spacing them about 0.75-inch apart.
-
Peel the adhesive liner from the back of the circle with a small foiled star, align over a small circle already attached to the cord, and press in place to make one complete circle shape. Repeat the same step with the large circle, another small circle, and a medium circle.
-
Repeat the pattern of stars to the desired length of garland to end with a small star circle. Lastly, trim the red pearl cotton cord ends.
-
Add to Christmas tree or hang on a mantle or anywhere for the holidays!
The Finishing Touches
-
To complete the tags, thread the twine through the tag openings and splatter each tag with white acrylic paint.
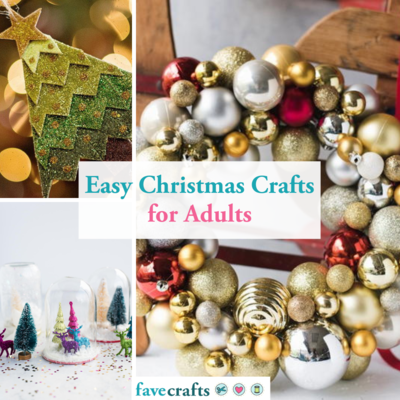
'Tis the Season to Celebrate! Discover More Christmas Crafts
If you enjoyed making the Foiled Stars Garland, you'll love trying out these other Christmas craft projects to add some handmade charm to your holiday decor:
1. Beaded Snowflake Ornaments: Create beautiful snowflake ornaments using a combination of beads, wire, and string. You can customize the color and size of the beads to match your holiday decor. Hang them on your tree or use them to adorn gifts for a personalized touch.
2. Pine Cone Wreath: Gather pine cones from your backyard or local craft store and create a stunning wreath to hang on your front door. Glue the pine cones in a circular pattern on a foam wreath form, then add a bow or some ribbon for a festive finishing touch. You can also spray paint the pine cones in gold or silver for a more glamorous look.
3. Holiday Mason Jar Lanterns: Turn ordinary mason jars into glowing lanterns with this simple craft project. Paint the jars in festive colors like red, green, or white, then add decorative accents like glitter, ribbon, or stickers. Insert battery-operated tea lights or fairy lights inside the jars for a warm and cozy glow. Display them on your mantel or use them as centerpieces for your holiday table.
We hope these Christmas craft ideas inspire you to get creative and add a personal touch to your holiday decorations this year!