Chunky Three Layer Bracelet
Looking for unexpected jewelry ideas? Make your own Chunky Three Layer Bracelet from Savannah Star and create your own "arm candy." This trendy bauble is perfect for any occasion and is sure to draw compliments.

Materials:
- Aleene’s Original Tacky Glue
- Resin shapes with pre-drilled holes
- Paper (I used red and animal print tissue paper and red hand-made paper)
- 3-D Crystal Lacquer
- Stretchy jewelry cord (for stringing bracelet)
- Instant glue (for securing knot in cord)
- Scissors
- Toothpick
Instructions:
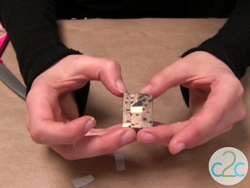
- I was inspired by the big chunky red bracelet that Drew Barrymore wears in a Cover Girl print ad and knew that I could create a big chunky bracelet in my own style! For this bracelet, I used resin shapes for the base. I love these resin pieces because they are pre-drilled which makes it easier to string. The first step to cut a piece of tissue paper larger than the shape so that it will wrap around both sides and ends.
- Next, apply Aleene’s Tacky Glue to the top of the shape.
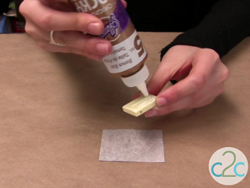
- I like to use my finger to spread out the Tacky Glue. You want to be sure you have a smooth thin coat of glue on top, bottom, ends and sides.
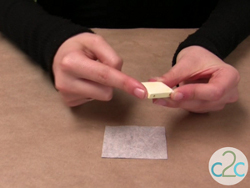
- Lay the shape glued side down onto the wrong side of tissue paper. Use your scissors to cut straight in on both sides at each end. Wrap the sides around and press into the glue. Add more glue where tissue overlaps.
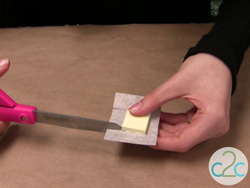
- Use scissors to cut away tissues from the sides leaving enough to cover the edge. Apply more glue if needed and glue the tissue to the sides.
- If you are left with an area on the back of the shape that does not have tissue, just cut a small piece and glue in place. You should now have a shape that is completely covered in tissue. Repeat with various colors of tissue and set all aside to dry.
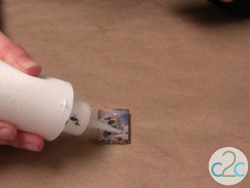
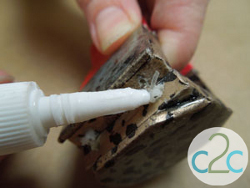
- To get the glossy look, I apply the 3D glaze to the top of the shape by squeezing directly from the bottle. Repeat for each piece and set aside to dry undisturbed overnight.
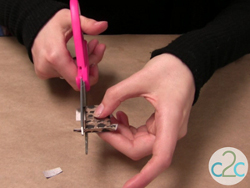
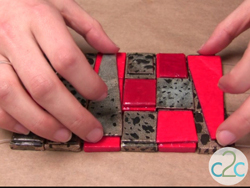
- For an added dimension on my pieces, I also cut cardboard to various shapes, covered them in tissue and 3D glaze and glued them in place over the resin pieces. You will also need to use a toothpick to poke holes in the tissue paper to open up the stringing holes that are covered by the tissue.Arrange your pieces on your work surface to determine pattern for your bracelet. Next, measure wrist to determine desired length of bracelet. Be sure to add about 6″ extra to each piece to allow for tying and knotting the ends and to be sure that the bracelet fits over your wrist and fits comfortable on your arm. Also, you may want to add beads in between the pieces, so add extra for that too!
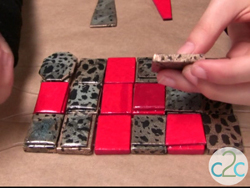
- I created several large triangle pieces for my bracelet which glue over the three rows of the bracelet. Here I am checking out placement. After I have tied my bracelets together in the next step, then I glue these in place with Aleene’s Tacky Glue. This gives me the opportunity to give more spacing between each bracelet if I want that. I found that I really wanted to try the bracelet on first, see how it fit and then I glued these on the finished bracelet.
- If you have ever used stretch cord before, you know that when you knot it, you need to add a dab of instant glue to the knot so that the knot will hold. Let that glue dry completely and then cut off the excess ends.
- Here I am wearing my new triple chunky bracelet :) I LOVE it!

For a comprehensive photo tutorial of this project, check out How to Make a Triple Chunky Bracelet.
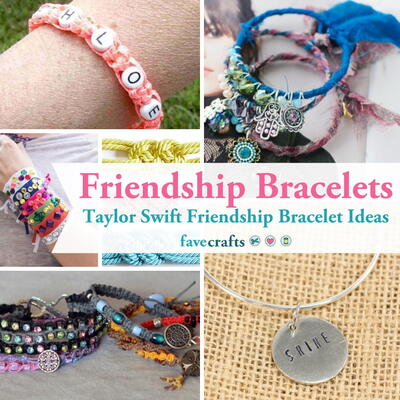
Read Next27 Friendship Bracelet Patterns
Your Recently Viewed Projects

Thanks for your comment. Don't forget to share!
annheineck
Jul 20, 2013
Yummmmyyyyy!!! I am making these for Christmas gifts this year! Awesome photos!
Report Inappropriate Comment
Are you sure you would like to report this comment? It will be flagged for our moderators to take action.
Thank you for taking the time to improve the content on our site.