Let's Go Fly a Kite Wall Decor

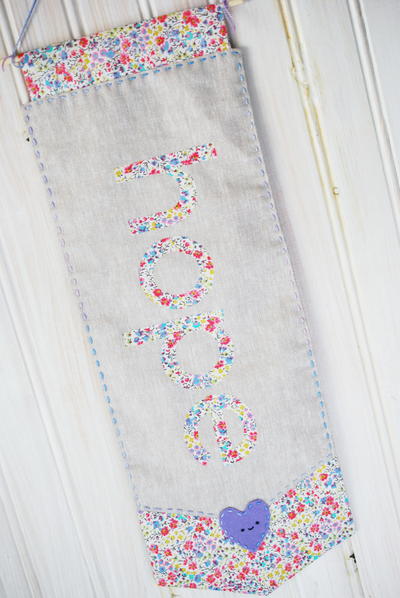
This beautiful kite wall decor is an easy sewing project for beginners. The result is perfect for spring, and so cheery. Celebrate the warmer weather by making a sweet little kite to hang on the wall. The designer states, "I’m ready to celebrate Spring with beautiful sunny skies and just enough breeze to fly a kite. If you’re not into flying kites, you could always make a fabric one to hang up on the wall." There is something so nostalgic about kite flying, and adding a kite as one of your interior decor motifs is a lovely way to inspire you to reminisce.
Time to CompleteUnder an hour
Main MaterialFabric
Primary TechniqueSewing

Project TypeMake a Project
Materials List
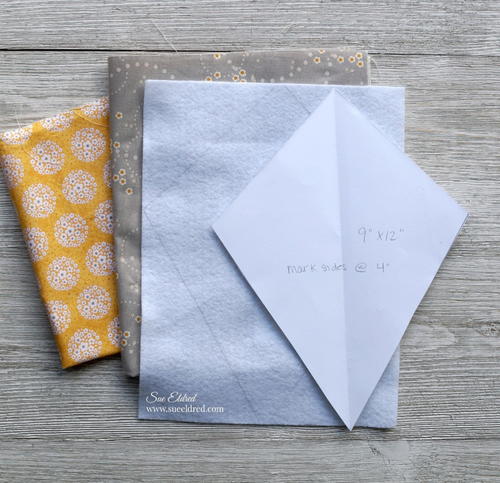
- Two pieces 9″ x 12″ cotton fabric
- 9″ x 12″ white felt
- Joy Iron On Embroidered Letters
- Joy Floral Applique
- 12″ x 12″ White Cardstock
- Scissors
- Rick Rack Trim
- Jute Twine
- Beacon Fabri-Tac Permanent Adhesive
- Sewing Machine
- Iron
Instructions for Let's Go Fly a Kite Wall Decor:
-
To create the kite pattern, cut the white cardstock to 9″ x 12″. Fold the cardstock in 1/2 lengthways. On the two long sides make a mark at 4″.
-
For the top of the kite, draw a line from the top middle fold to the 4″ mark on each side. For the bottom of the kite, draw a line from the 4″ mark to the bottom middle folds.
-
Cut out Kite pattern.
-
Trace and cut out the kite pattern on the backsides of both of the printed fabrics and the white felt.
-
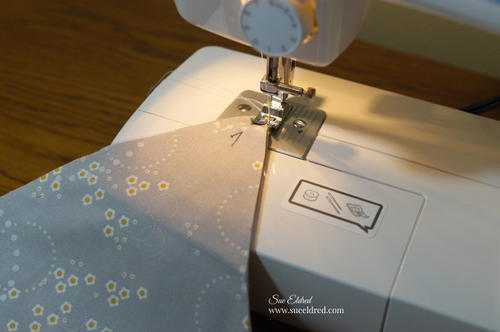
Sandwich the white felt between the two patterned pieces. Pin into place and top stitch around the kite.
-
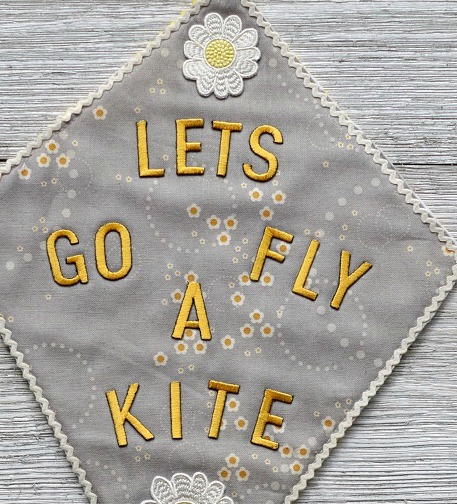
Arrange the words “Lets go fly a kite” onto the front of the kite with the shiny side down.
-
Cover with soft clean cloth and iron on cotton settings for 30 seconds. Turn kite over and repeat for an additional 30 seconds.
-
Cut the top flower and leaves off the floral applique.
-
Arrange the flowers on the kite and iron onto the kite the same way as the letters.
-
Glue rick rack around the edge of the kite.
-
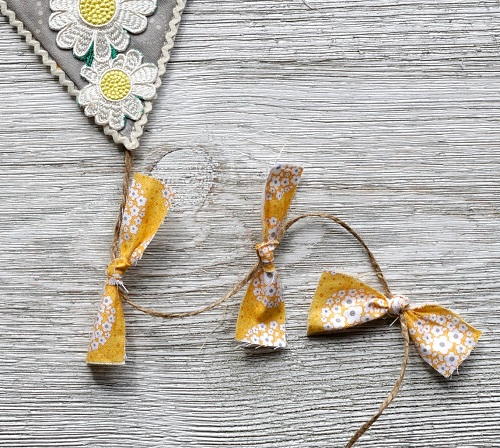
Cut strips of fabric and tie onto a 14″ piece of twine. Glue one end of the twine to the backside of the kite.
-
Make a small loop with a second piece of twine and glue to the top of the kite.