This project was submitted by one of our readers, just like you.
Laundry Scoop Spa Bath

Laundry Scoop Spa Bath
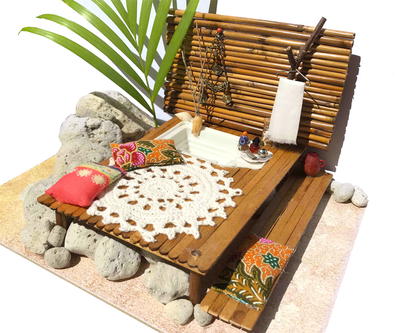
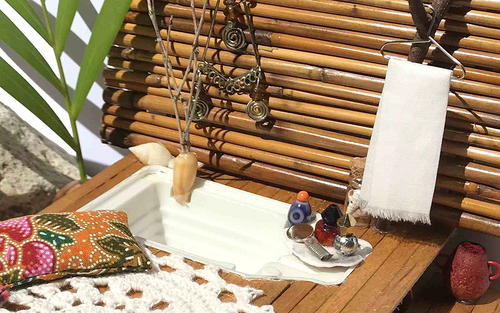
"You can make a joyful miniature outdoor spa scene from a laundry scoop and some craft sticks! A lovely surprise for the dollhouse. Use detailing from nature and some recycled bits. The bamboo back screen comes from a discarded garden screen; the wall hanging is an orphan earring; the rug comes from a damaged vintage doily; the vanity details are all from jewelry parts; the coat hanger is made from a paperclip; the large planter is from a dried and lacquered nut. Make the basic white spa bath surrounded by timber decking then supply your own style and imagination."
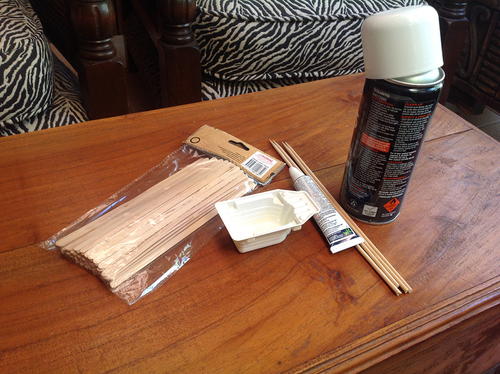
Materials List
- A laundry scoop in a tub-like shape
- Some craft sticks for the decking. (I used long ones to make enough room for some drying off and lounging. Mine have been dyed in coffee but you can use them unstained for a Scandi look. )
- Some multi- purpose glue (suited to wood, fabric, plastic, etc)
- White spray- on gloss enamel that will bind to plastic ( eg Rustoleum)
- A craft knife, a pencil and a ruler for cutting out.
Instructions
-
Spray the INSIDE of the laundry scoop with the white enamel. Let dry and repeat so you have two or three coats in total. (If you spray the outside the glue will lift some of the paint when you install it in the deck).
-
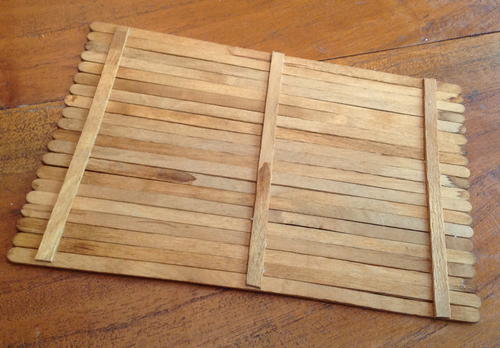
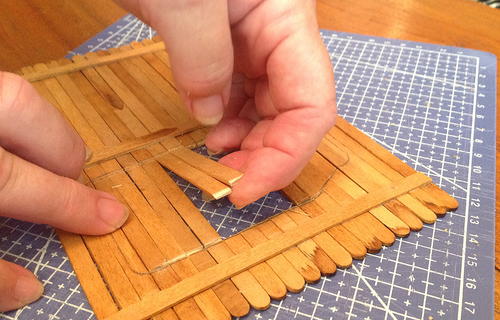
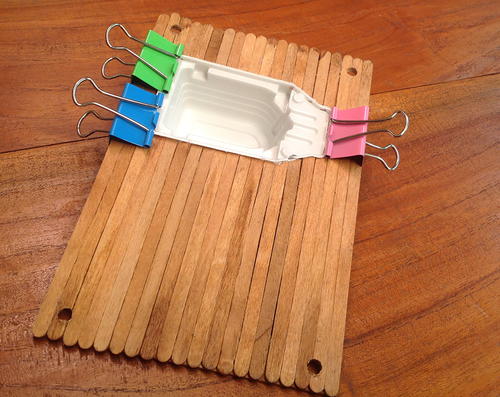
Line up 20 craft sticks on your cutting board. Measure the width and cut three sticks from some more boards. Glue in place.
-
When dry, trace out the shape of the spa bath as pictured on the underside of the deck. Now draw a second line about 2mm (1/8 in) INSIDE the traced line. This will be your cutting line.
-
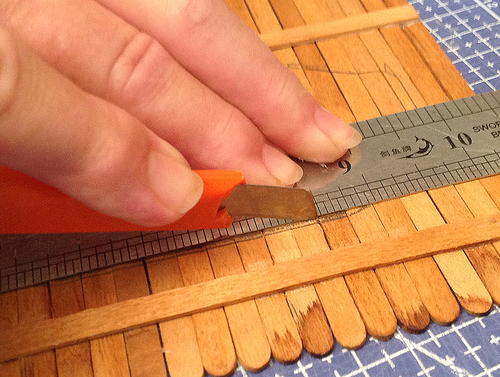
Using a new blade on your cutting knife and a ruler, begin to cut the straight marked lines. Work gently but firmly. You will need to make about ten cuts on each straight line. You will find you can then lift up the pieces and remove them. Next do the odd corners, so you have a spa- shaped hole as pictured.
-
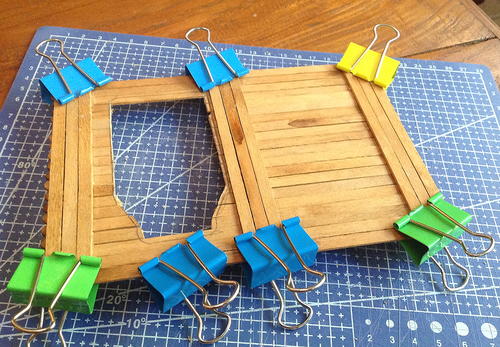
If you think the spa might be played with you can glue in some extra supports as I did to make it stronger. (Recommended!)
-
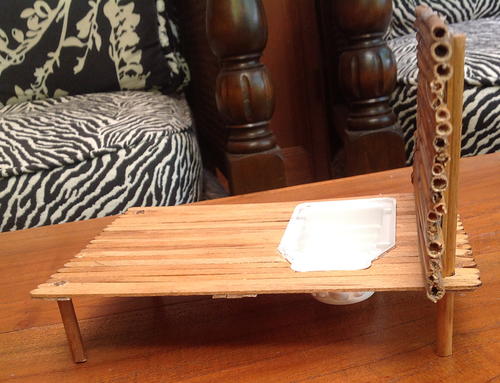
Before you glue the spa in place decide what sort of base you want. You can simply glue four matchboxes to the underside, as pictured. OR, you might want to turn it upside down and drill some holes and glue in some support feet. (Because I wanted to add a back wall I threaded the dowelling right through the holes to act as wall supports as well as feet.)
-
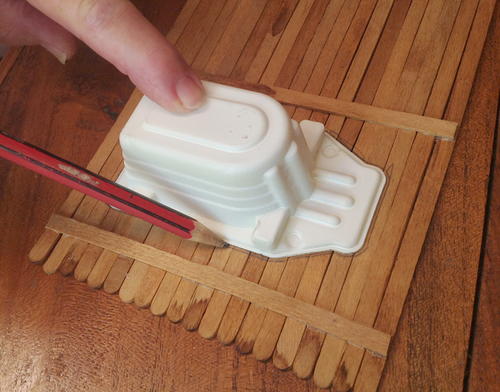
Now it's time to glue the bath into the deck. Make a fine line of glue all around your timber cut-out and lower the bath into position. While the glue is drying you can start adding your own finishing touches. I'm crafting on a tropical island, so I like to use shells as vases. What will you use in your part of the world?
NotesCost; under $10
Complete: in an evening, but depending where you live you might need to spray paint the tub the day before so it’s completely dry before you install it.
Scale: 1:16 kids dollhouse scale, compatible with Sylvanian families, Lundby, Le Toy Van etc…