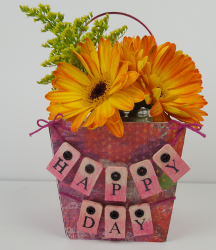
Celebrate Spring Flower Basket
Whether it's warm or cold, spring crafts for adults can put you in a good mood. Use scrapbook paper and spray-on glue to transform a plain cardboard pail into a Celebrate Spring Flower Basket from Tiffany Windsor. Fill it with faux flowers so it can bloom all year long.

Materials:
- Aleene’s Fast Grab Tacky Spray
- Aleene’s Original Tacky Glue
- Celebrate-It White Square Pail with ribbon (Michaels)
- Scrapbook papers of your choice
- Pencil
- Scissors
- Wood alphabet letters
- Acrylic paint (to match scrapbook paper)
- Paint brush
- Rivets (optional only if letters have holes)
- Embroidery floss
- Wire (heavy gauge for handle)
- Round nose pliers
- Toothpick
- Wax paper
- Paper towels
Instructions:
-
Once you have selected the words you want on your pail, lay them side by side, face up on paper towel.
-
To create ombre painted effect, pour several drops of acrylic paint on wax paper. Thin paint slightly with water. Brush paint along bottom edge of letters. Dilute paint with more water to create a lighter shade and brush along top of letters. Set aside to dry.
-
Remove ribbon handle from square pail.
-
Lay one side of pail down onto back of scrapbook paper. Trace around edge with pencil. Cut out and mark side of pail and back of paper with corresponding number. (Each side will be shaped slightly different so you will want to keep the pieces numbered.
-
Repeat tracing, cutting and numbering for each piece.
-
Working in a well ventilated area (I prefer to spray outside), lay your paper pieces, wrong side up on protected work surface. Spray with Aleene’s Fast Grab Tacky Spray according to bottle directions.
-
Immediately glue each piece to each side of pail. Smooth and press to adhere firmly along all edges.
-
Use toothpick to punch through paper to re-open rivet holes.
-
Cut wire to desired length for handle adding approximately 2″ to each end for swirls.
-
Working from the inside out, insert one end of wire into first hole. Use pliers to swirl end of wire. Bend to shape handle and insert other end of wire into second hole. Use pliers to swirl end of wire. Adjust as needed.
-
Line up alphabet letters side-by-side over embroidery floss. Working one letter at a time, glue to embroidery floss with Aleene’s Tacky Glue. Let dry.
-
Lay pail on side. Lay words in place and glue ends of embroidery floss in place with Aleene’s Tacky Glue. Let dry.
-
Tie embroidery floss into small bows and glue in place with Aleene’s Tacky Glue. Let dry.
- Fill small jar with water and arrange flowers.
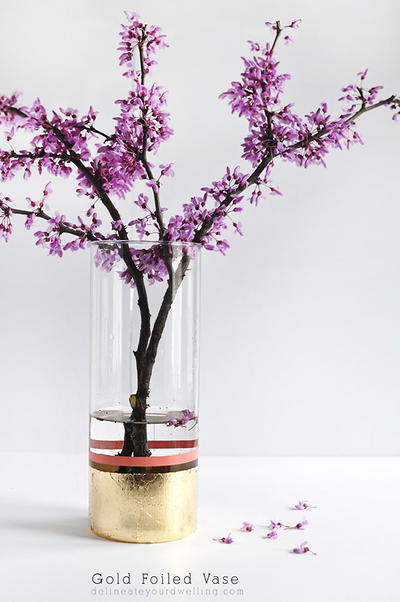
Read NextDIY Gold Foiled Vase