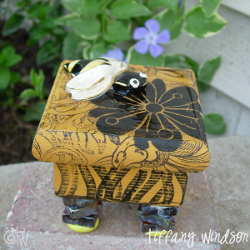
Butterfly and Bloom Box
Spark your creativity with this fun home craft tutorial. Embellish a cheap wooden box with stamps and other decorative materials to create a unique look. This Butterfly and Boom Box from Tiffany Windsor is unlike any other craft you've seen.

Materials:
- Wood box with lid
- Paint (I used Delta Creative Soy Paint) – color of choice plus black
- Foam brush
- Stencil (I used Tulip Multi-Surface Stencil)
- Rubber stamps
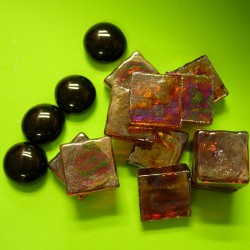
- Mosaic tiles and flat back marbles for leg
- Aleene’s Jewelry and Metal Glue
- Cosmetic sponge
- Sakura 3-D Lacquer
- Metal embellishments and rhinestones
- Small piece waxed paper
Instructions:
- I selected a box that I had pre-decorated from my craft stash but it’s easy to decorate your own just like I did. Just paint your box inside and out. Let dry. Select several different rubber stamps and determine placement. Using a cosmetic sponge, dab black acrylic paint onto rubber stamp and stamp onto box top, bottom, inside and out! (I like to use acrylic paint for my stamping because if I make a mistake, I can use a wet wipe to wipe off the paint and start again!)
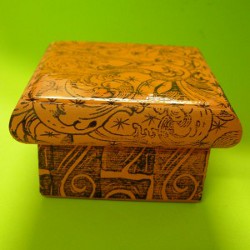
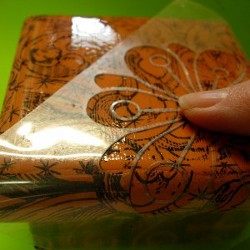
- Place self-adhesive stencil where desired.
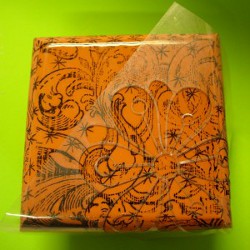
- Press in place with finger to secure on box top.
- Dab flat side of cosmetic sponge (I cut my sponges into several pieces) into black paint. Dab excess off onto waxed paper. Dab paint over stencil. Always use an up and down motion when sponging paint over stencil. This helps to keep paint from seeping under stencil.
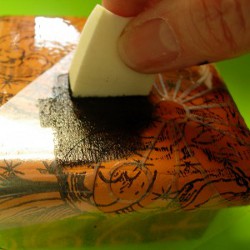
- Cover entire open stencil area with paint.
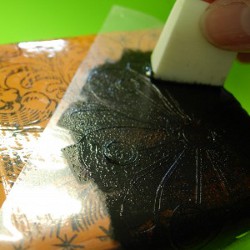
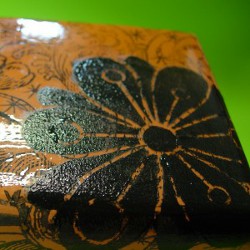
- Lift stencil to reveal design. Let dry completely.
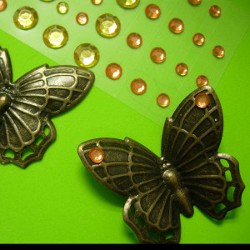
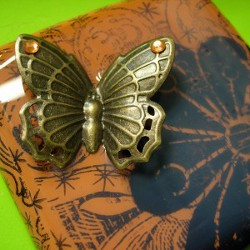
- If desired, add rhinestone accents to your metal embellishment.
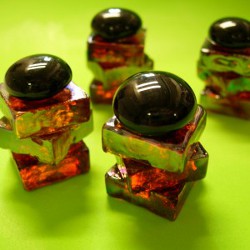
- Select mosaic tiles and flat back marbles for legs.
- Stack and glue. Let dry for several hours.
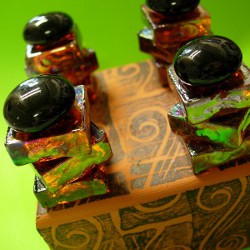
- Glue in place on bottom of box. If needed, readjust tiles as glue continues to dry. Let dry undisturbed overnight.
- Apply a layer of 3D gloss to top of box. Be careful when applying over painted area so that you do not scratch stenciled image.
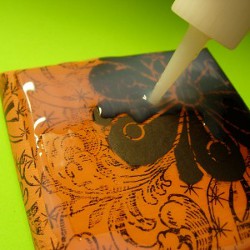
- When top is completely covered in gloss, gently place butterfly into gloss where desired. Let dry undisturbed overnight.
For a comprehensive video tutorial of this project, check out How to Make a Butterfly and Bloom Art Box.
Read NextDecoupaged Clay Pot


Thanks for your comment. Don't forget to share!
Report Inappropriate Comment
Are you sure you would like to report this comment? It will be flagged for our moderators to take action.
Thank you for taking the time to improve the content on our site.