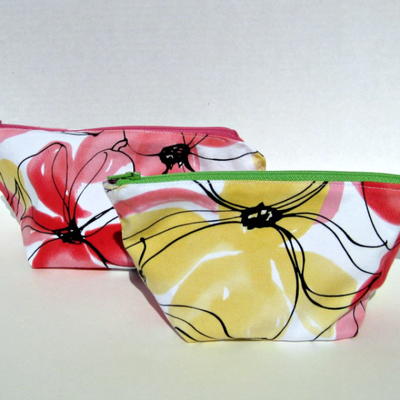
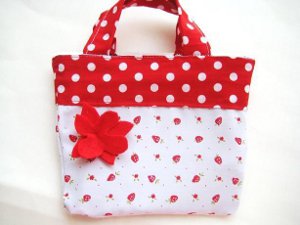
Reversible Bucket Bag
This Reversible Bucket Bag is great for little girls. Depending on her mood, she can turn her purse inside out to reveal a whole new bag! This easy sewing pattern is also great for teens and adults. Make a purse that goes with everything with this project!
Materials:
- 1/4 Yard of Denim fabric
- 1/4 Yard of the Strawberry Fabric
- 1/4 Yard of the Polka Dot Fabric
- Small piece of Red acrylic felt
- One safety pin to attach the flower
- Sewing notions and a Sewing machine
Instructions:
-
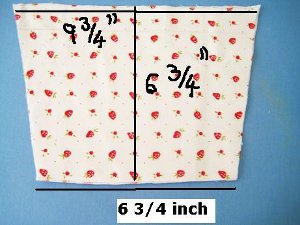
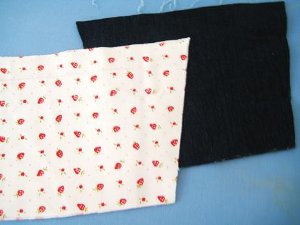
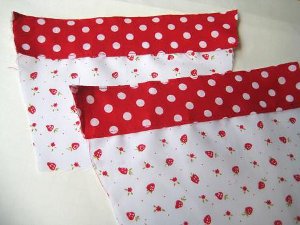
Cut out 2 pieces of the strawberry fabric with measurements as shown. Repeat the same with the denim fabric to get two pieces as shown above. You will get your pieces like this, 2 of each fabric.
Polka Dot Fabric Cutting
|
Polka Dot for the Band at the top ( Cut 4 of this size) |
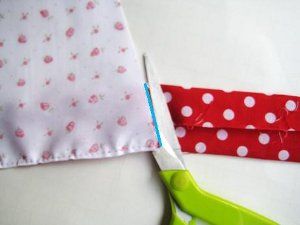
Polka Dot for the Handle (Cut 2 in this size) |
| 4 X 12 inches | 4 X 12 1/2 inches |
-
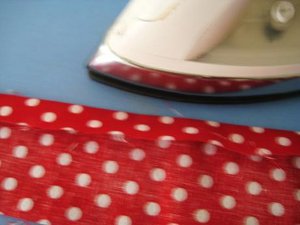
Take the polka dot strips you cut for the bands , fold one of the raw edged inside along the length by 1 inch and press.
-
Fold the other raw edge in by 1 1/8 inch and press. So you band will now be a little less than 2 inches wide.
-
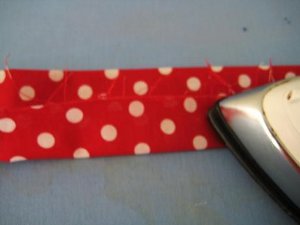
To make the handle, take the strips as per the table above, fold both the raw edges in by 1 inch and press just like you did for the band. Now fold it again at the middle and press to get a a handle that is about 1 inch wide. Sew the long edges shut. Keep it aside.

-
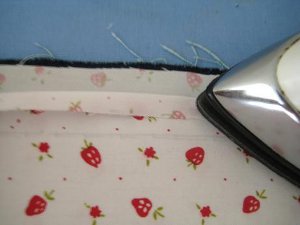
Fold the raw edge at the top (the widest side) of the starwberry piece by 2/8 inches to the right side and press. Repeat with the other starwberry and denim pieces.
-
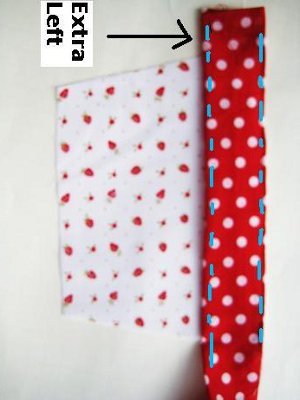
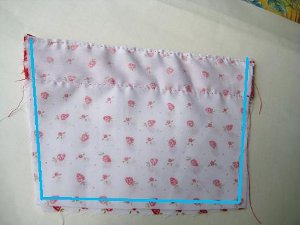
Keep the band you made over the top wide edge of the bag on the right side and sew along the edges as shown by the blue lines. Repeat for all the 4 pieces.
-
Cut off the excess band along the side of the strawberry piece following its shape.
-
After you finish attaching the bands it will look like this.
-
Keep the right sides together of both the strawberry pieces and sew as shown by blue line with a 2/8 inch seam allowance. Repeat with your denim pieces.
-
Trim the the bottom and top corners as well as the seams close to the stitch to reduce any bulk.

-
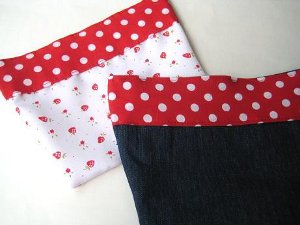
You will get two pouches like this.
-
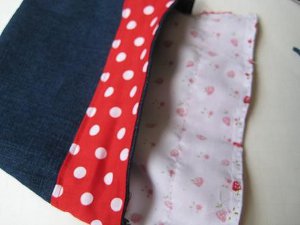
Keep the denim pouch right side out and the strawberry one wrong side out. Insert the strawberry pouch into the denim one. You will now have the wrong sides of the pouches touching each other.
-
Align the side and top seams.
-
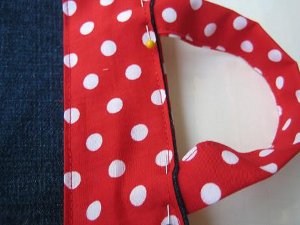
Insert the bag handle between the two layers ( almost 1 1/2 inches inside on each side) and pin in place.
-
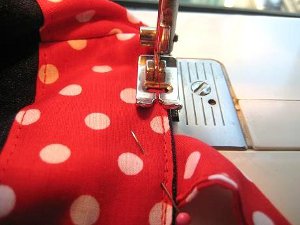
Sew along the top edge as shown above joining the two pouches and sandwiching the handle in between.
-
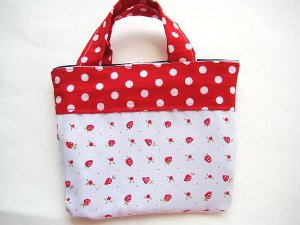
Your completed bag will now look like this.
-
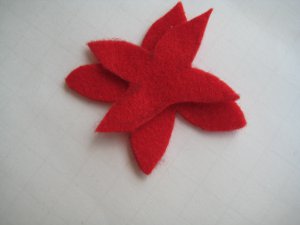
For the flower, cut out 2 flower motifs with pointy petals. My bigger layer was almost 2 1/2 inches and my smaller about 2 inches.

-
Overlap the two layers of petals.
-
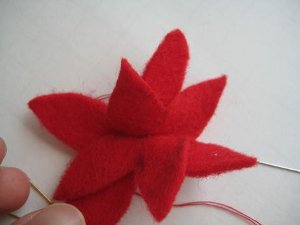
Pinch the center and hand sew to make the petals stand up. Attach it to the bag with a safety pin. When you want to reverse your bag , take the flower off and pin it to the new right side of the bag.
Read NextFabric Scraps Tote Bag
Your Recently Viewed Projects

Thanks for your comment. Don't forget to share!
sharadapersaud 378 6249
Jun 05, 2013
Great product will do a couple for sure for my grand daughters.
Report Inappropriate Comment
Are you sure you would like to report this comment? It will be flagged for our moderators to take action.
Thank you for taking the time to improve the content on our site.