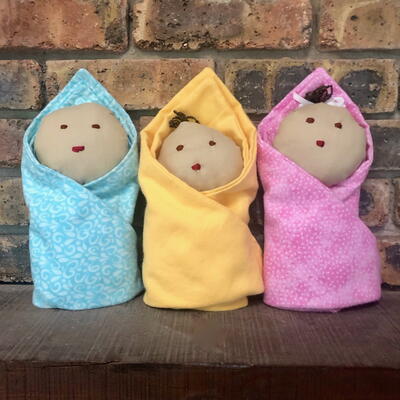
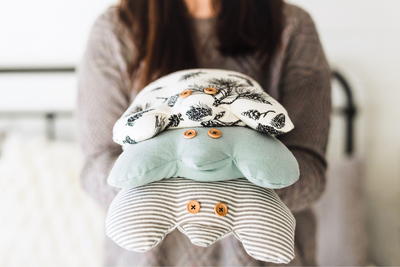
Swaddle Babies

Use this simple DIY plush doll pattern to make Swaddle Babies for all of the little ones in your life. Stuffed toys make the best keepsake, even more so when they're handmade. This easy baby doll sewing pattern is perfect for sewists of any level. So, grab your materials, and get to work on one of these little cuties!
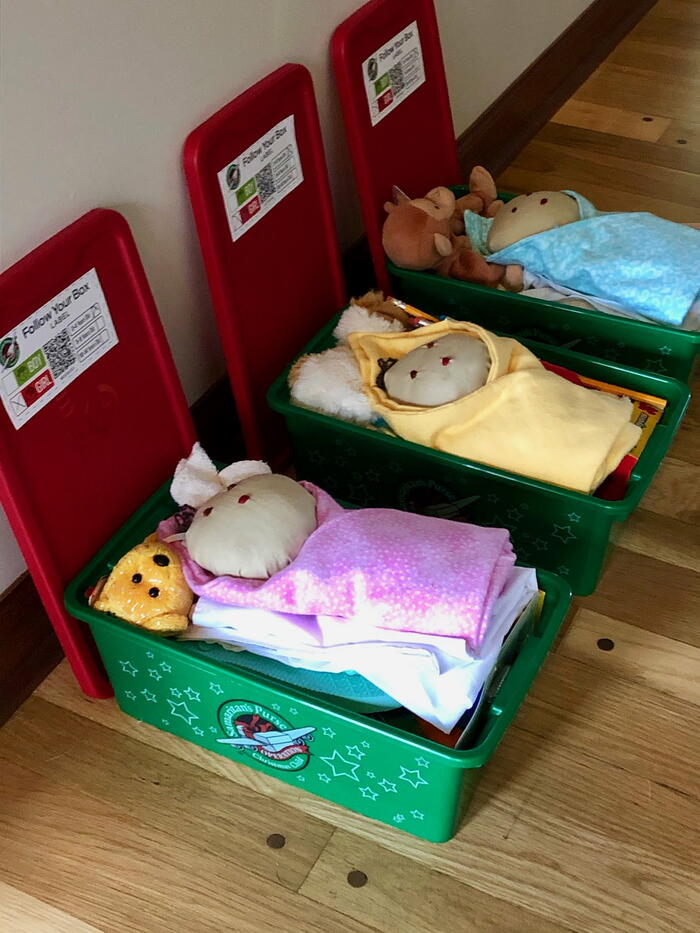
From the Designer: "Growing up, I loved my baby dolls and being just like my mommy. Because of this one of my favorite items to pack into shoebox gifts are dolls. I wanted to design a simple, hugable baby doll for our little Operation Christmas Child shoebox recipients (the 2-4 year olds) that would fit perfectly into a shoebox. These swaddle babies fit the bill."
Estimated Cost$11-$20
Time to CompleteIn an evening
Main MaterialFabric
Primary TechniqueSewing

Materials List
- 2-16" squares of flannel (can be the same or coordinating)
- 1-7" (approximately) circle of muslin
- Fairfield Poly-fil
- Thread to match flannel
- Embroidery Floss (variety of colors)
- Needle
- Scissors
- Dressmaker pencil
- Ruler
- Straight pins
- 2 feet of yarn (Optional)
- Ribbon (Optional)
Instructions:
-
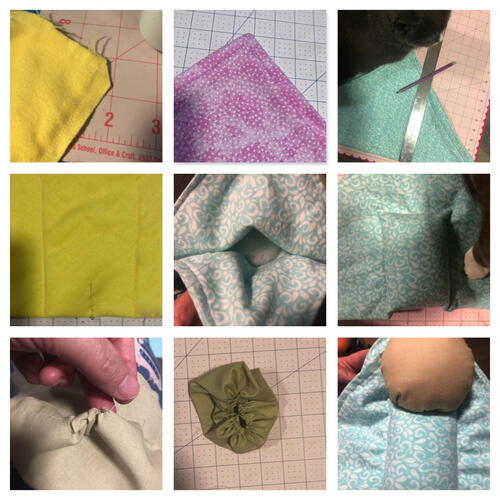
Begin by pinning right sides of fabric together, and using a 1/4" seam allowance sew around 3 sides. On the forth side sew all but 3 inches. Snip corners and turn to the right side. Give it a quick press if needed to flatten fully.
-
Turn in the opening and sew shut, then continue sewing around the entire edge of your flannel with a 1/4" seam allowance.
-
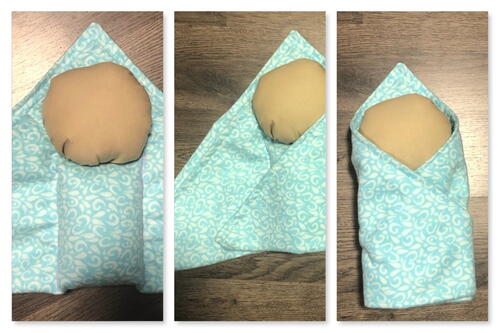
Fold the flannel square in half diagonally, offsetting about 1/2 inch at the top (see photo). Pin together. Find the center of the piece from the top (offset) point and pin for reference.
-
Mark the area for the "body". From the folded side you will be drawing 2, 5 inch long lines, 2 inches from either side of the middle pin. (See photo collage above for reference). Sew along these lines going through all layers of fabric.
-
Stuff the body cavity with Poly-Fil stuffing, take care not to over stuff so you can sew it shut. Stitch across the top of the body cavity again going through all layers of fabric. Set aside.
-
Take your circle of muslin and using your longest (basting) stitch and a 1/4 " seam allowance, sew along the perimeter of the circle. Do not back stitch! You want to be able to gather the fabric along the thread.
-
Carefully pull on one of the threads to begin gathering the muslin, till it takes the shape of a small pouch. Stuff tightly with Poly-Fil and tie off the thread. This will become the doll head.
-
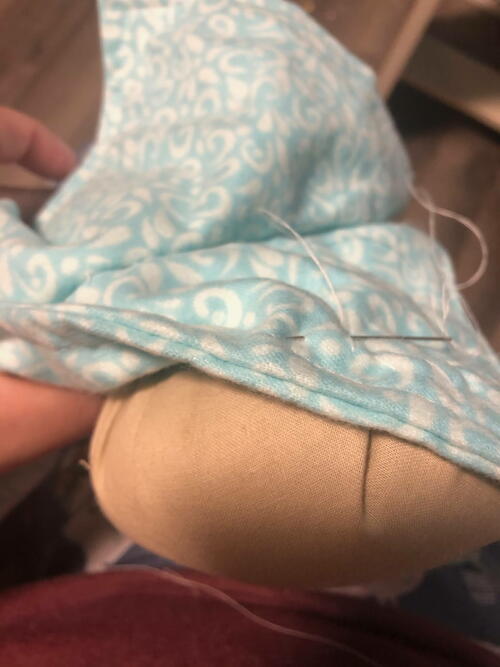
Attach your doll head, to the body. Hand stitch in place, being sure to only go through only the top layer of the blanket.
-
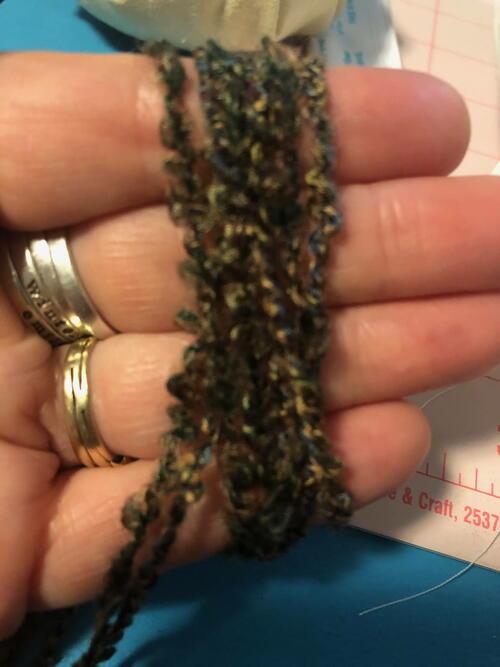
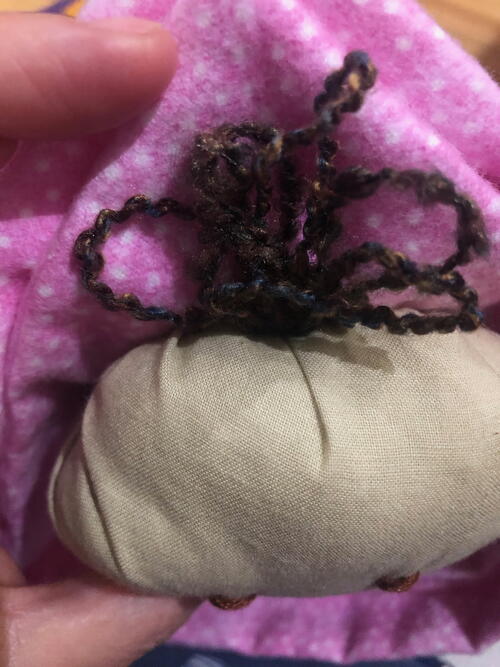
(Optional) If you want your swaddle baby to have hair. Wrap the length of yarn around your fingers and tie the bunch of loops together at the bottom. Fan out to form the curls. Tuck the tied end under the top of the head of the baby and sew in place.
-
Securely tack the top layer of blanket to the bottom layer to hide your stitches.
-
Securely tack the rest of the blanket around the baby.
-
Using embroidery thread, add eyes and mouth details.
-
Your Swaddle baby is now ready for a special child you love, or to tuck into a shoebox gift!
Want more full projects?
Read NextSwaddle Babies