That Smile Scrapbook Layout Idea
Free scrapbooking layout ideas like this one are perfect for any occasion!

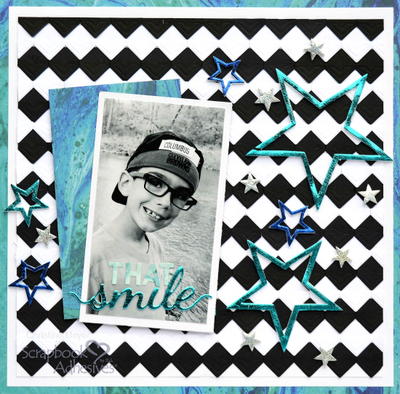
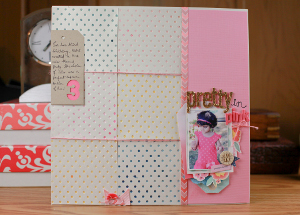
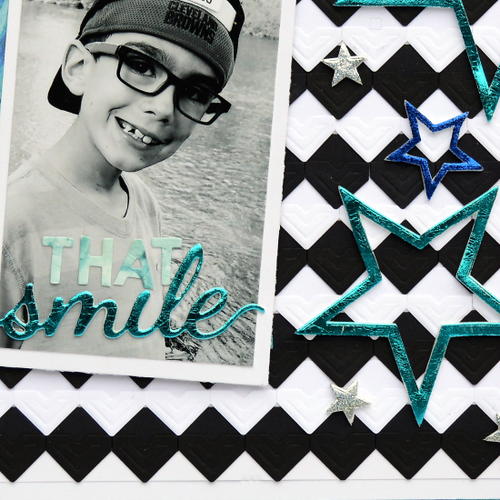
If you have an adorable photo of someone you love that is just begging to be scrapbooked, this is the perfect layout idea for you to save that smile! Use photo corners in an incredibly creative way to add beautiful texture and pattern to the background of this layout. Free scrapbook layout ideas like this one are wonderful for any occasion! The sticker reading "That Smile" is the perfect embellishment to complete the page, and the metallic foil creates the perfect flair. Save that smile for years to come with this beautiful layout.
From the Designer: "Although this is a clean style layout, the background is anything but plain! The Creative Photo Corners pairs perfectly with our foils for a one of a kind scrapbook layout for a stand out background."
Time to CompleteIn an evening
Primary TechniqueScrapbooking
Project or Page Size12 inches x 12 inches

Project TypeMake a Project
Materials List
- Scrapbook Adhesives by 3L® Creative Photo Corners Black
- Scrapbook Adhesives by 3L® Creative Photo Corners White
- Scrapbook Adhesives by 3L® 3D Foam Stars
- Scrapbook Adhesives by 3L® 3D Creative Sheets Medium
- Scrapbook Adhesives by 3L® Metallic Transfer Foils Variety Colors
- Scrapbook Adhesives by 3L® Metallic Transfer Foils Holographic Colors
- Scrapbook Adhesives by 3L® Crafty Foam Tape White
- Scrapbook Adhesives by 3L® E-Z Runner® Grand Refillable Dispenser
- Paper House Productions: Patterned Paper and Letter Stickers
- White Cardstock
Instructions
-
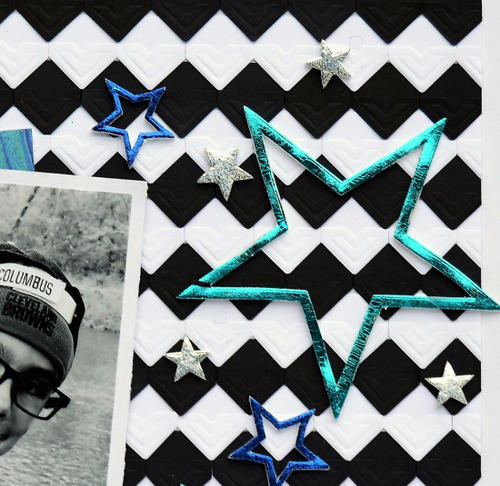
Start at the bottom of a 11 ½ x 11 ½- inch white cardstock and line up the Creative Photo Corners Black with corners facing down. Trim the excess on the side.
-
Start the second row with the Creative Photo Corners White with corners facing down. Make sure that the gap is a diamond shape. Repeat making the rows until the whole page is filled. Trim excess on top.
-
Mat onto a 11 ¾ x 11 ¾-inch white cardstock with the E-Z Runner® Grand Refillable Dispenser.
-
Add the layered background and adhere to the 12 x 12-inch patterned paper with the E-Z Runner® Grand Refillable Dispenser.
-
Add a piece of rectangular patterned paper with the E-Z Runner® Grand Refillable Dispenser on the left side of the layout on a slight angle. Adhere the rectangular photo on an angle next to the patterned rectangle with the Crafty Foam Tape White.
-
Place 3D Foam Stars in varying sizes around the page. Apply blue, turquoise, and silver holographic foils by removing the top liner of the stars, place foil color UP and rub to transfer the color to the shape. Peel off the foil to reveal the color.
-
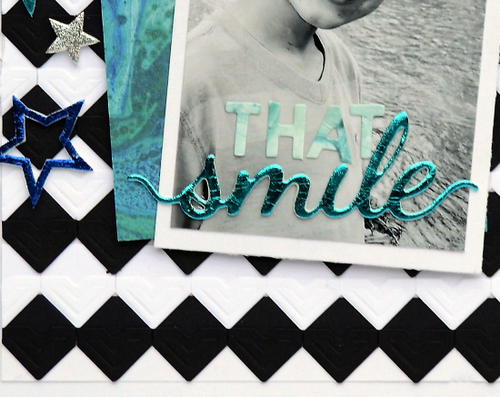
Die-cut letters “THAT” with patterned paper and adhere with the E-Z Runner® Grand Refillable Dispenser on the photo.
-
Die-cut “smile” with 3D Creative Sheets Medium. Remove bottom liner and place below “THAT.” Apply teal foil by removing the top liner, place foil color UP and rub to transfer the color to the shape. Peel off the foil to reveal the color.
What is your favorite scrapbook layout you've seen or made?