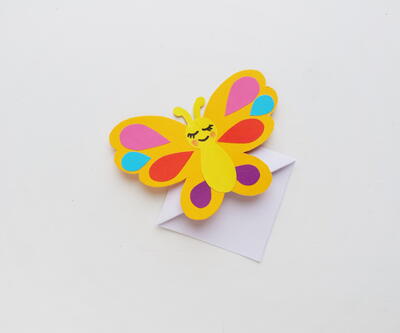
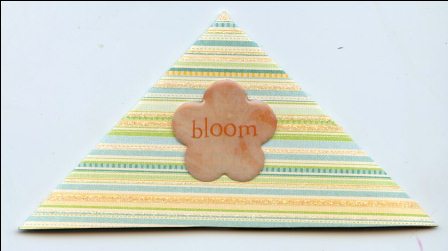
Corner Bookmark
Keep your embellishments flat, but have fun with this quick and easy craft project great for all ages. Make a corner bookmark with this craft project by Maria Nerius.
Materials:
- Scrap paper
- Stickers (EK Success Butterflies, K&Company epoxy )
- Fiskars Personal Trimmer
- Ruler and pencil
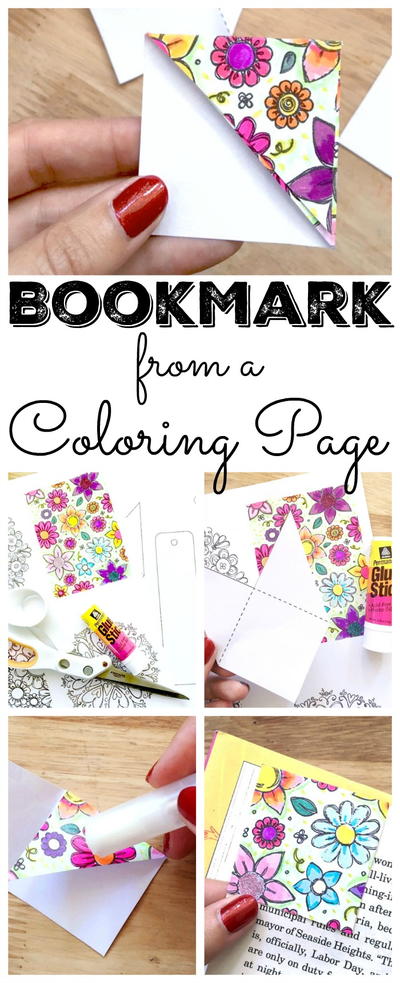
Instructions:
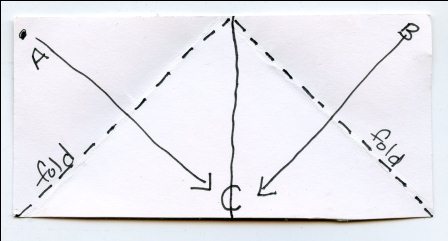
- Cut strips of paper: 4 1/4” x 2” Find center of the backside of your paper and mark with pencil.
- Take top left corner and fold to center of bottom, repeat taking top right corner to center of bottom, you should have a folded triangle.
- Place sticker where the two sides meet to close fold. Flip and place embellishment to front center.
Your Recently Viewed Projects


Thanks for your comment. Don't forget to share!
emydaylight 321905 1
Dec 19, 2016
I have seen this project done with different colors for different seasons.For example, one of my boys did this project in December and the teacher told them to make it in red color and then decorated as good old Santa. While in spring the other teacher had the children do it in green or yellow and use lovely spring color decorations. Very handy to have it as adult or child. Thanks for sharing it.
judyg
Jul 28, 2011
This is a wonderful craft for teaching children the proper way to mark pages. They can make it to suit their personalities and make a bunch for gifts. Thanks
Report Inappropriate Comment
Are you sure you would like to report this comment? It will be flagged for our moderators to take action.
Thank you for taking the time to improve the content on our site.