Stenciled Flowers Birdhouse
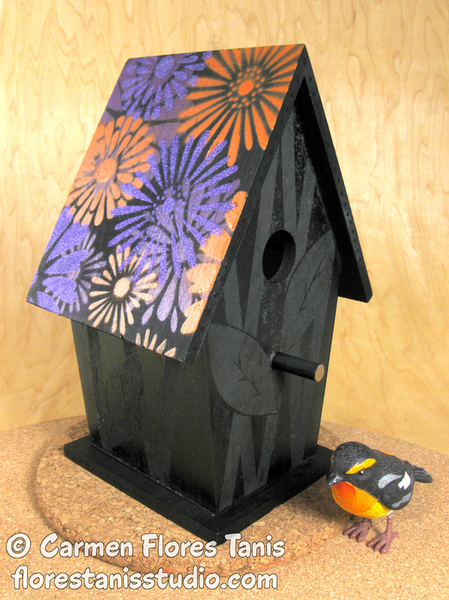
Inspired by the street art of Los Angeles, the Stenciled Flowers Birdhouse is a way you can bring this style indoors. Using Krylon spray paint in bright colors and overlapping stencils, you'll create a one-of-a-kind piece for your home. Tip: Use contrasting colors of spray paint to make your designs really "pop."
Primary TechniquePainting

Materials:
- 1 Can of Krylon Chalkboard paint - Black
- 1 Can of Krylon ColorMaster paint - Black satin
- 1 Can of Krylon ColorMaster paint - Pumpkin Orange Gloss
- 1 Can of Krylon ColorMaster paint - Rich Plum Gloss
- 1 Can of Krylon ColorMaster paint - Rich Plum Gloss
- 1 Can of Krylon Easy-Tack Repositionable Adhesive
- 1 Plaid Delta Stencil Mania - Daisies
- 1 Bottle Dimensional Paint
- 1 Plain wood birdhouse
- 1 Low tack paper tape
- Adhesive shelf vinyl
- Plain scrap paper
- Pair of scissors
- Kraft knife
- Sandpaper
- Permanent marker
Instructions:
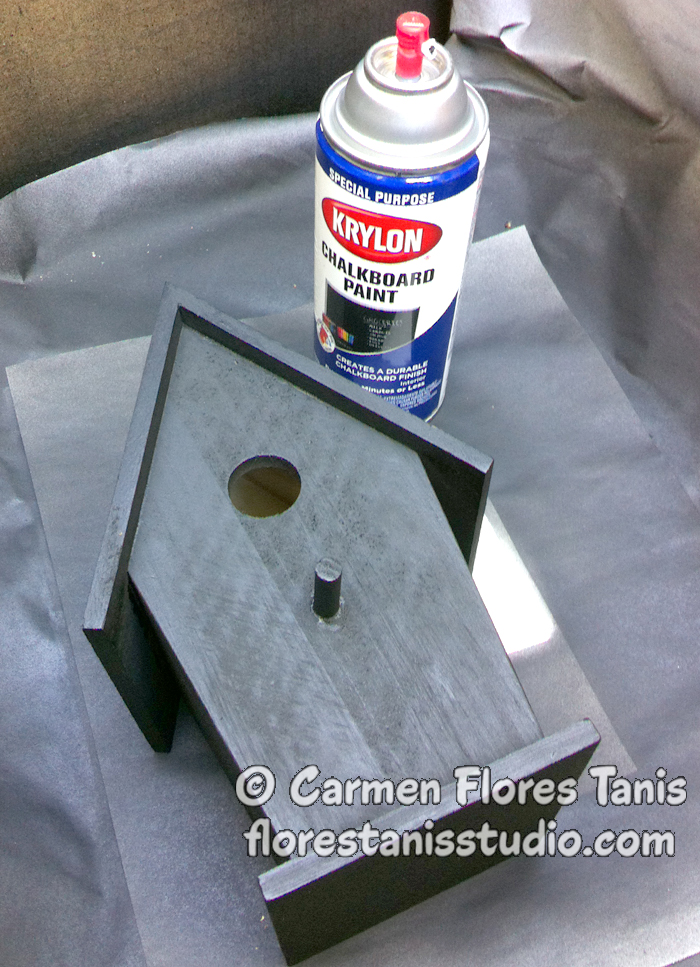
- Lightly sand the birdhouse. Spray with Krylon Chalkboard paint. (**Tip - use a large cardboard box as your "spray booth".) Let dry one hour then spray a second coat. Let dry.
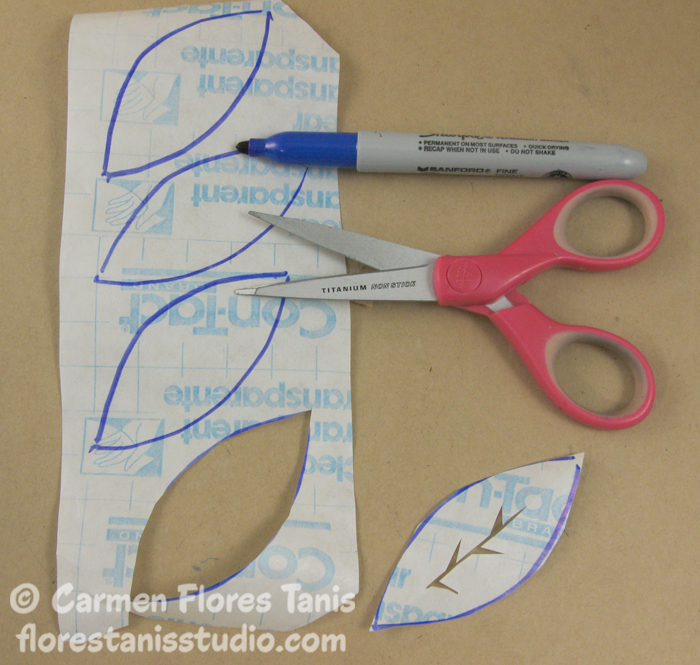
- Spraying the sides of the birdhouse: Put strips of paper tape on the sides of the birdhouse. This will create the flower stems. Cut leaf shapes from the adhesive shelf vinyl. Remove the paper backing on the cut leaves and apply them sticky side down onto the birdhouse. Use plain paper and paper tape to mask off the roof to protect it from any overspray.
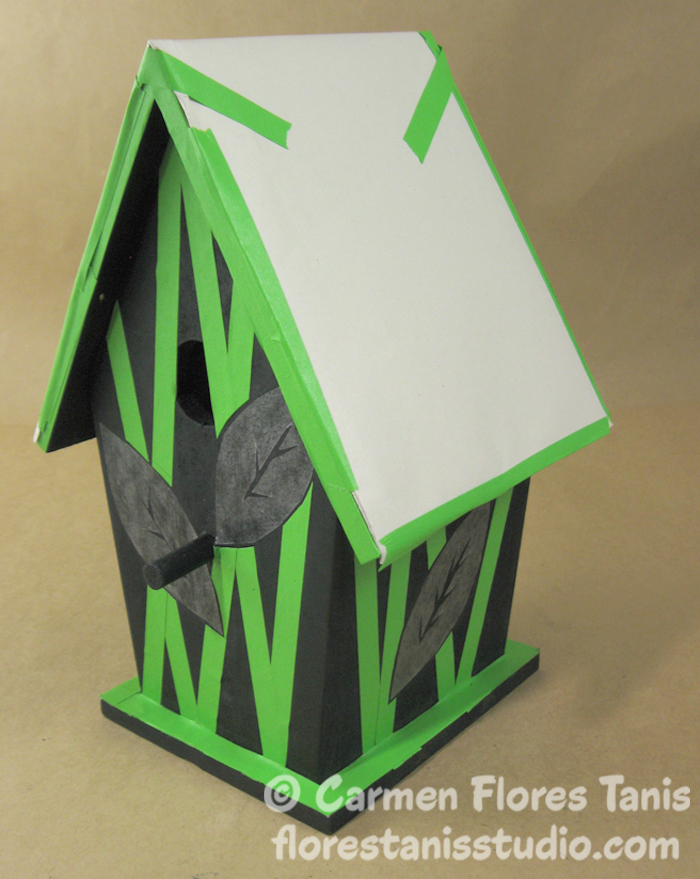
- Spray the sides of the birdhouse with Krylon ColorMaster black satin paint. This will give you a cool two-tone effect! Let dry 10 minutes then remove the paper tape and vinyl leaves. Remove the paper and tape from the roof.

- Stenciling the roof: You will spray one side of the roof at a time so use paper and tape to mask one half of the roof and all the newly painted sides of the birdhouse.
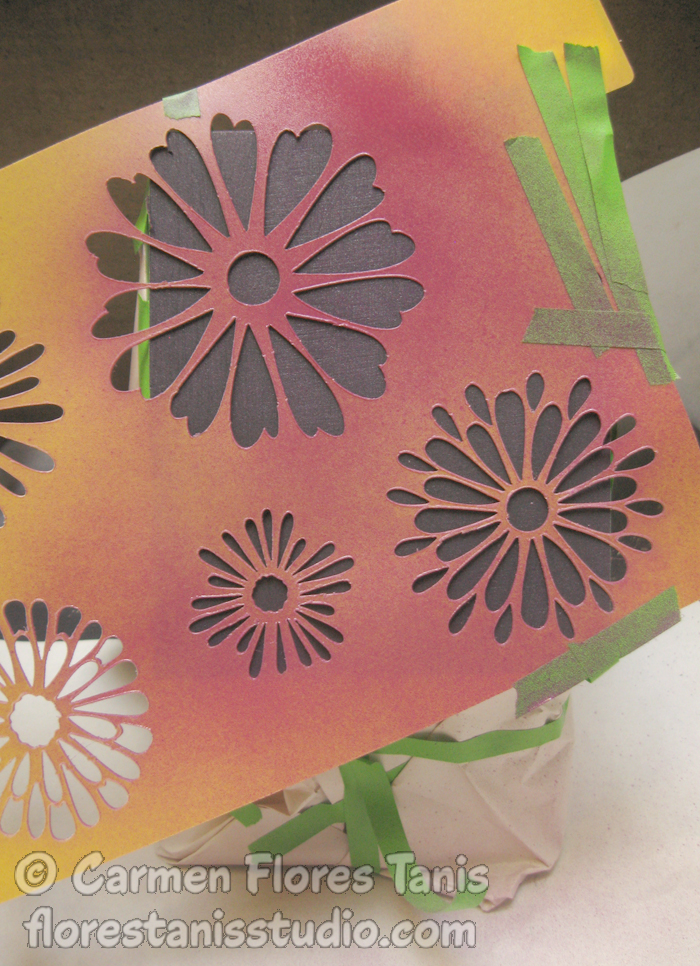
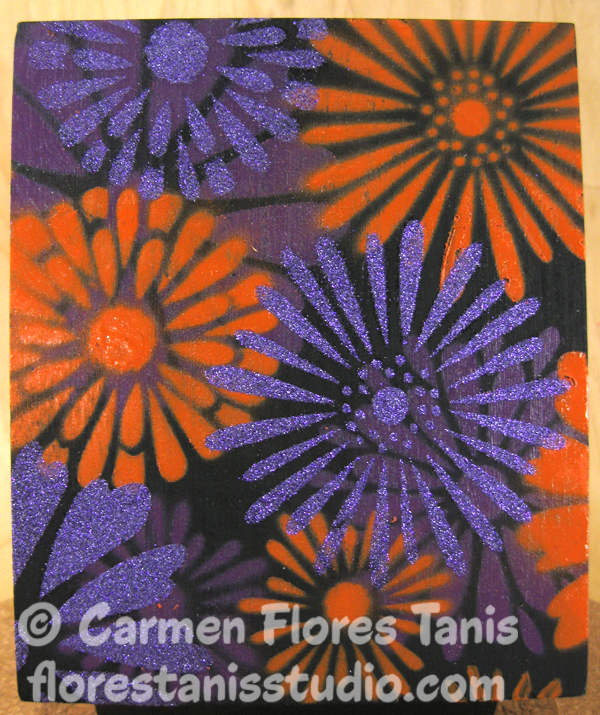
- Spray the back of the Daisies stencil lightly with Krylon Easy-Tack Repositionable Adhesive. Adhere the stencil to the unmasked side of the roof. Use paper tape to mask off any areas of the roof not covered by the stencil. Spray with Krylon ColorMaster Rich Plum Gloss paint. Let dry 10 minutes then remove the stencil. Reposition the stencil on the roof to your liking and press into place (respray with Krylon Easy-Tack Repositionable Adhesive if necessary). Spray lightly with Krylon ColorMaster Pumpkin Orange Gloss paint. Let dry 10 minutes then remove the stencil. Reposition the stencil again and spray with Krylon Glitter Blast. Let dry 10 minutes then remove the stencil. Mask the newly painted side of the roof to protect it from any overspray. Remove the paper from the unpainted roof and repeat the stenciling/spraying as above. Remove all the paper and tape when done spraying.

You can find this project, as well as many more, in our new eBook, Make it Yours®: How to Spray Paint Furniture, Home Decor Projects, Holiday Crafts and More from Krylon®! Download your own free copy today!
Read NextChippy Chair Makeover DIY Home Decor