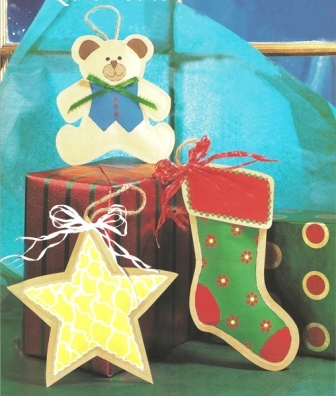
Quick Stitch Holiday Ornaments
Use brown grocery bags and acrylic paint to sew up the cutest and most frugal Christmas ornaments. You will need a sewing machine for this quick ornament craft from Heidi Borchers of Inspired at Home.
See this project and more ornament sewing tutorials in 6 Sew Easy to Make Christmas Ornaments, a free eBook to download!

Materials:
- For each: batting
- White thread or clear monofilament
- Sewing machine
- Acrylic paint – assorted colors
- Paintbrushes – ¼” flat shader, fine-tip
- Aleene’s® Tacky Glue™
- 7” length twine
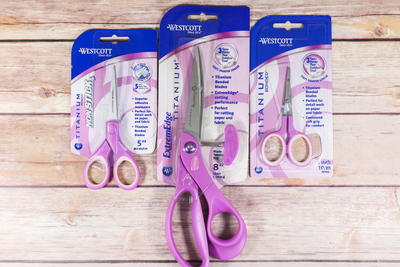
- Scissors
- Patterns
For stocking
- Brown grocery bag – 1 (2-1/4” x 3-3/4”) piece, 2 (5” x 10”) pieces
- Fine-tip permanent black marker
- Red raffia (or yarn or ribbon)
For bear
- 2 (6” x 8”) pieces brown grocery bag
- Fine-tip permanent black marker
- 10” length ¼” wide green picot edged ribbon
For star
- 2 (7-1/2”) squares brown grocery bag
- Iridescent fine glitter
- White raffia (or yarn or ribbon)
Instructions:
For stocking, cut 2-1/4” x 3-3/4” brown bag piece and round corners for cuff. Transfer pattern to 1 (5” x 10”) brown bag piece. For bear and star, transfer pattern to 1 brown bag piece each. For each, referring to photo, paint designs. Let dry. For stocking and bear, draw details with marker. For star, lightly sprinkle glitter onto wet paint. Let dry.
For stocking, bear and star, cut out design, adding ¼” all around. Transfer pattern to batting and cut out, cutting just inside marked line. Center and stack remaining brown bag piece, batting shape, and painted design right side up. Machine-stitch bag layers together, using ¼” seam allowance. Trim excess brown bag from design.
For stocking, glue cuff to top of stocking. Cut several (13”) lengths of raffia. Handling several strips as 1, tie strips into bow. Glue bow to stocking cuff. Let dry. For bear, tie ribbon in bow. Glue bow to bear. Let dry. For star, cut several (13”) lengths of raffia. Handling several strips as 1, tie strips into bow. Glue bow to star. Let dry.
For each, fold twine in half to form loop. Glue ends to top back of ornament for hanger. Let dry.
Your Recently Viewed Projects

Thanks for your comment. Don't forget to share!
ethome 9801693
Dec 15, 2010
These are very SWEET little ornaments. Going to do these with my Grandbaby this weekend. She is 2 and loves to paint. Can't wait! Thank you for sharing this wonderful idea!!!!
Report Inappropriate Comment
Are you sure you would like to report this comment? It will be flagged for our moderators to take action.
Thank you for taking the time to improve the content on our site.