Plastic Holiday Magnets
These Plastic Holiday Magnets from Berta Gilholm are friendly for kids and the environment. Recycle Christmas cards and plastic cups, while making fun and cheap stocking stuffers for friends and family. These magnets are also a great classroom activity for teachers.

Materials:
- Old Christmas Cards
- Plastic Instant drink cup #5
- Small Cotton Balls
- Acrylic paint or permanent markers
- White glue
- Scissors
- Glitter
- Old plastic lid
- Button magnet
- Small brush
Instructions:
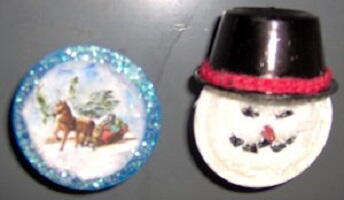
Holiday Scene Refrigerator Magnet:
- Color the whole cup with a royal blue permanent marker.
- Cut very small pictures from old Christmas cards.
- Flatten out a cotton ball and spread out a little with fingers. Spread glue on one side of the cotton and glue cotton to the inside bottom of the cup.
- Trim the small pictures to fit inside the cup. If you want you can glue pictures standing up in a 3D design in front of and inside of the cotton.
- Put a few drops of water inside the plastic lid and dip the tip of a blue marker in it, stirring until the water turns a very light blue. Take a paint brush and paint the blue water onto the cotton for accent (sky, clouds, etc.). You can change this color for different themes. Add a little glitter with drops of glue and let dry an hour.
- Glue a small round button magnet to back of cup.
Cherry-nosed Snowman Magnet:
- Color 1 of the cups with white acrylics inside and out.
- Take 3 cotton balls, pull apart into smaller sections, and glue to the bottom and insides of the cup until cup is full.
- Glue 2 small black beads for eyes onto cotton, 1 medium red pointy bead for nose, and five small black beads arranged in a smile for mouth.
- Put a few drops of water inside the plastic lid and dip the tip of a red marker in it, stirring until the water turns a very light pinky-red. Take a paint brush and paint the red water onto the cotton on each side of the nose, below eyes, and toward cheeks for rouge.
- Take the other cup and color with a black marker inside and outside (this is the hat).
- Glue hat, top down, above snowman’s eyes on the edge of the cup. Add a little strip of bumpy yarn or glitter with a small line of glue around the brim of the hat and let dry an hour.
- Glue a small round button magnet to back of cup.
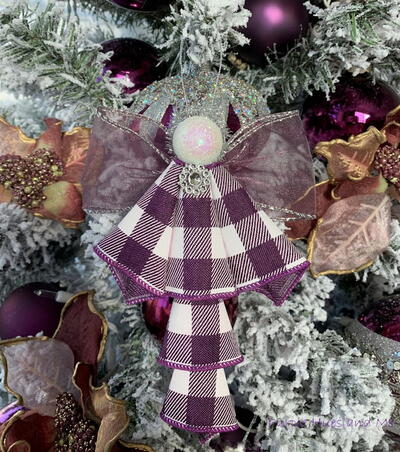
Read NextPurple Plaid Angel Ornaments