Liquid Sculpey® Art Deco Style Christmas Tree Ornament

Liquid Sculpey® is perfect for creating festive holiday ornaments! Use this polymer clay tutorial to brighten up your Christmas tree with a vintage vibe. This design can be made with either two or three layers (depending on your preference) and each ornament is unique due to the marbling. Let’s go through the steps to craft this Art Deco-inspired tree ornament!
A few reasons I love working with Liquid Sculpey®:
- It’s easy to use.
- Endless design possibilities.
- The result is both flexible and strong!
- No kneading required (which is wonderful because I have arthritis in my hands).
- No harsh smell.
- Simple to clean up.
- It’s fun!
Time to CompleteIn an evening
Main MaterialClay
HolidayChristmas
Materials List
- Sculpey Tools™ Oven-Safe Silicone Molds: Geometric Jewelry and Whimsy
- Liquid Sculpey® in Red, Emerald Metallic, Silver, and Gold
- String (or ribbon)
- Scissors
- Superglue
- Toothpicks (or similar disposable tool)
- Oven-safe baking dish
- Oven mitts
Instructions
-
Preheat the silicone molds according to the instructions on the packages. They will be warm when removing from the oven so do this carefully (use a potholder and place them on a heat-safe surface).
-
When the molds are cooler to the touch place them on your (covered) work surface.
-
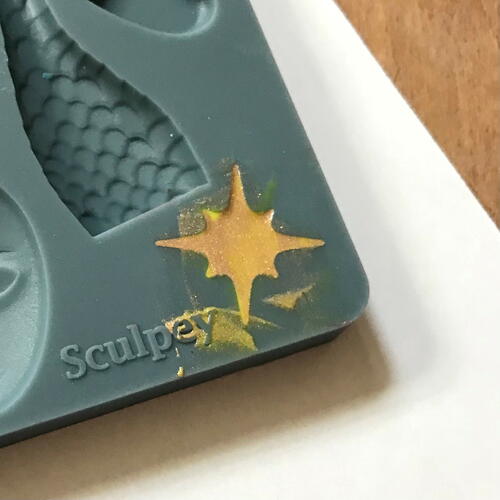
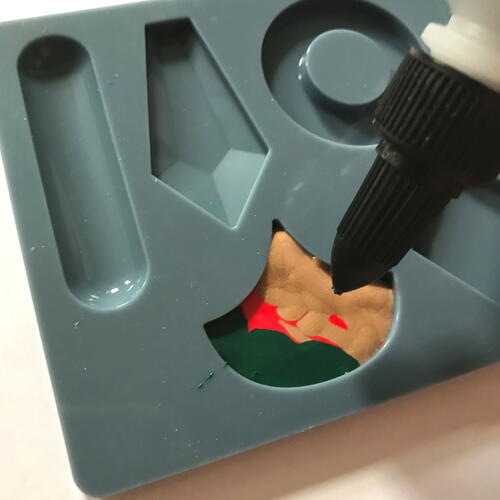
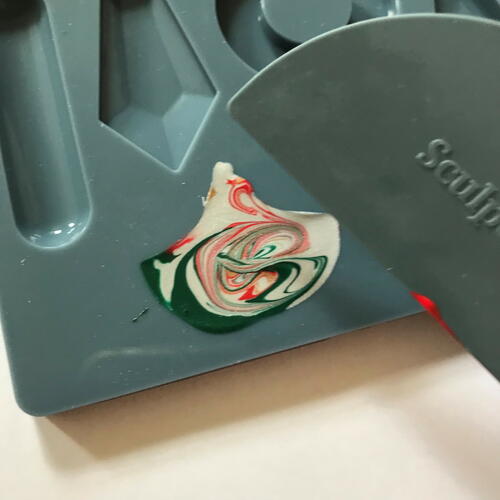
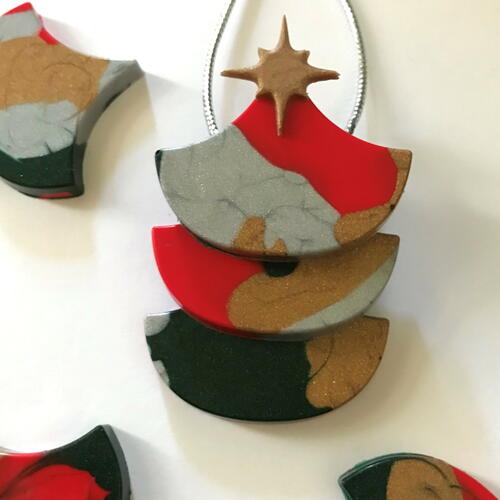
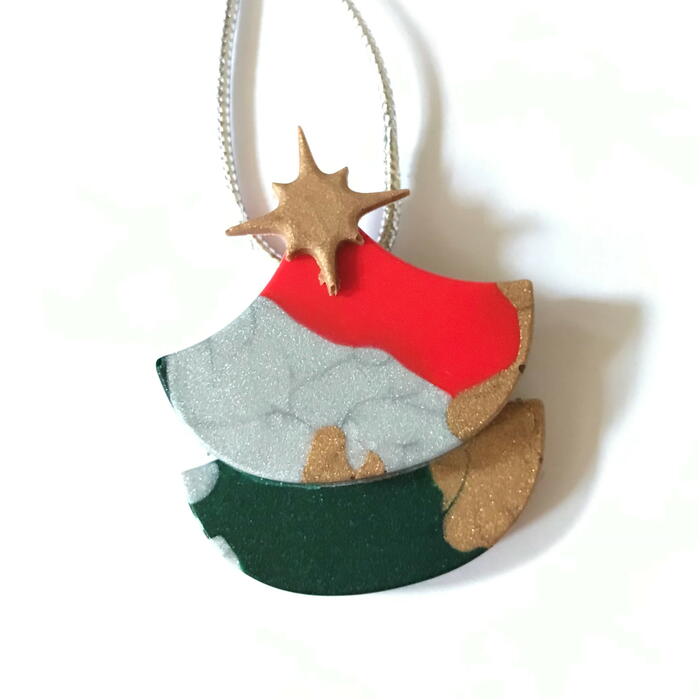
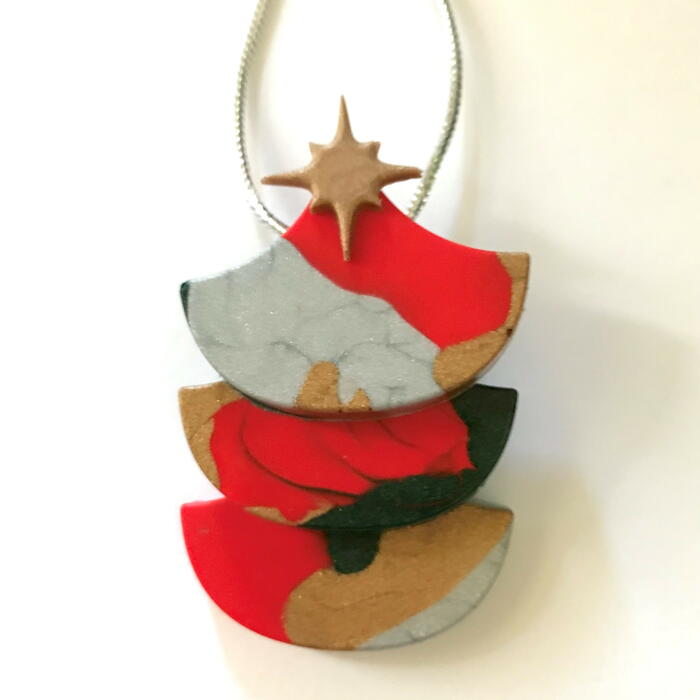
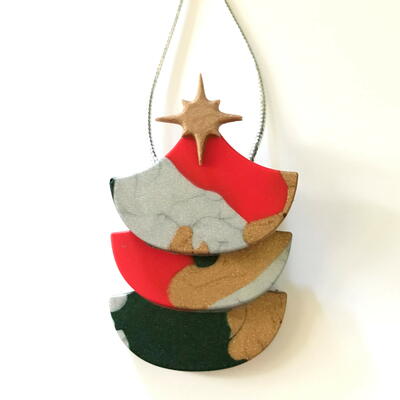
Now for the fun part- using the Liquid Sculpey® polymer clay! Shake the (closed) bottles thoroughly before use. For this project create a solid metallic star shape from the Whimsy mold and 2-3 of the fan shape from the Geometric Jewelry mold per ornament. Use the Red, Emerald Metallic, Gold, and Silver clay colors to make the fan, adding each color in random places until the mold is filled to the top.
-
Swirl the clay in the fan shape around a bit to resemble marble. This can be done with a toothpick or similar washable or disposable instrument.
-
Get the air bubbles out by popping them with a toothpick, then slightly lift and gently drop the molds onto your work surface a few times. Be careful not to spill the clay out of the mold shapes.
-
Next, use the enclosed squeegee tool to remove excess clay. Gently scrape it along the top of the molds and wipe off any excess (if there’s a lot scrape it into a container to reuse).
-
Carefully place the filled molds into an oven-safe dish (I prefer ceramic). Be sure they stay evenly balanced or the clay can run out of the mold.
-
Bake according to the Liquid Sculpey® clay’s instructions on the package. Check it in increments of 5 minutes, and remove the molds when the clay is relatively solid. When making this tutorial the Liquid Sculpey® took about 15 minutes in the oven to harden, but this can vary based on your oven and clay thickness.
-
Carefully remove the molds from the oven (use protective mitts) and allow them to cool.
-
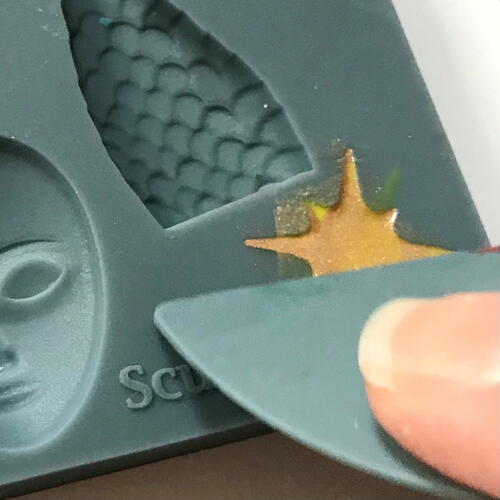
Pop the clay pieces out of the molds onto a clean work surface. Trim or pull off any excess clay around the shape.
-
Repeat Steps 3-10 several times to make more fan shapes.
-
Stack the shapes until you are pleased with the design placement. This can be done with either 2 or 3 of the fan shapes. A small extra piece of hardened liquid clay can help prop up the pieces from underneath when designing and gluing them together.
-
Place the looped string between the upper layers of the ornament. The cut ends of it should be hidden between the layers.
-
Glue each layer (and the string) together with superglue. Take your time and allow the layers to dry before the next one is attached. It helps to take a photo before gluing so it’s easy to reassemble.
-
Finally, glue the star shape onto the top point of the highest fan shape. Allow the ornament to dry for 24 hours before placing on a tree or elsewhere.