This project was submitted by one of our readers, just like you.
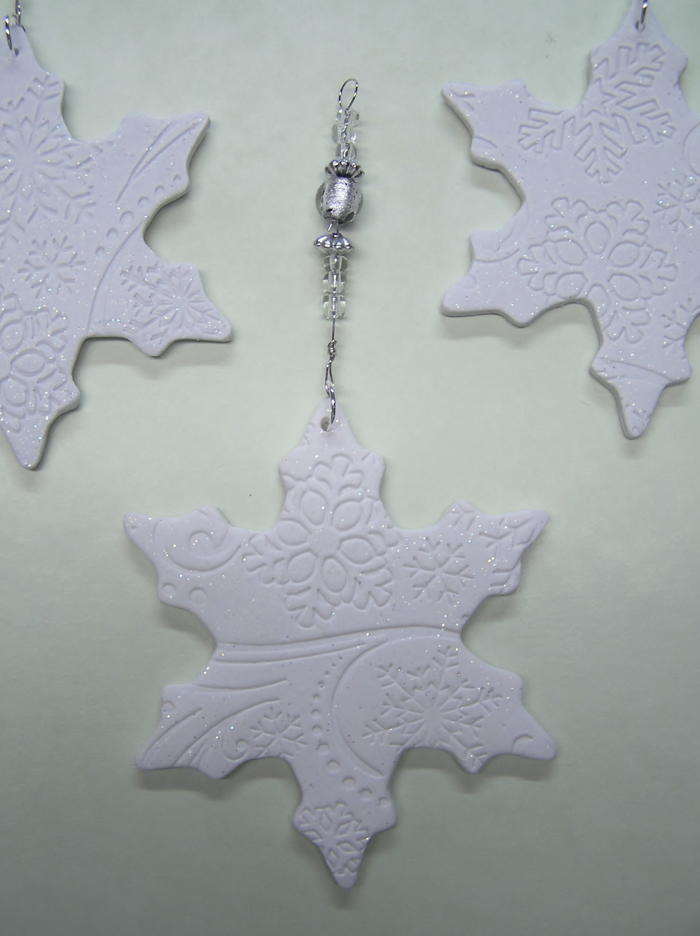
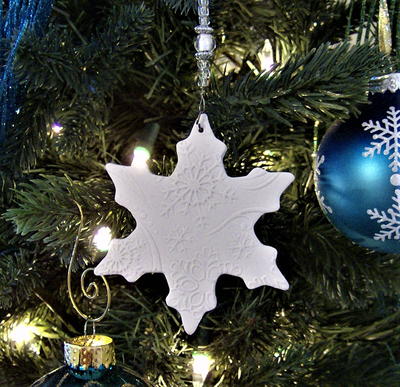
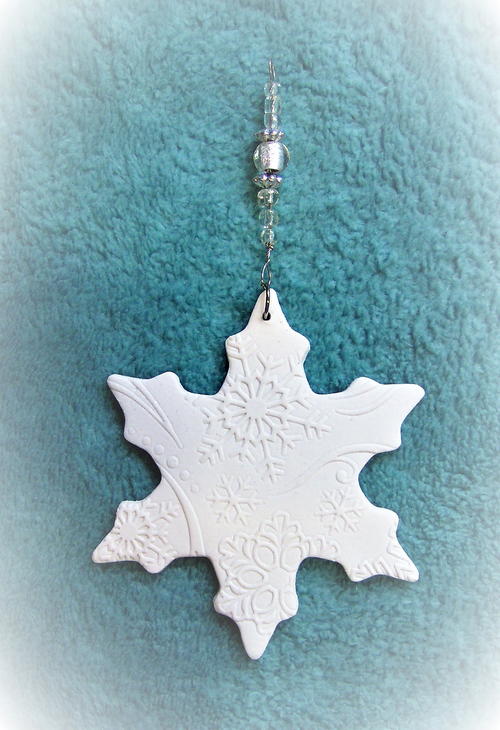
Embossed Snowflake Ornaments

Embossed Snowflake Ornaments
"If you have never worked with polymer clay before his is a great project to give it a whirl! If you can use a rolling pin and cookie cutter you can create these elegant and sparkly snowflake ornaments! These snowflakes are not only gorgeous ornaments for your tree but would also make pretty package tie-one as well. This project is not only quick and easy but low cost many them awesome gifts for teachers and friends! "

Materials List
-
Premo Sculpey Accents (Polymer Clay)–Frost White Glitter (two-2 oz. blocks)
- Darice Embossing Essentials Embossing Folder- Snowflake Swirl or pattern of choice
- 3” snowflake cookie cutter or cutter of choice
- Non porous surface for cutting such a ceramic tile or marble slab
- Clay conditioning machine or rolling pin and two wood skewers
- Spray bottle for water
- 26 gauge silver craft wire
- Glass and metal beads of choice
- Silver jump rings 10mm
- 2 pair small pliers
- Wire snipper tool or small sharp scissors
Instructions
-
Condition clay before use by running through clay conditioning machine 8-10 times or kneading by hand until pliable.
-
Run clay through conditioning machine on the thickest setting or use rolling pin to roll a sheet of clay. To be sure the sheet has uniform thickness, place skewers on your work surface at ether end of your rolling pin.
-
Fill spray bottle with clean water and lightly spritz inside of embossing folder. Carefully lift sheet of clay and lay inside folder. Close folder. Roll over the folder with the rolling pin using firm pressure. Turn folder over and repeat. Gently open folder and check the impression. Gently coax clay off embossing sheet and lay on hard surface.
-
Use the cookie cutter to cut out a snowflake. Gently remove clay from cutter. Use gentle finger pressure to round the edges of snowflakes.
-
Use the end of a skewer to make a small hole in one point for hanging the snowflake. Wiggle the skewer gently to make the hole larger and round. Repeat on reverse side.
-
Place card stock on your hard surface then bake according to manufacturer’s directions. The cardstock will prevent the reverse side of your snowflakes from becoming shiny. Let cool.
-
Cut an 8” length of wire. Form a loop in one end and twist excess wire tightly below the loop. Thread beads onto wire then form another loop with remaining wire. Use wire snippers to trim excess wire. Use pliers to open jump ring. Insert ring through the hole in the top of the ornament. Place one loop over jump ring then close ring. Repeat with remaining ornaments.
NotesOnce kitchen tools such as rolling pins are used for polymer clay they are not safe to be used again for food.