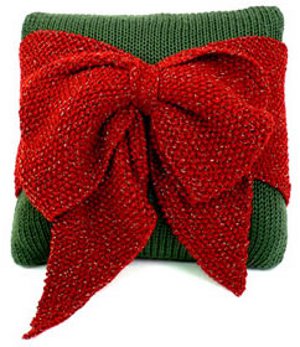
Christmas Bow Pillow
This knit pillow from Caron Yarns is the perfect accessory for your living room this holiday season. Already wrapped and ready to give, this easy knitting pattern is great to give to friends and family, and is the perfect project for the beginner. So if you're asking Santa for a new set of knitting needles this Christmas, be sure to bookmark this pattern as a cute knitting project that you're going to love to make!
Materials:
- 1 skein Caron International's Simply Soft yarn in Green
- 1 skein Caron International's Simply Soft yarn in Red
- DMC Gold Glitter thread in Dark Sage (MC), Autumn Red (CC), and Gold (held together with CC) (optional)
- US 8 (5 mm) knitting needles or size to obtain gauge
- Yarn Needle
- Split-ring stitch marker or safety pin
- 14" Pillow Form
- 3 buttons – 3/4" diameter
- 1/2 yard dark green fabric, for lining pillow cover (optional)
Abbreviations and Stitches Used:
- k1-f/b (increase): Knit next st, then knit it through the back loop.
- k2tog (decrease): Knit 2 sts together through the front loops.
- Stockinette stitch (St st): Knit on RS, purl on WS.
- Seed stitch (Seed st): Row 1 (RS): * K1, p1; repeat from * across. Row 2: Knit the purl sts and purl the knit sts as they face you. Repeat Row 2 for Seed st.
Instructions:
Pillow measures approximately 14"
Pillow cover is worked using MC in Stockinette stitch, and lined (if desired); Bow and Sash are worked separately in Seed stitch, using CC and a strand of gold Glitter held together.
Pillow Cover (Make 2)
-
Using MC, cast on 50 sts.
-
(RS) Begin St st; work even until piece measures 14" from beginning.
-
Bind off all sts.
-
With RS's of Pillow pieces facing each other, sew pieces together along 3 sides.
-
Lining (optional): Cut 2 pieces of fabric 15" square, or size to fit Pillow Cover pieces plus 1/2" on all sides for seam allowance. With RS's of Lining pieces facing each other, sew pieces together along 3 sides. Insert Lining into Pillow Cover, with WS's facing each other.
- Pillow Form: Insert form into Pillow cover; turn under seam allowance on lining, sew edge. Sew remaining edge of Pillow cover neatly together.
Ribbon Sash
-
Using CC (and Gold Glitter, if desired), cast on 32 sts.
-
Begin Seed st; work even for 2 rows.
-
Buttonhole Rows: (RS)Continuing in Seed st, work 3 button holes across, having 5 sts at beginning and end of row as follows: Work 5 sts, bind off 3, work 6 sts, bind off 3,work 7 sts, bind off 3, work to end.
-
(WS) Work across in Seed st, casting on 3 sts over bound off sts.
-
Continuing in Seed st, work even until piece measures 28" from beginning.
- Bind off all sts loosely in pattern.
Bow
When working Bow, place a marker (pm) at beginning of RS rows, to indicate which edge is being shaped.
-
Using CC (and Gold Glitter, if desired), cast on 2 sts.(RS) [k1-f/b] twice—4 sts.
-
Begin Seed st; work 1 row even; pm at beginning of next row to indicate edge being shaped.
-
Shape Side: (RS) Beginning this row, increase 1 st (k1-f/b) at beginning of every other row 28 times, working increased sts in Seed st—32 sts; keep marker in place after last increase row.
-
Work even in Seed st until piece measures 41" from marker (last increase row), end with a WS row.
-
Shape Side: (RS) Beginning this row, decrease 1 st at end of every other row until 1 st remains, as follows: Work across to last 2 sts, k2tog. Note: The shaping is being worked at the opposite edge of the Bow piece.
- Fasten off.
Finishing
-
Using yarn needle, weave in ends.
-
Sew buttons opposite buttonholes on sash; wrap sash around pillow and button in place.
- Bow: Tie Bow piece in large bow (see photo); attach to Front of Pillow.
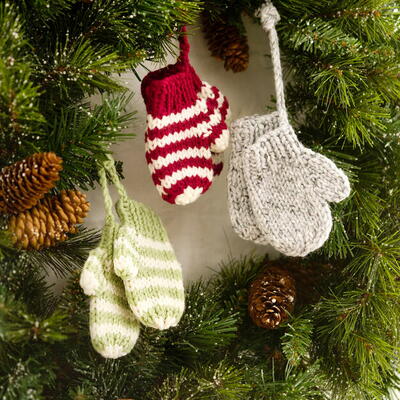
Read NextKnitted Mitten Ornaments Pattern
Your Recently Viewed Projects

Thanks for your comment. Don't forget to share!
mulberrygalprinces s
Jul 19, 2018
This is really very pretty and after reading the directions, I can see it will be easy to make. It will make a very pretty addition to my Christmas theme. With one slight change. I want to make the pillow in white with a red bow for a more elegant look.
Sue What
Dec 04, 2016
What a great idea for a Christmas craft. These will look festive under the tree until the presents are placed there. And then they'll look fantastic on the couch. The pattern looks easy enough for even a beginner, and the instructions are very clear. I'm hoping to figure out how to adapt the pattern to make different sizes of pillows.
smdichtel 0303160
Nov 12, 2016
Can you knit this pillow in the round on circular needles and/or use the magic loop cast on ?
Editor Dana
Nov 15, 2016
Hi there! I checked in with our resident knitting expert and this is what she said: Knitting this pattern in the round should be easy enough! Pillow Cover (Make 1): 1. Using MC, cast on 100 sts and join to work in the round. 2. K around until piece measures 14" from beginning. 3. Bind off. 4. Lining: Turn inside-out so WS is facing and follow instructions to stitch on optional fabric lining. 5. Seam CO edge together. 6. Insert pillow form into pillow. 6. Seam BO edge together. The ribbon sash and bow must be worked flat/cannot be worked with circular needles. I'm unsure about the lining instruction (number 4). I can't conceptualize how to do that with one big tube rather than two separate pieces (which is what knitting in the round would produce). I hope this helps! -Editors of FaveCrafts
lynnevangeline
Dec 28, 2015
Do you have more information about the gold thread used? perhaps a link to the product? I tried to find it, but DMC seems to have several products, so I was confused. Also, about how much yardage do you think it will take? Thanks so much! Super cute pattern!
Kaylee
Dec 30, 2015
Hi lynnevangeline! I am not entirely sure which gold thread was specifically used for this example, but you should be able to use just about any embroidery thread in these colors. I assume one spool would be just fine. If you have any more specific questions, I suggest reaching out to the designer (Caron) as they will be able to provide more detailed information. Hope that helps! - Kaylee, Editor
Melissa Ryan
Dec 03, 2012
To those looking for a crochet pattern, I recommend contacting the designer (in this case, Caron Yarns) to see if they offer a pattern. Good luck and let us know if you find anything! We'd be happy to post it here :)
donnak
Dec 01, 2010
is there possibly a way to convert this pattern to crochet stitches. I love this article but don't know how to crochet.
Crafter 2336675
Aug 17, 2010
This pattern is great. Do you have a comparable pattern in crochet?
Report Inappropriate Comment
Are you sure you would like to report this comment? It will be flagged for our moderators to take action.
Thank you for taking the time to improve the content on our site.