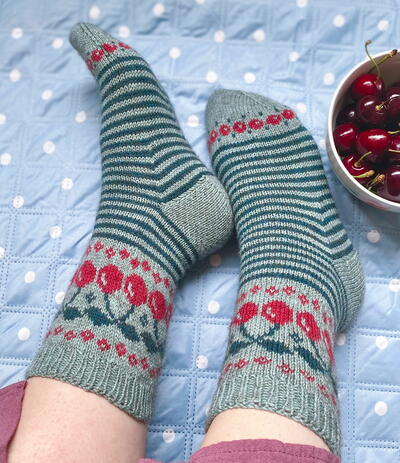
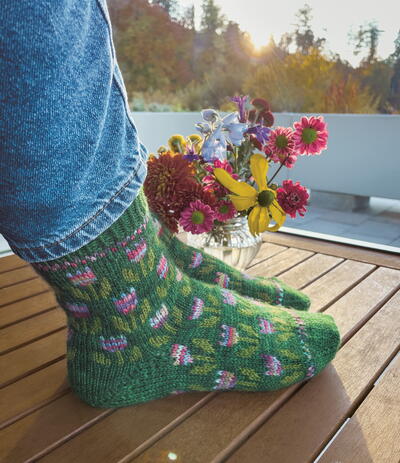
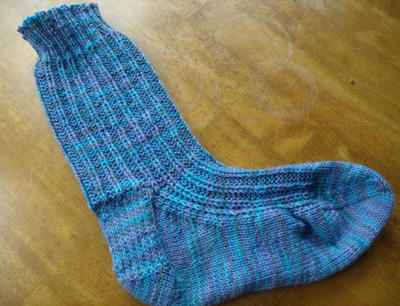
Cherry on Top Knit Socks

“A cherry on top” is the final touch that makes something as beautiful as possible. I feel that’s true for these delightful striped socks with fun colorwork cherry motifs. How can we resist cherries, whether they are sweet and fresh off the tree in the summer months, the sour variety in a delicious pie or the warm, wooly version knit on these socks?
Construction Notes
Knit from the top down with a ribbed cuff, this sock includes an original cherry colorwork pattern on the leg, with a smaller berry pattern knit before the toe. These socks are addictive to knit with stripes running throughout the leg and foot. An eye of partridge heel flap and gusset are included.
Sizing
1 (2, 3)
To fit (foot circumference): 7 (8½, 9½) inches / 17–19 (20.5–23, 23.5–25) cm
Finished circumference: 6 (7½, 8½) inches / 14.5–16.5 (18–20, 20.5-23) cm
Recommended ease: Approximately 1 inch (2.5 cm) of negative ease.
Leg/foot length can be easily adjusted. See instructions for details.
Sample shown is knit in size 2 for shoe size US 8.5 (EU 39, UK 6), foot circumference 8¾ inches (22.5 cm).
Gauge
34 sts x 38 rnds = 4 inches (10 cm) for size 1 leg colorwork only.
36 sts x 40 rnds = 4 inches (10 cm) for stockinette, ribbing and size 2 leg colorwork.
32 sts x 44 rnds = 4 inches (10 cm) for size 3 leg colorwork only.
Materials List
-
Yarn
Fingering weight, Schachenmayr Regia Premium 4-ply Merino Yak (58% Wool, 28% Polyamide, 14% Yak), 437 yds (400 m) per 100-g skein.
-
Shown in
MC: Mint Meliert (1 skein)
CC1: Himbeer Meliert (1 skein)
CC2: Teal Meliert (1 skein)
Any fingering-weight sock yarn can be used for this sock pattern as long as you can obtain the same gauge. A good substitute would be SweetGeorgia yarns or Madelinetosh.
-
Needles
For ribbing and stockinette for all sizes: US 1 (2.25 mm), 32-inch (80-cm) circular for magic loop, or DPNs, or two circulars or a 9-inch (23-cm) circular needle (as preferred).
For size 1 colorwork only: US 1.5 (2.5 mm), 32-inch (80-cm) circular for magic loop, or DPNs, or two circulars or a 9-inch (23-cm) circular needle (as preferred).
For size 2 colorwork only: US 1 (2.25 mm), 32-inch (80-cm) circular for magic loop, or DPNs, or two circulars or a 9-inch (23-cm) circular needle (as preferred).
For size 3 colorwork only: US 2 (2.75 mm), 32-inch (80-cm) circular for magic loop, or DPNs, or two circulars or a 9-inch (23-cm) circular needle (as preferred).
Important note: Do check your gauge for fit. Additional sizes can be achieved by going up or down needle sizes.
Rejoin CC2 and start knitting stripes as follows:
Knit 2 rnds with CC2.
Knit 2 rnds with MC.
Continue knitting stripes for a further 1½ inches (4 cm) or however long you would like the leg of your sock to be. Finish after a MC stripe. Cut CC2. -
Notions
Stitch marker
Scissors
Tapestry needle
Cherry on Top Pattern
Cuff
Cast on 56 (64, 72) sts with MC and size US 1(2.25 mm) needles. Divide sts evenly over the two needles and place a marker at the beginning of the round. For DPNs, place half of your sts on one needle and divide the other half over two needles. Join to work in the rnd, being careful not to twist sts.
Ribbing Rnd:*K1, P1; rep from * to end of rnd.
Work Ribbing Rnd for a total of 12 rows, approximately 1¼ inches (3 cm).
Leg
-
Knit 1 rnd with MC. For sizes 1 and 3 only, transfer the sts onto the larger needle size.
-
Work increase rnd:
Size 1:*K7, M1L; rep from * to the end of rnd. 8 sts inc’d. 64 sts total.
Size 2:*K4, M1L; rep from * to the end of the rnd. 16 sts inc’d. 80 sts total.
Size 3:*K9, M1L; rep from * to the end of the rnd. 8 sts inc’d. 80 sts total. -
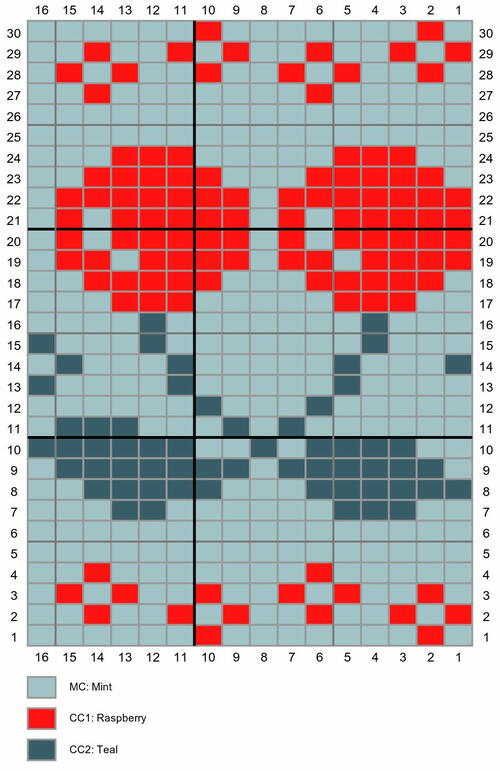
Work rnds 1–30 of Colorwork Chart A, joining CC1 and CC2 where shown. The chart repeats 4 (5, 5) times around the sock. Cut CC2 after rnd 16. Cut CC1 on completion of chart.
-
Knit 1 rnd with MC. For Sizes 1 and 3 only, transfer the sts back onto the smaller needle size.
-
Using MC,work decrease rnd:
Size 1:*K6, K2tog; rep from * to the end of the rnd. 8 sts dec’d. 56 sts total.
Size 2:*K3, K2tog; rep from * to the end of the rnd. 16 sts dec’d. 64 sts total.
Size 3:*K8, K2tog; rep from * to the end of the rnd. 8 sts dec’d. 72 sts total. -
Rejoin CC2 and start knitting stripes as follows:
Knit 2 rnds with CC2.
Knit 2 rnds with MC.
Continue knitting stripes for a further 1½ inches (4 cm) or however long you would like the leg of your sock to be. Finish after a MC stripe. Cut CC2.
Eye of Partridge Heel Flap
The eye of partridge heel is worked flat and knit back and forth using the 28 (32, 36) sts on Needle 1 with MC. Needle 2 is holding the 28 (32, 36) sts for the instep. You can remove the marker you placed at the beginning.
-
Row 1 (RS): *Sl1 st purlwise, K1; repeat from * to the end of the row. Turn.
Row 2 (WS): Sl1 st purlwise, P until the end of the row. Turn.
Row 3 (RS): Sl2 st purlwise, *K1, Sl1; repeat from * until 2 sts before the end of the row, K2. Turn.
Row 4 (WS): Same as Row 2.
Repeat these 4 rows, ending on a purl row after a total of 28 (32, 36) rows. There will be 14 (16, 18) edge sts for you to pick up after the heel turn.
Gusset
-
You will now be picking up stitches along both sides of your heel flap.
-
With MC, knit across the heel stitches, placing a BOR stitch marker after 8 (10, 11) sts (the halfway point).
-
Join CC2, knit to the end of the heel sts, then pick up and Ktbl 14 (16, 18) sts along the edge of the heel flap. Pick up and knit 1 more stitch at the corner between the heel flap and instep to help prevent a hole in the corner. Place a stitch marker here to help show you when to decrease in the next round, or adjust the loop and needles so the heel/gusset sts and instep sts are separated there.
-
Knit the 28 (32, 36) sts on the instep being held on Needle 2. Place a stitch marker after the instep stitches as well, as you did above.
-
Pick up 1 stitch in the corner and Ktbl 14 (16, 18) sts along the edge of the heel flap. Knit the first half of the heel to the BOR stitch marker.
-
You now have a total of 46 (54, 60) heel/gusset sts, 28 (32, 36) instep sts and are knitting all stitches again in the round. 74 (86, 96) total sts.
Toe
Your stitches should now be placed equally on Needles 1 and 2. Needle 1 is holding 28 (32, 36) sts at the bottom of your foot, with 14 (16, 18) sts on either side of the BOR marker. Needle 2 is holding 28 (32, 36) sts at the top of your foot.
-
Setup rnd: Knit 1 more rnd with MC to the BOR marker.
-
Rnd 1 (decrease rnd):
Needle 1: Knit until 3 sts remain, K2tog, K1.
Needle 2: K1, SSK, knit until 3 sts remain, K2tog, K1.
Needle 1: K1, SSK, knit to BOR.
4 sts dec’d. -
Rnd 2: Knit all sts.
-
Repeat rnds 1 and 2 until 20 sts remain on each needle (40 sts in total).
-
Continue knitting only rnd 1 (dec every rnd) until 10 sts remain on each needle (20 sts in total).
-
Remove BOR stitch marker. K5 sts to the side of the sock. With 10 sts on each needle, join remaining stitches using Kitchener stitch.
Finishing
Weave in all ends. Soak and block. Repeat instructions for the second sock.
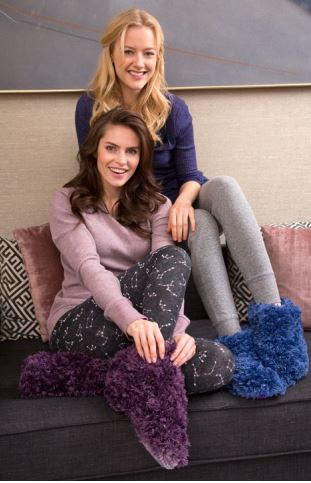
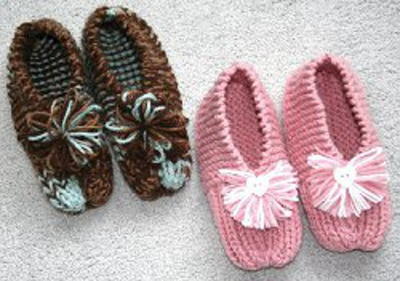
Read NextGrandma's Knitted Slippers