How to Make Friendship Bracelets
Learn how to make friendship bracelets with this jewelry craft video project produced exclusively for FaveCrafts.com by Catherine Fox. Learn how to make friendship bracelets from beginning to end.
If you like this bracelet, you'll also love making this Ladybug Friendship Bracelet and these Colorful Friendship Bracelets!
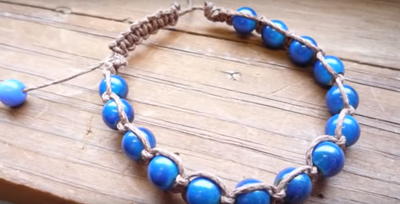
For the bracelet in the video, I used four different colors of embroidery floss for this bracelet. I make this bracelet to demonstrate each step of the art of friendship bracelet making. Keep in mind that each pattern will call for a different number of floss colors.
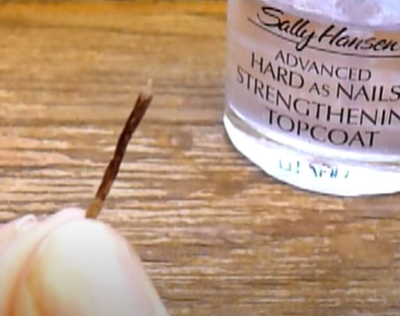
A clipboard is used to keep your work in place while you knot. If you haven't noticed already, I did some altering to my clipboard. Instead of always finding a ruler, I glued an old seamstress tape measure to the side of the clipboard. I also added some magnetic tape to the corner to keep a pin with me. I use a pin in case I need to undo a knot - a pin comes quite in handy!
Materials:
- Embroidery floss
- Ruler
- Scissors
- Clipboard
- Optional: tape, spray bottle with water
Instructions:
- Measure and cut your strands of floss. For quicker measuring, you just need to measure one strand of embroidery floss and then use that strand to measure and cut the rest. Every pattern will call for a different number of embroidery floss strands and different lengths. Refer back to your pattern for this information.
- Gather all your strands and make an overhand knot near one end.
- Clip your knot to the clipboard and separate the strands into three groups. (Since I have four strands, I have two strands in one group and one strand in the other groups.) Start braiding.
- Once your braid reaches about 3-1/2" to 4", make an overhand knot near the braid.
- Separate your strands. Now it's time to learn the basic friendship bracelet knot. For this project, I am starting with the first strand on the left side. Take this strand and bring it over the neighboring strand, making sort of an "L" shape. Then bring the first strand through the loop you created. Pull to tighten. Repeat one more time to create one knot. The knot you just made is called a double half-hitch knot or forward knot.
- To make this bracelet, I will be taking the left-most strand of embroidery floss and make knots on each of the other strands. Repeat this until the bracelet is as long as you want it to be.
- Tie an overhand knot at the end of your work. Make a 3-1/2" to 4" braid and tie an overhand knot at the end. Trim ends.
- To flatten, or "block", your bracelet, tape your bracelet to your clipboard. Spray the bracelet with a generous amount of water. Let dry. Your bracelet is now ready to wear!
Read NextStunning Opal DIY Pendant
Your Recently Viewed Projects
Thanks for your comment. Don't forget to share!
quanahs 5032097
Mar 22, 2016
Another great video tutorial by Catherine Fox. The instructions are clear and easy to follow. Catherine also provides some good tips for setting up supplies and tools to make the process easier. The finished bracelet is colorful and a great present for a bestie.
misternoname7 6347 047
Apr 12, 2012
This is how I make friendship bracelets and they come out pretty nice http://howtofixstuff.blogspot.ca/2012/04/how-to-make-friendship-bracelet.html
ljcooks 3183458
Jan 07, 2012
The music was much to loud and the voice was muffled. Not a good viedo!! May have been better if the music was omitted.
jillshope 123
Feb 01, 2011
This was a very good and helpful video. I can make these bracelets. Thanks alot FaveCrafts. A big THANK YOU to Catherine Fox for using all things a crafter would have or could buy cheaply. Most of these crafts, one has to pay a arm and a leg just to try! Thanks, once again!
Report Inappropriate Comment
Are you sure you would like to report this comment? It will be flagged for our moderators to take action.
Thank you for taking the time to improve the content on our site.