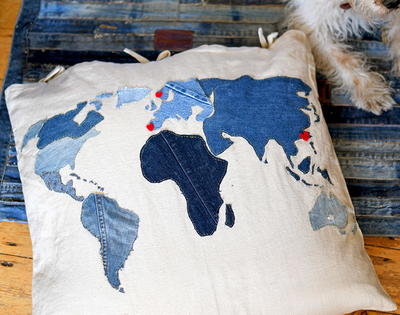
How to Make a Pillow Cover by Repurposing Old Jeans
Find out what to do with old jeans with this easy, step-by-step sewing tutorial.
Before you finish cleaning out your wardrobe, learn how to make a pillow cover by repurposing old jeans. This free step-by-step sewing tutorial will teach you how to make a denim pillowcase by upcycling jeans that no longer fit or have holes in the knees.
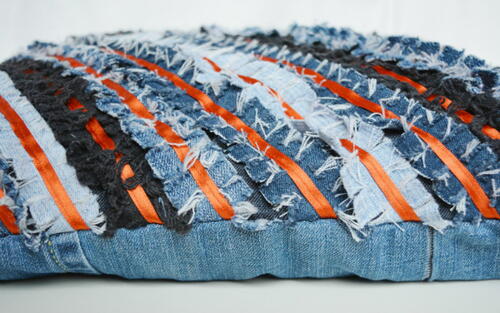
Use jeans in varying washes for a lovely contrasting effect. You can offset the colors by sewing in orange ribbon and really highlight the chevron shape. If you're looking for old jeans ideas, this is a fantastic project for making denim pillow covers. Denim is so sturdy, too, so this new DIY pillowcase will last you for years to come!
From the blogger: "One of my go to fabrics is denim – its so versatile and strong. One of my all time favorite makes is a denim rag quilt. Today I am going to share with you a chevron denim rag cushion. It’s perfect for using up scraps of denim from other projects."
Estimated CostUnder $10
Time to CompleteIn an evening
MaterialsFabric
Primary TechniqueSewing

Project TypeMake a Project
Materials List
- 3 pair of old jeans or more
- 18″ navy zip
- 6 meters of thin orange ribbon
How to Make a Pillow Cover By Repurposing Old Jeans
Directions
-
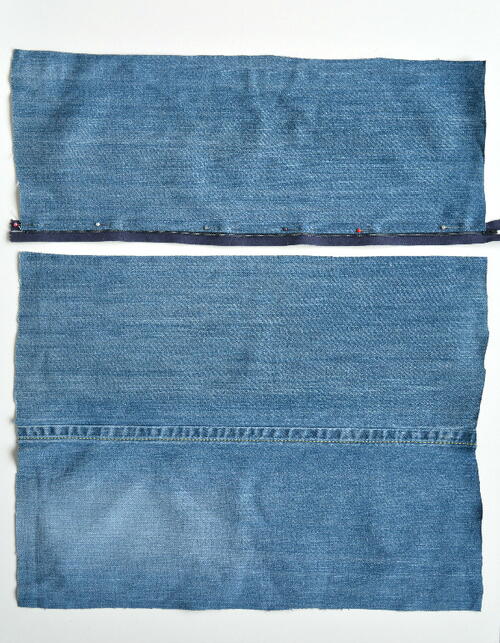
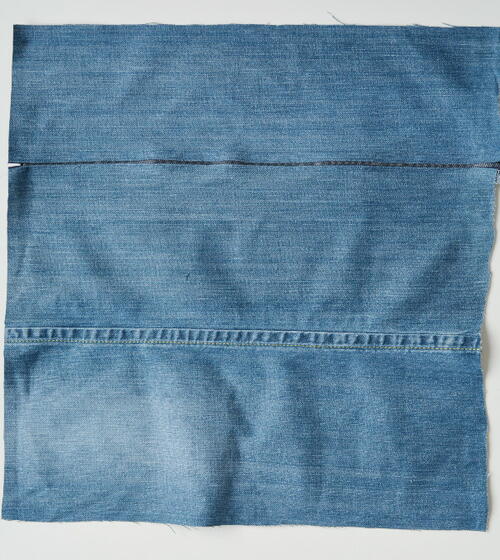
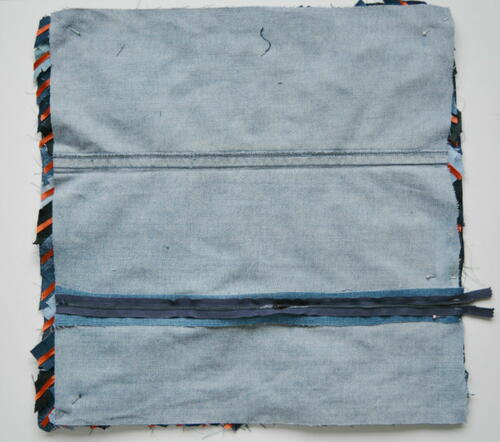
Start with the back of the cushion cover. Check your jeans, pick the pair with a wide and straight leg. Cut off the hem of the jeans and then cut the leg off at 18″. Cut down the seam with the most curve leaving a straight line. Next cut a further piece of denim 18″ long from the other leg.
-
Place together – check the two pieces will make a 18″ square. If not add another panel.
-
Turn and press an edge, place along the zip. Pin and stitch using a zipper foot. Repeat for the other side of the zip. Trim the back of your cushion to 19″ square.
-
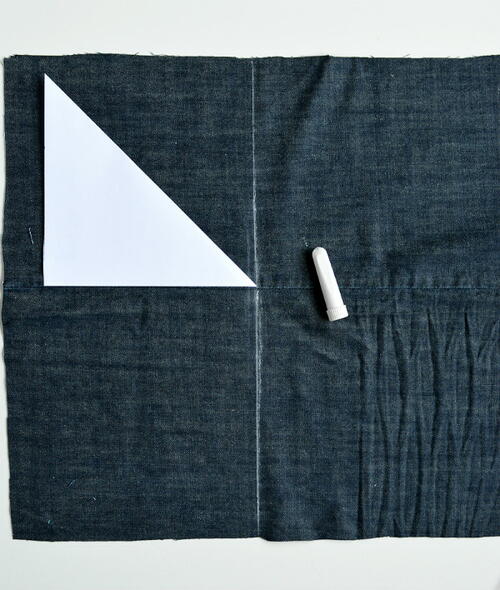
For the front panel cut a 18″ square of denim. If necessary piece together pieces of denim.
-
Using a quilters ruler and tailors chalk mark down the center. Fold a square of paper diagonally in half. Place on your denim to use as a guide to mark the stitch line for your strips of denim. Mark several stitch lines both sides of the center.
-
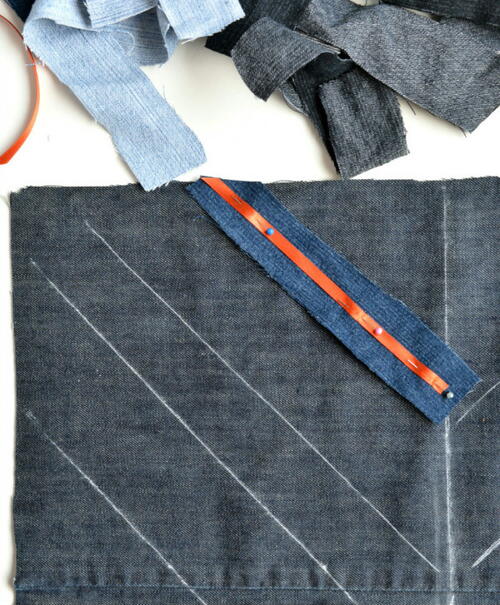
Cut a number of strips of denim measuring 1 1/2″wide. Pin to the cushion with ribbon down the center of the strip. Stitch in place to secure.
-
Place your next strip parallel, with your ribbons being approximately 1″ apart. Stitch to secure. Continue until you have finished one side.
-
Repeat for the second side, ensuring you are aligning the ribbons at the center of the cushion.
-
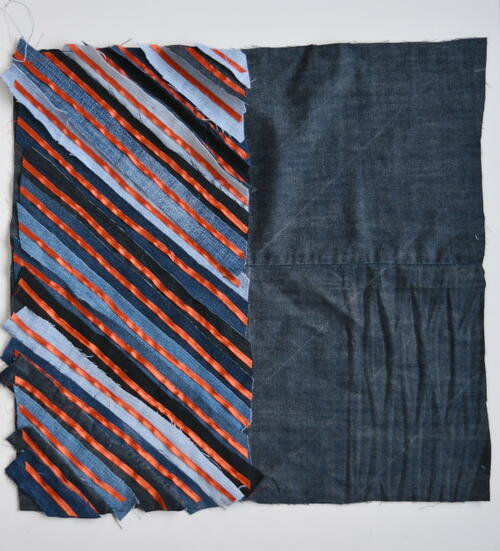
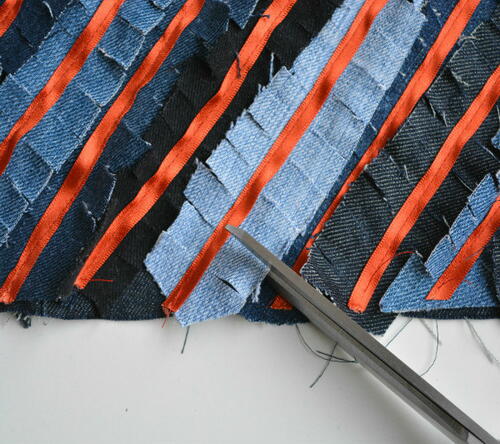
Snip in the denim strips up to the ribbon. Snip 1/4″ apart down both sides of every strip.
-
Partly unzip the zip. Place right sides together of the cushion. Stitch with 1/2″ seam allowance.
-
Turn right side out – lastly wash your cushion to roughen up the edges. Tip – do not place in the washing machine with other items unless you wish to be pulling lots of threads of denim off your clothes (learn form my mistake!).
-
Fill with an 18″ cushion.
Why You'll Love This Recycled Craft
Here are the top 3 reasons to make the craft project How to Make a Pillow Cover by Repurposing Old Jeans:
1. Eco-Friendly: By repurposing old jeans that would otherwise be thrown away, you're helping to reduce waste and give new life to something that might have been discarded. This project is a great way to be environmentally conscious and add a touch of sustainability to your home decor.
2. Personalized Style: Using jeans in varying washes allows you to create a unique and personalized pillow cover that fits your individual style. You can mix and match different denim shades to create a visually appealing design that reflects your taste. Adding in orange ribbon or other embellishments can further customize the look to match your decor.
3. Durable and Long-Lasting: Denim is known for its durability and strength, making it the perfect fabric for a pillow cover that will withstand frequent use. The sturdy nature of denim means that your new DIY pillowcase will hold up over time, ensuring that you can enjoy your creation for years to come. Plus, the chevron design adds a modern touch to your home decor that is both stylish and timeless.
So why not give this craft project a try? Not only will you have a fun and creative sewing project to work on, but you'll also have a unique and sustainable addition to your home decor that you can enjoy for years to come.
Your Recently Viewed Projects
Thanks for your comment. Don't forget to share!
Cheryl E
Feb 20, 2018
This is a great idea to recycle old jeans into a colorful pillow. The instructions call for using three pairs of old jeans which seems like a lot. However, I found I could use a plain muslin square to stitch all the denim strips and ribbon onto and use muslin for the back of the pillow and only used one pair of jeans. Fun project.
Report Inappropriate Comment
Are you sure you would like to report this comment? It will be flagged for our moderators to take action.
Thank you for taking the time to improve the content on our site.