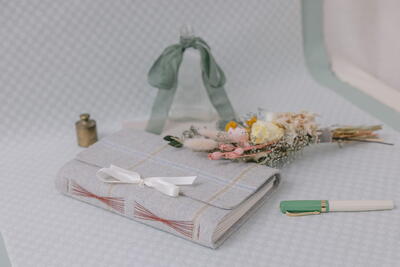
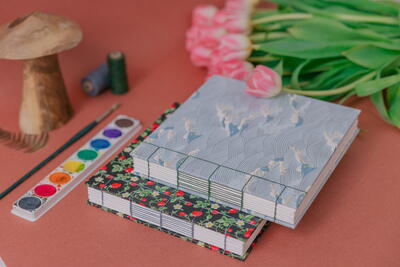
Travel Diary

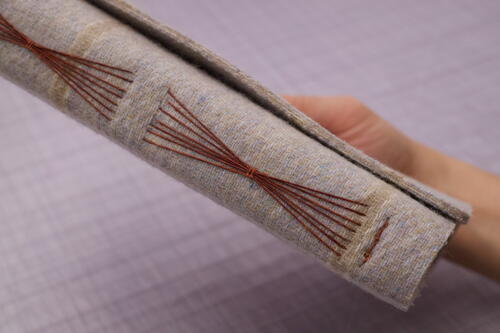
This project sparks nostalgia because it reminds me of the diaries I used to collect as a kid. The wrap-around cover makes this book an excellent keeper of secrets. The design is elevated with a quality fabric cover and a beautiful stitching pattern. Long stitch is a versatile and straightforward binding, allowing the book design to be very customizable.
In this project, I use wool fabric stiffened with HeatnBond®, a fusible interfacing. An alternative option is 2-mm-thick felt which is non-woven and doesn't require edge treatment. If you have sewing skills, I encourage you to sew your own double-sided cover, or even a quilted one!
Materials List
-
•49 sheets of 8½ x11–inch (21.6 x 27.9–cm)writing or sketch paper, 60–80lb (90-120gsm) text weight, grain short (preferred) or long
•2 sheets of10 x19–inch (25.4 x 48.3–cm) heavyweight fabric around 1/16 inch (2 mm) when stacked
•1 sheet of 9½ x18½–inch (24.1x 47–cm) HeatnBond Lite or Ultra hold or alternative double-sided fusible interfacing
•Choice of cover edge treatment (embroidery floss [for non-woven fabric], double-fold bias tape, or liquid seam sealant)
•1-inch (2.5-cm) wide artist tape or painter’s tape
•Strip of stiff paper cut to 8½ inches (21.6 cm) in length and 2–3 inches (5–7.6 cm) in width
•Waxed linen thread, any gauge
•Choice of book closure: snap button, Velcro® fastener, ribbon
-
Tools
•Bone folder
•Ironing board
•Flat iron
•Rotary cutter
•Ruler
•Scissors
•Non-smudge ink pen
•Cutting mat
•Awl
•Needle
•Stitch holder (or another needle)
•Fabric marker (optional)
•Tweezers or small needle-nose pliers
•Utility knife
Instructions:
Folding Signatures
Using short grain paper for the pages is preferred for making flatter folds, but long grain paper will work just fine and have no effect on the function of the book.
-
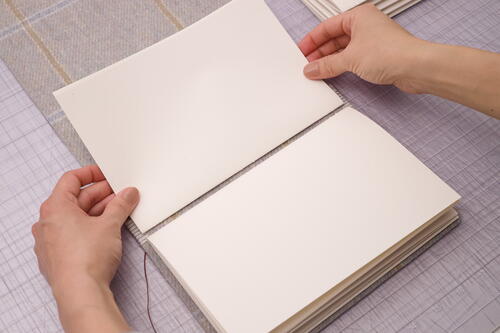
Start by folding seven sheets of the writing or sketch paper in half, with the short edges meeting each other. Crease the fold with the bone folder. Flip the folded papers vertically and crease the fold one more time. This is the first signature, which should measure 5½ x 8½ inches (14 x 21.6 cm). Make six more signatures like this and set aside.
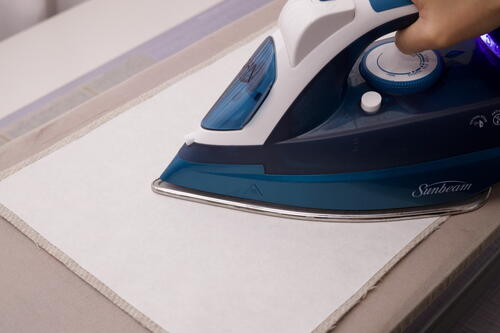
Preparing the Cover
The cover is made by attaching two sheets of heavyweight fabric with HeatnBond fusible interfacing, which functions as an adhesive and stiffener. The final cover of this book measures 2 mm thick. If you’re using a stiff, non-woven fabric, such as felt, as a stand-alone cover, skip to step 3.
-
Set up the ironing board and flat iron. Iron both pieces of fabric flat and set one aside. Place the sheet of HeatnBond, paper side up, centered on the wrong side of the fabric. Iron on the HeatnBond according to package instructions. Let the fabric cool.
-
Peel off the HeatnBond paper backing and place the other piece of heavyweight fabric on top, right side up, making sure the edges line up. Iron on the top piece of fabric. If necessary, use the steam function to penetrate the thick fabric to ensure the HeatnBond’s adhesion is activated throughout. Let the fabric cool.
-
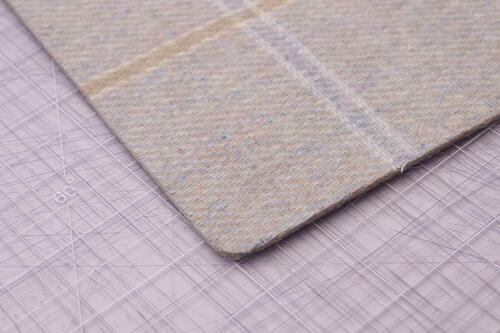
Using the rotary cutter and ruler, trim all 4 edges so that the piece measures 9 x18 inches (22.9 x 45.7 cm) and the edges are straight and square. Make sure all of the edges are attached securely with HeatnBond. If you prefer, cut round corners with scissors.
-
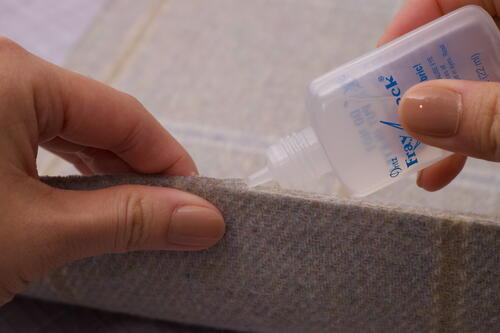
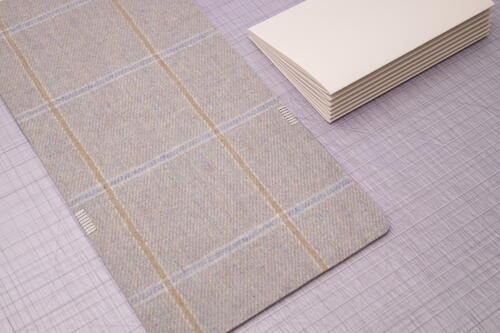
There are several options for finishing the edges. If you’re using a non-woven fabric, you can hand sew a decorative edge stitch with embroidery floss, such as the blanket stitch. Woven fabrics require edge treatment to prevent fraying. If you have a sewing machine, you can sew on double-fold bias tape. For a no-sew solution, use a liquid seam sealant, such as Dritz Fray Checkr. Apply a small amount on all the edges to absorb into the fabric. Let dry for 15 to 30 minutes.
-
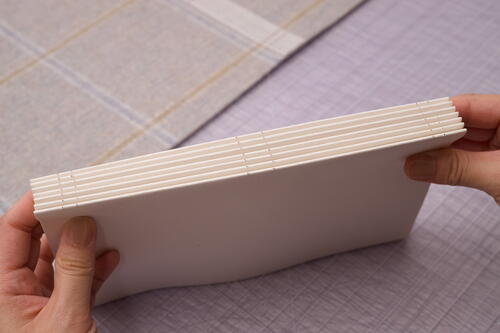
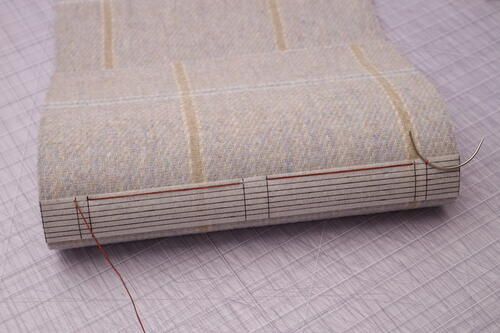
Wrap the cover around the signatures for a test fit. The front cover should wrap over the width of the signatures, and the back cover should overlap the front cover by about 5 inches (12.7 cm).
Making a Sewing Guide and Punching Holes
This sewing guide will be taped onto the cover for sewing and will come in handy for punching holes into the signatures. Use a pen that doesn’t smudge to prevent ink from smearing onto the book.
-
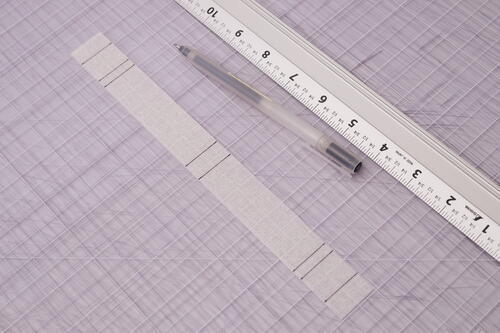
Cut a 10-inch (25.4-cm) piece of artist tape and place it vertically on a smooth clean surface. First, we will mark horizontal lines on the tape by starting with dots on the sides. With the pen, mark the following eight points along the length of the tape from the top: ½ inch (1.3 cm), 1¼ inches (3.2 cm), 1½ inches(3.8 cm), 4¾ inches (12.1cm), 5¼ inches (13.3 cm), 8½ inches (21.6 cm), 8¾ inches (22.2 cm), 9½ inches (24.1cm). Mark the same points on the other side of the tape and draw lines across the width of the tape by connecting the dots. There should be eight horizontal lines. The image shows the spacing between the marks.
-
Now we’re going to draw vertical lines to mark where each signature will be sewn. On the top and bottom edges of the tape, mark seven points spaced 1/8 inch (3 mm) apart. Connect the points by drawing lines along the length of the tape. You may need to wipe the ruler clean from residual ink. These seven vertical lines will coordinate with the seven signatures. Each intersection of the grid will be a sewing station. There should be six sewing stations per signature.
-
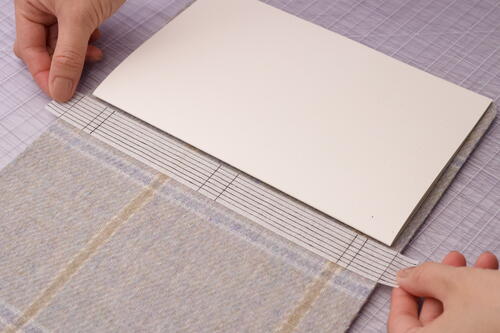
To apply the spine tape onto the outside cover, lay the cover flat facing down, and place one signature up to the right-side edge. Place the spine guide onto the left of the signature, matching the first and last horizontal line with the head and tail edges of the cover. Press along the tape to adhere. Remove the signature and wrap the top and bottom edges of the tape around the fabric so the tips of the tape are visible on the inside cover.
-
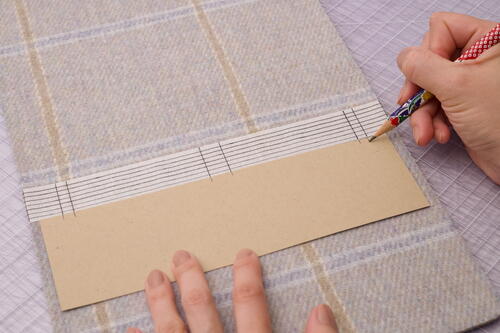
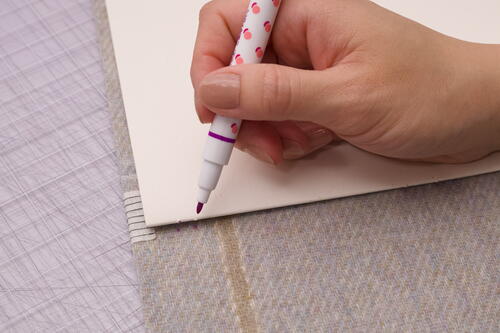
The strip of stiff paper, which is the same length as the signatures, will be the guide for punching holes. To make the punching guide, line up the stiff paper strip along the length of the spine tape and center it between the head and tail. With the pen, mark points on the long edge of the stiff paper at the short lines.
-
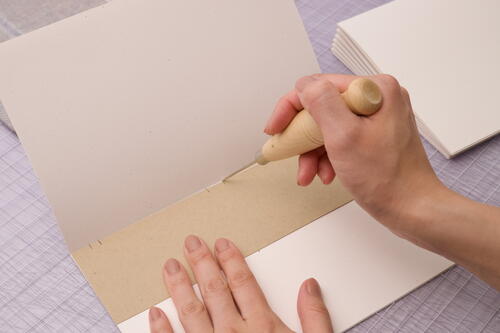
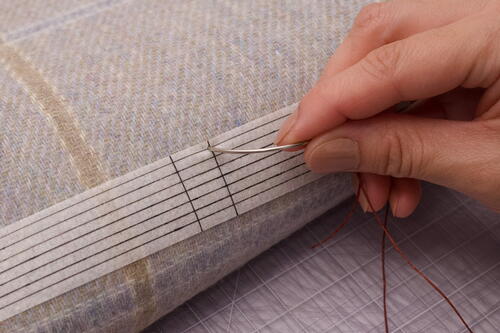
Working on the cutting mat, place the punching guide up against the fold of the first signature, making sure the head and tail edges are flush. Hold the awl at a 45-degree angle and punch holes through the fold at each point marked on the guide. Pierce the paper until the needle tip is visible on the other side and do not enlarge the holes. Repeat this step for all seven signatures. Hold all the signatures together and check that the holes are aligned.
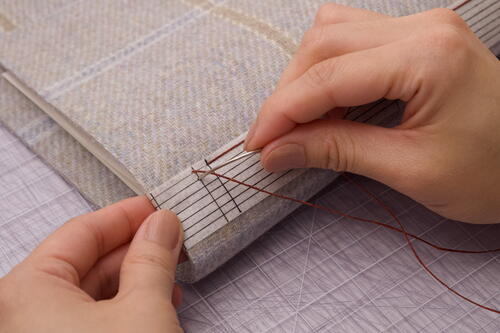
Sewing - Long Stitch Binding with Gathering Stitch
To set up, lay the cover open on the desk with the front cover at the bottom pointing towards you. Place the stack of signatures within arm's reach, with the spines facing towards you. Weare going to sew on one signature at a time, from front cover to back cover. The holes will be numbered as sewing stations 1 to 6, going from left to right.
-
Measure and cut thread that is eight times the length of the spine. Tie a double overhand knot on one end. Thread the other end through a needle and pull it through about 1 to 2 inches (2.5 to 5 cm). Fold the thread and press it flat with your fingers.
-
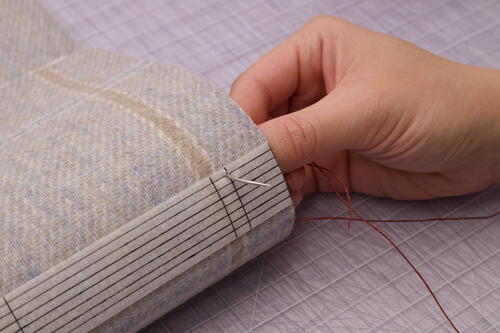
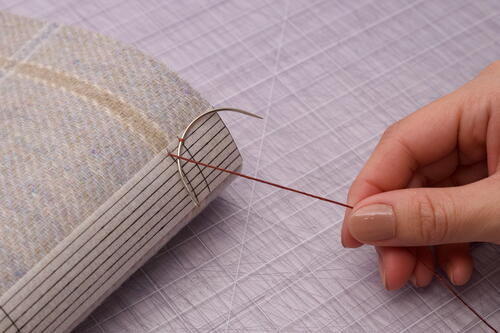
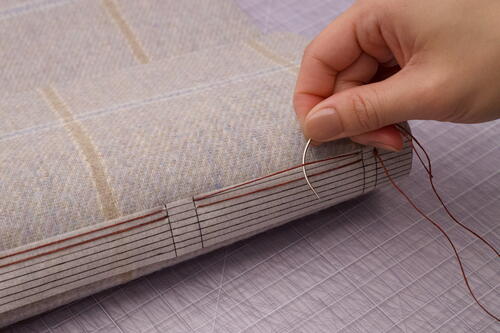
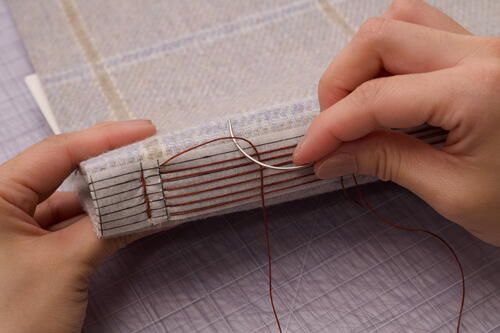
Pick up the first signature. Starting from the inside of the signature, sew out through the 6th (right most) station and pull the thread all the way to the knot.
-
Align the folded edge of the signature with the first tape lines at the head and tail. Using the signature as a guide, find the first sewing station by poking the needle through the fabric to the first intersection on the tape. You may have to try a few times. Sew through to the outside spine, pulling the signature and cover to touch.
Tip:
The sewing process may feel awkward and floppy since the fabric doesn't offer much structure. Try to not sew too tightly as you'll be able to adjust the tension later on. When all the signatures are sewn on, the completed book will feel sturdy. -
Hold the signature and cover together with your non-dominant hand to prevent shifting. Sew back into the same hole of the cover but not through the signature. Pull the thread until there is a small loop on the outside spine. Be careful to not pull the thread out of the book. Hold the loop in place with a stitch holder, such as another needle. Sew through station 6 of the signature to the inside.
-
Sew out through station 5 of the signature, then through station 5 of the cover by poking the needle out of the next intersection on the tape. Pull the needle and thread all the way through.
Tip:
To find the cover sewing stations, line up the edge of the signature with the tape markers at the head and tail. Place the needle on the fabric at the signature hole. Push through and check the outside spine to see if you have pierced through an intersection on the tape. Alternatively, if you have a fabric pen with disappearing ink, place the signature or the punching guide lined up with the markers at the head and tail, and draw dots on the fabric to mark the sewing stations. Confirm that they lineup with the points on the tape by poking your needle through. -
Sew in through station 4 of the cover, then through station 4 of the signature to the inside.
-
Sew out through station 3 of the signature, then through station 3 of the cover to the outside.
-
Sew in through station 2 of the cover, then through station 2 of the signature to the inside.
-
Sew out through station 1 of the signature, then through station 1 of the cover to the outside.
-
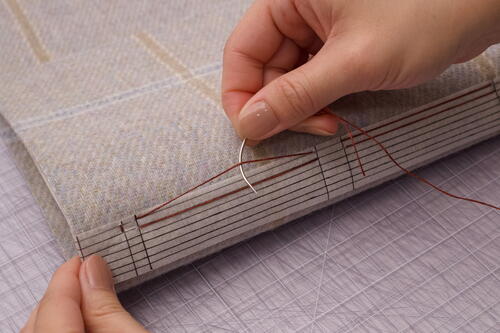
Let’s add the next signature. With the front cover positioned towards you, pick up a new signature and place it in front of the previous one, checking that the holes are aligned between the signatures. On the outside spine, sew through station 1 of the next line on the spine tape, then sew in through station 1 of the new signature to the inside. Pull the thread and bring the signature and cover to touch.
Note:
Each time a new signature is added, the position of the cover is reset to confirm alignment of the sewing stations. While sewing on a signature, you can maneuver your work however you need. -
Sew out through station 2 of the signature, then through station 2 of the cover to the outside.
-
Sew in through station 3 of the cover, then through station 3 of the signature to the inside.
-
Sew out through station 4 of the signature, then through station 4 of the cover to the outside.
-
Sew in through station 5 of the cover, then through station 5 of the signature to the inside.
-
Sew out through station 6 of the signature, then through station 6 of the cover to the outside.
-
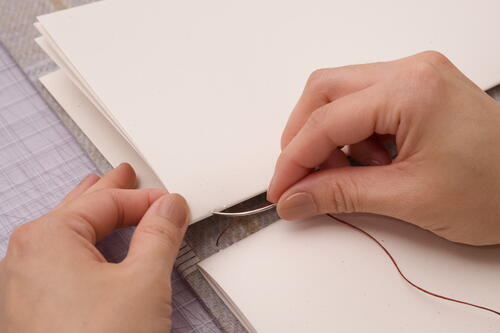
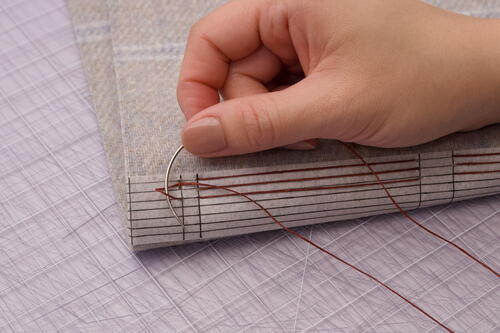
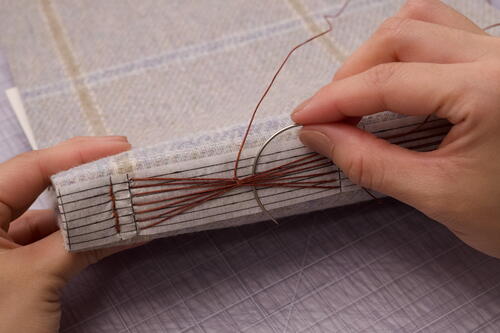
Carefully remove the stitch holder from the first signature and sew through the loop. Pull the working thread taut.
Tip:
You can increase thread tension by pulling the long stitches on the spine with the needle. Start with the first long stitch of the first signature, then pull on the subsequent stitches by following your sewing path until you reach your working thread. Pull until there is no more slack, but do not over-tighten. I suggest doing this after sewing on every two signatures. -
With the front cover positioned towards you, pick up a new signature and place it in front of the previous one, checking that the holes are aligned between the signatures. On the outside spine, sew through station 6 of the next line on the spine tape, then through station 6 of the new signature to the inside. Pull the thread and bring the signature and cover to touch.
-
Sew out through station 5 of the signature, then through station 5 of the cover to the outside.
-
Sew in through station 4 of the cover, then through station 4 of the signature to the inside.
-
Sew out through station 3 of the signature, then through station 3 of the cover to the outside.
-
Sew in through station 2 of the cover, then through station 2 of the signature to the inside.
-
Sew out through station 1 of the signature, then through station 1 of the cover to the outside.
-
Create a kettle stitch by sewing behind the stitch between the previous signatures, then pull the thread taut.
-
Repeat steps 10 to 15 for sewing on the 4th signature. Create a kettle stitch with the stitch of the previous signature on the outside spine and pull it taut.
-
Repeat steps 17 to 22 for sewing on the 5th signature. Create a kettle stitch with the stitch of the previous signature on the outside spine and pull it taut.
-
Repeat steps 10 to 15 for sewing on the 6th signature. Create a kettle stitch with the stitch of the previous signature on the outside spine and pull it taut.
-
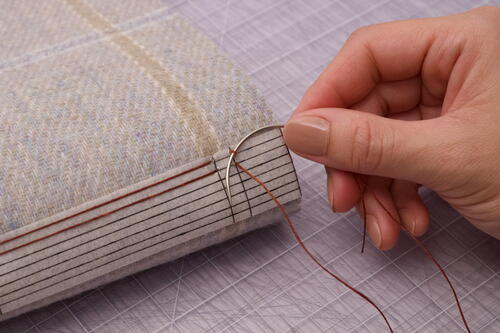
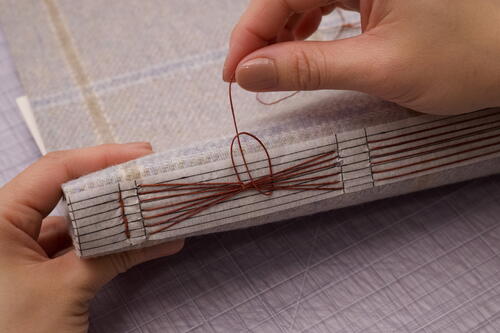
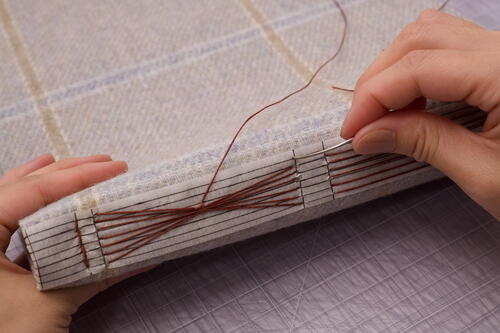
Attach the 7th and final signature at station 6 by sewing in through the cover and signature. Sew out through station 5 of the signature, then through station 5 of the cover to the outside. Close the book and spin the book around so that the spine is facing you, and the 7th signature is on top. Let’s begin the gathering stitch.
For the remaining steps, the sewing stations will be renumbered as 1 to 6, going from left to right on the spine side. -
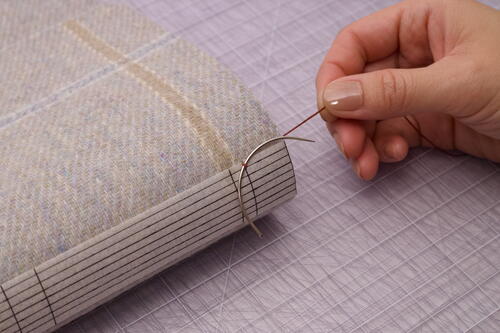
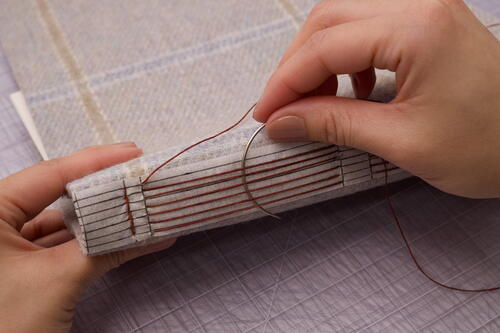
The gathering stitch is a decorative stitch that creates a bow shape. Bring the needle down behind all of the long stitches. Sew up through the loop of the working thread and pull it taut. Bring the needle down behind the stitches again and sew up through the loop of the working thread to secure the gathering stitch.
-
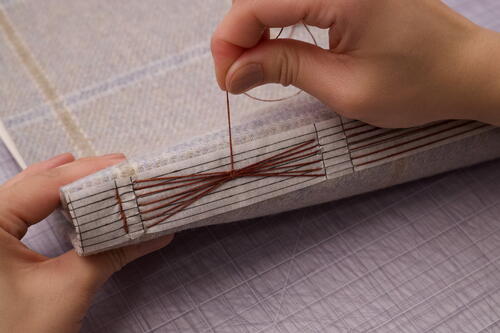
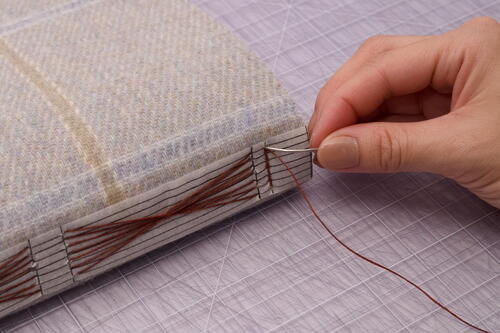
Sew in through station 3 of the cover and signature, then out through station 4 of the signature and cover back to the spine.
-
Repeat step 28 to create another gathering stitch. Sew in through station 5 of the cover and signature, then out through station 6 of the signature and cover. Create a kettle stitch by sewing behind the stitch of the previous signature and pull it taut.
-
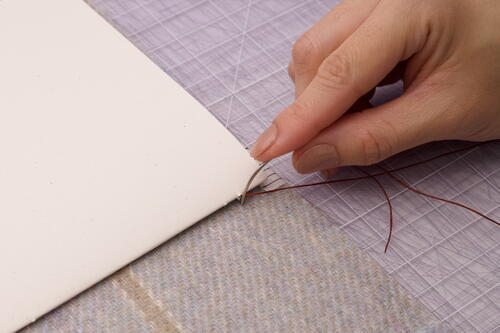
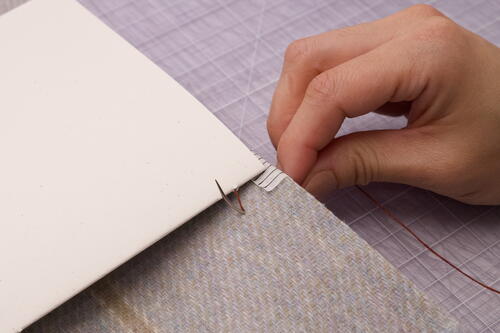
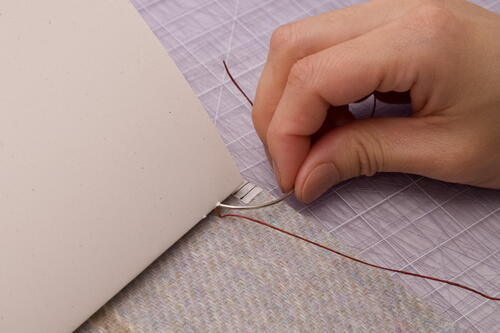
Sew back in through station 6 of the cover and signature. On the inside, secure the sewing by tying a double half hitch knot. Cut the excess thread.
-
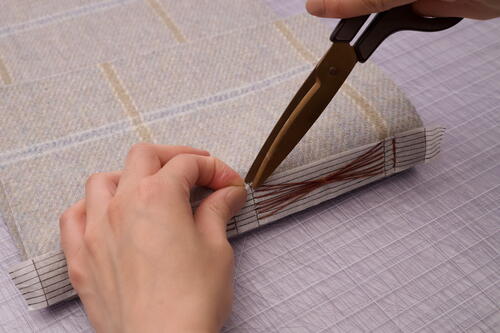
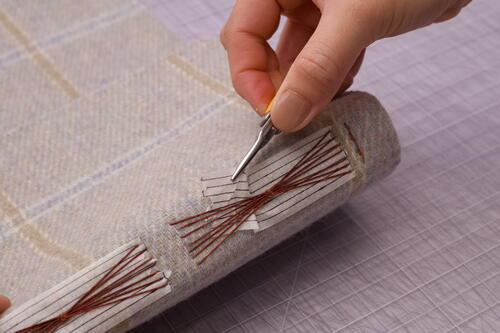
Using scissors and tweezers or pliers, carefully remove the tape from the cover without disturbing the stitching. Cut the tape along the short lines of the spine tape, being careful not to cut the thread. Peel the tape away from the sewing stations to remove.
-
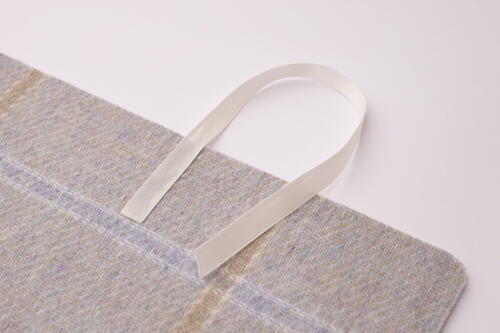
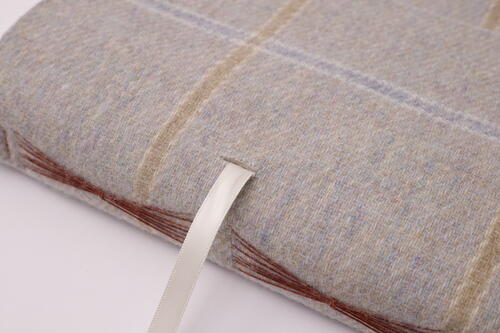
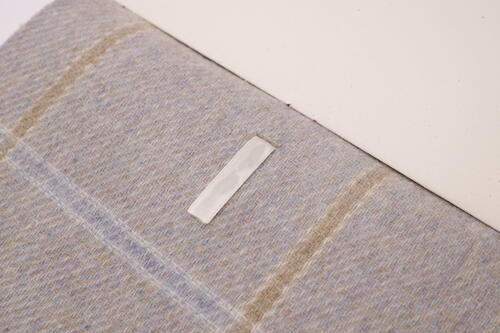
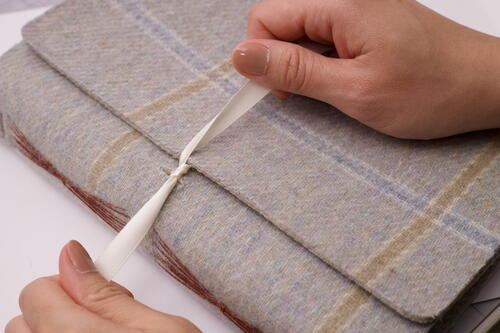
To add a closure to the book, you can sew on snap buttons, Velcro fasteners or ribbon. I chose to attach ribbon ties with fabric glue. Glue on a piece of ribbon on the edge of the inner back cover. On the front cover, cut a slit near the spine where the cover overlaps and treat it with liquid seam sealant. Then thread the ribbon through and glue one end to the inner cover. Seal the edges of the ribbon with a lighter. The ribbon is ready to be tied after the glue is dry.

Sewn variation:
If you have sewing experience, you may choose to create your own double-sided cover. Stiffen the fabric to your liking, sew the fabrics around the edges' right sides together and then turn it right side out. Press with an iron for clean, finished edges. The final cover should measure 9 x18 inches (22.9 x 45.7 cm).
Credit:
Reprinted with permission from Handmade Books at Home by Chanel Ly. Page Street Publishing Co. 2023. Photo credit: Chanel Ly.
Read NextTravel Diary