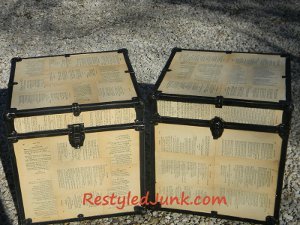
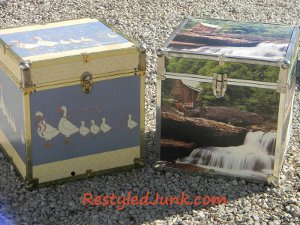
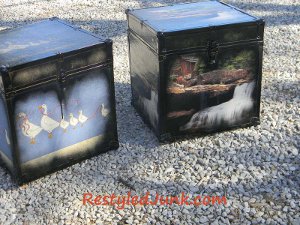
Decoupaged Book Page Trunks
Give plain storage items a major makeover. Use decoupage and an old book to upcycle and old trunk and create something entirely new. Decoupaged Book Page Trunks can be tailored to fit any age group or aesthetic taste - all you have to do is let your creativity shine through.

Materials:
- Cube trunk
- Sandpaper
- Dry rag
- Black spray paint
- Old book
- Craft knife
- Scissors
- Sponge brush
- Decoupage medium
- Straight pin
Instructions:
-
Lightly sand the surface, trim and hardware on the outside of a cube trunk. Wipe off the sanding dust using a clean, dry rag.
-
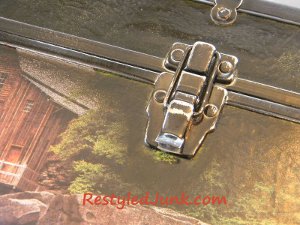
Close and latch the trunk. Using black spray paint, paint the metal trim (including the latch) on the outside of the trunk. Allow the paint to dry.
-
Lightly sand the painted metal trim to distress and give it an aged appearance. Wipe off the sanding dust with a clean, dry rag.
-
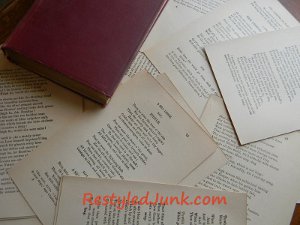
Choose an old book to use as the decoupaged paper on your trunk. I like using older books with thicker pages. The fibers just seem to accept the decoupage medium well with a minimum of wrinkles. Cut out the pages using a craft knife.
-
With one side of the trunk facing you, overlap the edges of one book page on the metal trim of one corner. Rub the page over the metal trim using your fingers. Remove the paper. Using scissors, cut along the lines of the pressed impressions on the paper.
-
Using a sponge brush, apply decoupage medium to the same section of the trunk's surface that you customized for the book page. Lay the book page over the medium and press firmly with your fingers to adhere and remove bubbles.
-
Apply another layer of decoupage medium over the top of the book page.
-
Repeat steps 5 through 7, overlapping the edges of each book page, until the decorative surface on all sides of the trunk is covered.
-
Note: As the pages soak up the medium, they may form new bubbles. Poke the bubbles with a straight pin and press them down before the medium has completely dried.
- Allow the trunk to dry. Protect the decoupaged surface of your trunk with your favorite spray or brush-on clear sealer.
Tips:
-
If full book pages form too many bubbles, tear or cut the pages into smaller pieces.
-
Wrapping paper, wallpaper and any paper ephemera can be substituted for the book pages.
- For added interest and texture, crumple your pages to create wrinkles, then flatten again.