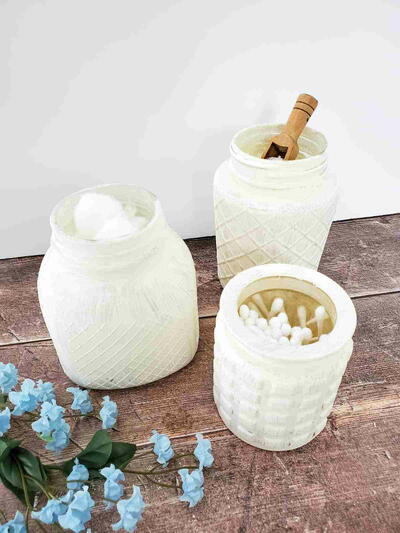
Etched Vanilla Jar

The Etched Vanilla Jar makes the perfect gift for any baker or as a housewarming gift! This project walks you through the steps needed to create your own custom-etched jar full of homemade vanilla.
Etchall reusable etching creme makes it super easy to turn a plain glass jar into something wonderful to give to a special someone. Finish off your etched glass by adding paint or Rub 'n Buff for some extra sparkle.
MaterialsGlass
Primary TechniqueGlass Crafts

Project TypeMake a Project
Materials List
- etchall™ etching creme
- etchmask™
- etchmask™ Transfer Sheets
- etchall™ Swivel Knife
- etchall™ Squeegee Tool
Project Instructions
-
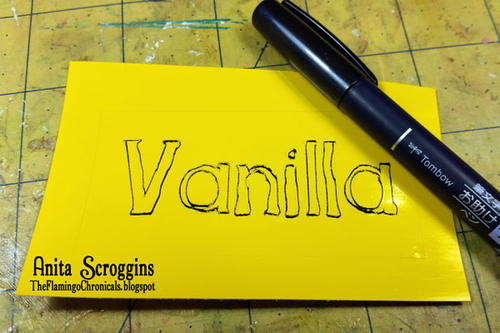
I used my Cameo Silhouette to cut the etchmask™ sheet. It's hard to see in the photo, but there is a box round the word that is about the same size as the side of the bottle where I wanted to etch. Because I am going to use transfer paper to place to mask, I won't be able to see the cut for placement. I use a black marker to outline to cut so I will be able to see it. Once this is done I cut the excess etchmask™ away.
-
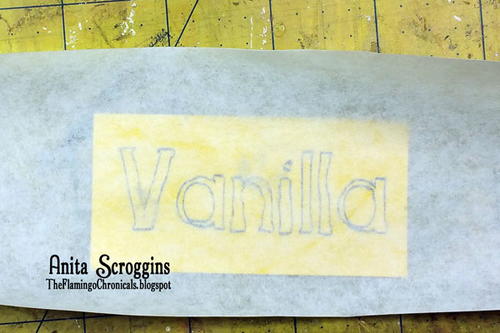
Cut a piece of etchmask™ Transfer Sheet and place it over the mask. Use the squeegee tool to smooth it down. Cut the excess away.
-
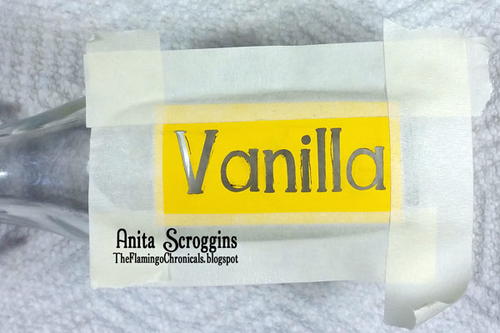
Peel the backing from the etchmask™ and apply it to the surface to be etched. Use the squeegee tool to make sure it is adhered securely. Remove the transfer sheet from the top and remove the letters using the Swivel Knife or Detail Pick. Insert the point of the knife into the center of a letter, rather than at the edge; this will keep the edges from the distorted. Apply masking tape around the edges to keep from accidently getting etching creme where you don't want it!
-
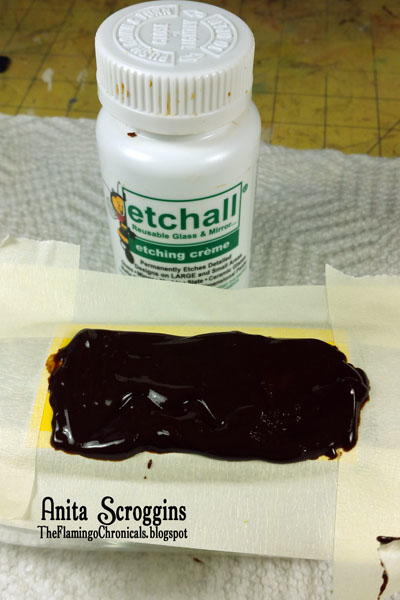
Apply a thick coat of etching creme and allow it to sit for 15 minutes. My supply looks a little like chocolate pudding because it was shipped in the heat of summer - it still works just fine! After 15 minutes, scrape the creme back into the jar and rinse the area with cold running water taking care not to get it on the bottle.
-
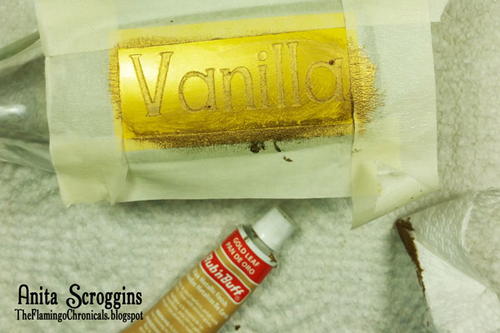
Once the glass is etched you can apply color using paint or other methods. I like Rub 'n Buff, it is quick and easy! I prefer to leave the mask in place when I apply it - it's just less messy this way in my opinion. Apply the Rub 'n Buff with a soft cloth, and then buff away the excess. Remove the mask and tape.
-
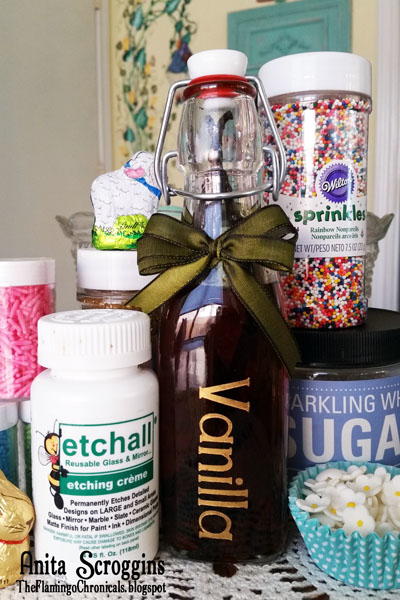
Fill with vanilla add a ribbon, add to a basket with some baking goodies and you have the perfect gift!
Find more of Anita's projects at theflamingochronicals.blogspot.com.
More Crafty Ideas For You
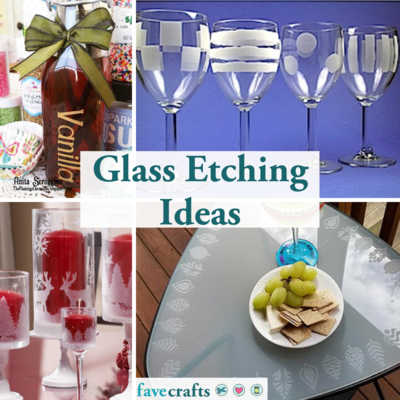
We love the idea of creating personalized etched jars to store all your favorite items, like spices, bath salts, or loose tea leaves. If you're a fan of the etched vanilla jar project, then we have a few more craft ideas that you might enjoy.
For those who enjoy working with glass, you might want to try creating a set of beautiful etched glass coasters. This project allows you to add a touch of elegance to your home decor while also protecting your furniture from water stains and heat damage. Simply choose a design that you love, etch it onto the coasters, and seal it with a protective coating for long-lasting beauty.
If you have a green thumb and love gardening, consider etching personalized plant markers for your garden. Not only will these markers help you keep track of all your plants, but they also add a touch of charm to your outdoor space. You can etch the names of your herbs, flowers, or vegetables onto the markers for a creative and practical touch.
Lastly, for those who enjoy giving handmade gifts, why not try etching personalized glass mugs or tumblers? These make perfect presents for birthdays, holidays, or just because. You can etch a monogram, a special date, or a sweet message to make your gift truly unique and meaningful.
No matter what craft project you choose to undertake next, we hope you have fun exploring your creativity and making something beautiful with your own hands. Happy crafting!
What other homemade food products do you like to make?