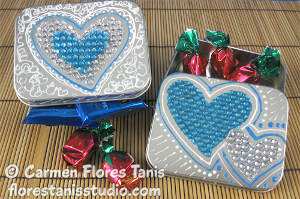
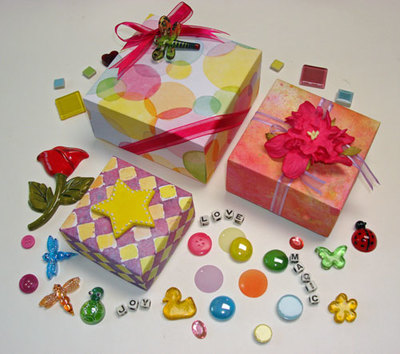
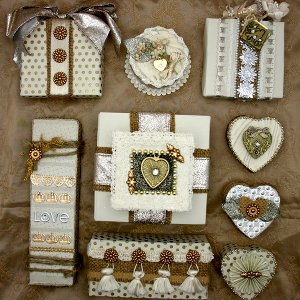
Elegant Silver and Gold Boxes
These Elegant Silver and Gold Boxes from Jolee's Boutique would make great wedding favor boxes for candies or little gifts. Made with various paper scraps and elegant 3-D stickers, these gift wrapped boxes are simple, yet stunning. Make one of these 9 boxes or use these ideas to create a set of boxes of your very own!
Materials:
Polka Dotted Box with Rosette:
- Cardstock
- Paper mache heart box
- Scissors
- Polka dot background stamp and ink
- Hot glue gun
- Gold rhinestones
- Rosette
- Various stickers and embellishments
Flying Heart Box:
- Heart shaped box
- Cardstock
- Jolee's Parcel border stickers
- Glitter
- Burlap fabric
- Jolee’s Parcel circle accent
- Floral leaves
- Adhesive
- Patterned paper
- Sequin border
- Scissors
Locket Heart Box:
- Paper mache box
- Patterned paper
- Rhinestone border
- Locket sticker
- Foam tape
- Adhesive
- Bow
- Ribbon
- Cardstock
Polka Dotted Rectangular Box with Tassels:
- Rectangular box
- Cardstock
- Scissors
- Polka dot stamp
- Adhesive
- Burlap fabric
- Trim with tassels
- 4 Jolee’s Parcel Stickers
Square Box with Glittery Bird:
- Square shaped box
- Cardstock
- Patterned paper
- Ribbon edger punch
- Ribbon
- Burlap fabric
- Jolee’s Parcel border sticker
- Rhinestones
- Millinery flowers
- Floral bird
- Glitter
- Bird charm
Square Box with Glittery Box:
- Cardstock
- Paper mache box
- Polka dot stamp
- Adhesive
- Burlap fabric
- Ribbon
- Bow
- 3 Jolee’s Parcel accents
Circle Shaped Ribbon Roll:
- Ribbon roll
- Patterned paper
- Scalloped scissors
- Trim and border stickers
- Crystals
- Floral leaf
- Glitter
- Millinery flowers
- Heart charm sticker
- Bow
Rectangular Box with LOVE Sticker:
- Box
- Patterned paper
- Burlap fabric
- Adhesive
- Ribbon
- Scallop punch
- Cardstock
- Twine
- Border stickers and embellishments
- Rhinestones
- Floral pieces
- Jolee's Parcel sticker
- Piece of trim
Large Double Stacked Box with Lace Window:
- Large square box
- Cardstock
- Burlap fabric
- Ribbon
- Glitter
- Polka dot backgroud
- Adhesive
- Border sticker
- Lace frame
- Rhinestones
- Jolee's Parcel stickers
- Foam tape
- Heart charm sticker
Instructions:
Polka Dotted Box with Rosette:
- Cut cardstock to fit the lid and base of your paper mache heart box.
- Stamp each piece with the polka dot background stamp.
- Heat emboss the stamped dots and then adhere the paper to cover the box.
- Embellish the box with gold rhinestones and a rosette.
- To create the rosette, cut a 1 inch by 12 inch piece of paper. Punch one edge with the ribbon edger punch. Fan fold the paper so the scallops all line up. Connect the ends of the paper together and adhere the center of the rosette to the box. Place a Jolee’s Parcel sticker in the center of the rosette.
Flying Heart Box:
- Cover the lid of the heart shaped box with cardstock.
- Create a pattern on the lid by cutting and arranging Jolee’s Parcel border stickers.
- Glitter all the way around the edge of the box.
- Create the heart by cutting the shape from burlap fabric.
- Adhere a Jolee’s Parcel circle accent to the center of the fabric heart.
- Using floral leaves, glitter the front and the back of the leaves with Pewter colored glitter.
- Once they are dry, attach them to the top of the box and place the fabric heart on the leaves.
- Cover the base of the box with patterned paper.
- Add a sequin border next to the lid sprinkled with glitter.
Locket Heart Box:
- Cover the lid of the box with patterned paper.
- Add a rhinestone border around the shape of the heart.
- Place a locket sticker on foam tape and secure it to the center of the lid.
- Add a bow to the locket.
- Cover the edge of the box with ribbon.
- Cover the base of the box with cardstock.
Polka Dotted Rectangular Box with Tassels:
- Wrap a rectangular shaped box with cardstock.
- Make sure to score the edges as you wrap the box.
- Do not adhere the paper to the box.
- Once you have the shape of the box, stamp the polka dotted background and heat emboss the dots.
- Adhere the paper to the box.
- Cut a 1½ inch strip of burlap fabric and wrap around the box. Allow the burlap to fray.
- Place trim with tassels onto burlap strip.
- Adhere 4 Jolee’s Parcel Stickers to the trim. Make the stickers look like they are tacks holding the tassels in place.
Square Box with Glittery Bird:
- Wrap and adhere cardstock to square shaped box.
- Cut a 3 inch wide strip of patterned paper to wrap around the center of the box.
- Using the ribbon edger punch, punch a border on both sides of the strip.
- Thread ribbon through the slits.
- Cut a 1 inch strip of burlap fabric and adhere to the patterned paper.
- Embellish the burlap with a Jolee’s Parcel border sticker and rhinestones.
- Add millinery flowers to the top of the box.
- Glitter a floral bird. When it is dry, glue it to the top of the box.
- Hang a bird charm on the front of the box.
Square box with Glittery Box:
- Cut cardstock and score paper to fit box.
- Stamp polka dots and heat emboss before adhering the paper to the box.
- Once the paper is secured to the box, wrap burlap and ribbon around the center of the box.
- Add a large bow to the top of the package.
- Embellish the ribbon with 3 Jolee’s Parcel accents.
Circle shaped Ribbon Roll:
- Cover the ribbon roll with patterned paper.
- Cut the top of the ribbon roll so it is the same size as where you would wind the ribbon.
- Leave the bottom section larger.
- Pull off the cardboard bottom to cover it.
- Use scalloped scissors to trim out the circle shape.
- Decorate the circle with trim and border stickers.
- Add crystals to the scallop on the border sticker.
- Glitter a floral leaf, and once it is dry, adhere it to the top of the box.
- Add millinery flowers. Place 3 crystals in the center of the millinery flower.
- Add a heart charm sticker to the bundle of flowers and a bow to the flower’s stem.
Rectangular Box with LOVE Sticker:
- Cover the box with patterned paper.
- Secure burlap around the sides of the box.
- Add a ribbon border along the top section of the burlap.
- Punch a scalloped cardstock border and add it to the bottom section of the burlap.
- Wrap twine around the box at the top and the bottom.
- Add border stickers and the word “LOVE” to the front of the box.
- Decorate 3 of the crown border stickers with rhinestones.
- Embellish the twine with floral pieces and a Jolee’s Parcel sticker.
- Add a piece of trim under the crown border sticker to finish off the box.
Large Double Stacked Box with Lace Window:
- Cover the large, square box with cardstock.
- Wrap layered burlap with ribbon.
- Glitter the inside of the small box and set aside to dry.
- Stamp and heat emboss the polka dot background design for the base of the small box.
- Add an adhesive border sticker around the lid of the box.
- Place a lace frame on top of the box to highlight the window in the box.
- Embellish the window with rhinestones and Jolee’s Parcel stickers.
- Add foam tape behind a heart charm sticker.
- Place the sticker inside the glittery small box.
- Stack boxes together for a pretty presentation.
Read NextFather's Day Fishing Box
Your Recently Viewed Projects
Thanks for your comment. Don't forget to share!
Cordless Cat Studi o
Apr 21, 2013
Cute, but I wish you'd do real DIY box tutorials. This is simply decorating a purchased box.
Report Inappropriate Comment
Are you sure you would like to report this comment? It will be flagged for our moderators to take action.
Thank you for taking the time to improve the content on our site.