This project was submitted by one of our readers, just like you.
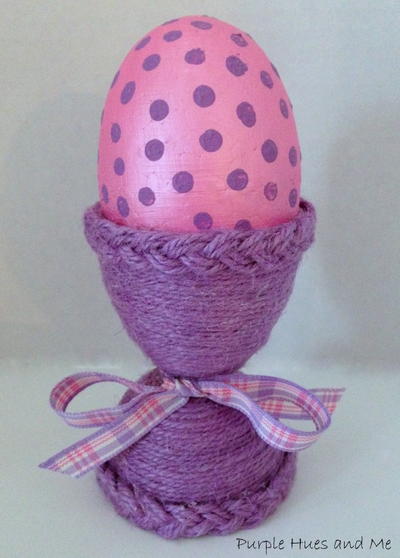
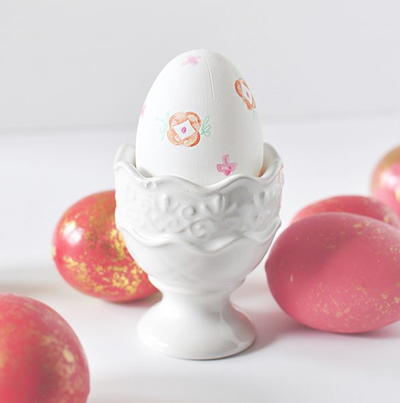
Twine Wrapped Egg Holder Upcycle DIY

Twine Wrapped Egg Holder Upcycle DIY
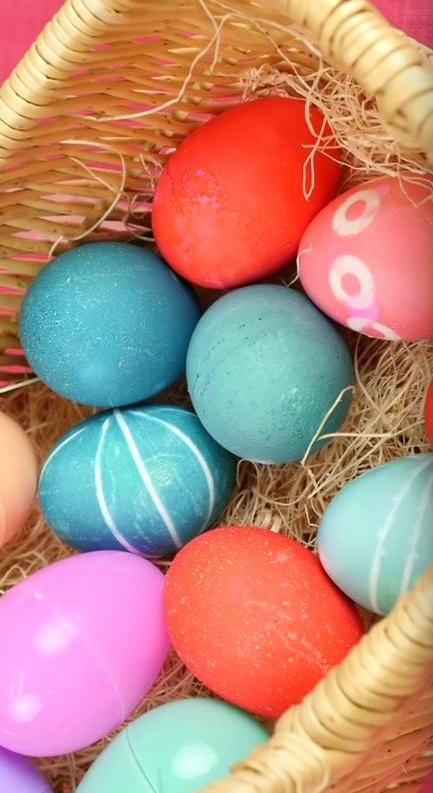
"Here's a great way to make something adorable out of those cheap plastic eggs you see at Easter time - a twine wrapped egg holder! Perfect in table settings for breakfast, brunch or entertaining! And the best part, you can use a variety of colorful threads - jute, baker's twine, hemp, yarn and even embroidery floss - plus ribbon or trim for any season or holiday! What a fabulous way to dress of a table setting!"
Primary TechniqueGeneral Crafts

HolidayEaster
Project TypeMake a Project
Materials List
- Plastic Eggs
- Twine
- Fabri-Tac Fabric Glue
- Ribbon
- Hot Glue
Instructions
-
Open a large plastic egg into two pieces.
-
Place a hefty amount of a quick-grab glue that dries clear in the center of one of the half eggs.
-
Grab the end of the twine and begin twirling it around in a circle and place down on top of the glue, holding in place until secure and doesn't move ( a few seconds).
-
Begin twirling the twine around the egg, adding glue periodically along the bottom of the twine and plastic.
-
Be sure to wrap the twine as close together as possible, while keeping the rows evenly pushed together.
-
Continue wrapping and gluing the half egg until reaching the end. Then cut twine at an angle to blend in and secure the end with more glue.
-
Repeat the same steps for wrapping the other half egg.
-
Make a braid trim by measuring around the widest portion of one of the halves doubling the amount plus 3-4 inches extra. Then cut six strands of that measurement, tying the ends together in a knot. Divide the strands into three groups of two and begin loosely braiding the strands.
-
Measure the finished braid around the edges of the half eggs. Saturate the braided ends with glue to prevent unraveling when cut and let dry. Cut braid at an angle to fit and glue in place for both pieces.
-
Place the smaller egg portion on a flat surface, bottom up, and hot glue the larger egg portion centered on top, for an adorable egg holder!
NotesTie a ribbon into a bow around the middle for a decorative look!
Why You'll Love This Trash to Treasure Craft
1. It's an eco-friendly project: By repurposing an old egg carton and turning it into a stylish twine wrapped egg holder, you are not only reducing waste but also giving new life to something that would have otherwise been thrown away.
2. It's budget-friendly: Instead of buying a new egg holder from the store, you can create your own unique one using materials you likely already have on hand. This project is a great way to save money while still adding a personalized touch to your home decor.
3. It's a fun and creative DIY project: Wrapping the egg holder in twine gives it a rustic and charming look that can be customized to match your personal style. Get creative with different colors and textures of twine to make a one-of-a-kind piece that will impress your friends and family.
4. It's practical and functional: Not only does this twine wrapped egg holder serve as a decorative piece for your kitchen, but it also helps organize and store your eggs in a neat and stylish way. Say goodbye to cluttered egg cartons taking up space in your fridge!
5. It's a great gift idea: Looking for a thoughtful and handmade gift to give to a friend or loved one? This twine wrapped egg holder is a unique and practical present that shows you put time and effort into creating something special for them. Plus, they'll appreciate the eco-friendly aspect of this upcycled DIY project.

Read NextOne Hour Bunny Banner