Mini Button Wreath
Gather up your spare buttons and create a little button wreath to hang in your home. Use all white buttons and scrapbook paper like designer Wendy Hyde for an elegant wreath.

Materials:
- Lightweight cardboard (I like to collect this so I have it around for various projects...things like the cardboard that comes in folded shirts, large tags from clothing etc.)
- Scrapbook paper (ideally this should be the color of the buttons you will be using.)
- Two glasses (or other round objects) one smaller than the other.
- Pencil
- Scissors
- Stick glue
- Hot glue gun
- Hot glue sticks (I went through about 2 of these)
- Buttons (lots - I used about 80 or so for my small wreath) I like white vintage buttons best, but you could use any color and you can buy them new - of course.
- Ribbon
Instructions:
- Using the stick glue, start by gluing the scrapbook paper to the cardboard. Remember, stick glue is your friend...be very generous.
- Using a pencil, trace the rims of the glasses onto the paper. The larger glass outside and the smaller glass inside to create a wreath form.

- Cut out the wreath form. If you're the perfectionist-type you can gently sand the edges so they are smooth (using a sanding block), but keep in mind that they will be 90% hidden by the buttons.
- Now comes the fun part. Gather your buttons. I like to sort them into sizes before I get started gluing...makes the whole gluing process a little easier.

- Start by gluing a layer of large buttons to the form.


- Now glue a layer of slightly smaller buttons on top of the larger ones, staggering them to cover the spaces between the larger buttons.

NOTE: I like to play around with where I will put the buttons because I want to vary the shades of the buttons...especially when using white buttons, because it creates more texture and interest.
- Continue gluing on buttons using smaller buttons each layer, and filling in the blank open spaces. This will create a rounded effect. Then I go back and add smaller buttons to the empty spaces left on the edge between the large buttons in the first layer. (That description is about as clear as mud, but hopefully, you get what I mean.)

- And that's it! Loop a pretty length of grosgrain ribbon around the top and tie with a bow...then hang it somewhere that will make you smile when you look at it.


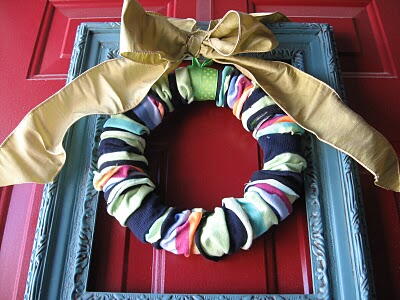
Read NextMay Flowers DIY Spring Wreath
Your Recently Viewed Projects

Thanks for your comment. Don't forget to share!
Hannah
May 10, 2017
This is pretty fantastic! I suggest you put cotton around before placing the buttons. In that way, it will look much thicker. If you are more artistic, you can use different kinds of button, different colors or different shapes. It will also look nice if the buttons are earth colors.
flowergirl
Mar 02, 2017
i have never really thought wreaths could be decorative any time of the year aside from holidays but this is very clever. its a great idea for a baby shower gift and a wonderful way to use up those excess mismatched buttons you are hoarding.
SissieSass
Jan 27, 2017
I want to try this project because it reminds me of my grandma. She used to have a button jar where she kept all the loose buttons. When someone would lose a button she went to the jar and looked for a match. There was always something that would work even when she could not find the exact match. I love it. Thanks so much!
Marilyn B
Jan 23, 2017
Super instructions, love this project! I have some textured reflective wallpaper that would work perfectly as the background, and it is pre-glued which gives me a head start, tho I might add some glue as well. I can see this in many sizes, but starting small is a good way to go until you get the hang of it. I have done button forms, a heart, an initial letter and a 3D letter. The first two had fabric backs and we sewed and glued buttons on, the letter background I painted first, then glued the buttons on.
BeckySue
Sep 04, 2016
This tutorial was one of the best I've seen here! Thanks! I have lots of buttons, so I could make one for every season or holiday, but I think I'll start out making a small one for my guest bathroom.
ladonasmile 955836 5
May 15, 2013
the idea is a great way to get rid of my pile of buttons that has accumulated for some time. thank you, keep up with these brilliant creative ideas
Kathryn20000
Oct 04, 2012
I was finally able to print directions for this wonderfully delightful Christmas ornament. I intend to start using my antique buttons that have been saved for years (some off my clothes when I was REALLY little).
jmandrews 7125451
Mar 07, 2012
I love this. I'm going to have to do some of these. I have a bag full of buttons I need to use.
buggalcrafts
Feb 12, 2012
I thought these were adorable the first time I saw them. I didn't have a lot of buttons - I was using my grandmother's buttons and didn't want to tie them all up - AND I happened to have a ton of mini grapevine wreaths, so I used the wreath as a base. To attach them I used glitter Mod Podge. I still owe a couple of people one. I think this is a great way to showcase those treasured buttons. Anyway, an update on the project is that I found some COOL mini heart shaped buttons at Hobby Lobby and just knew I need to make one for my Valentine Garland. They turned out great - the photo doesn't do it justice as the glitter gleams in the flash not looking like it does in real life. Take a look for yourself! http://buggalcrafts.wordpress.com/2012/02/10/another-valentine-craft-mini-valentines-button-grapevine-wreath/
cmclauss
Nov 18, 2011
I love that you took great photos as you progressed through the craft. It helps so much to 'see' step by step. I collect buttons and have an over abundance of vintage white/off white. Love this idea. Now I just need something to do with all this black and brown buttons.
mapabeek 8394171
Jun 17, 2011
I had the same thought as jlburnett as far as covering both sides. And I LOVE the idea of using a "handed down" collection of buttons. My mom has a metal can that held dads pipe tobacco that's full of buttons. I don't think she ever threw away any garment without cutting the buttons off and saving them in that can! Many of them still have a little shred of material on the back, and most all of them still have at least some of the threads attached. The wreath would tell a story, just as the quilts made from all the remnants and scraps of our Sunday dresses & play clothes do. Terrific idea!
Nonalynn9
Mar 10, 2011
This is a great idea. It would be great to have some special designer buttons to add to a button wreath. These special buttons would stand out and add a sense of whimsy to the project.
wintersnow
Jul 31, 2010
what a grat idea to do wtih all the buttons in your Mothers button box. There are some great ones in hers and what do you do with all of them? Also a grat memory present for everyone in family who use to play in the button box.
pathss2003gmailcom
Jul 19, 2010
unusal, i lke it when my husband started his game, i took all his button's off of this and that, and i made something similar to this..thank you for reminding me of a swell gift to make, so when he comes see's his children - he'll remember this button ring in place of our wedding ring..
Eneri
Jul 09, 2010
This is great ,thank you for sharing it. I think that glass buttons and even diamond looking buttons will look beautiful, there's so much you can do with this.
jlburnett
Jul 09, 2010
I would cover the back side also with paper and buttons so it would look nice if hung in a window where people would see it from the outside.
twiceshy51
Jul 08, 2010
so nice! i can see this in a large size, with red and green buttons, hanginhg in a window at christmastime! thanks for the idea!
Hazel
Jul 08, 2010
This ia a great project for kids to make. I teach kids craft classes and this is one i would use... great idea Wendy
Report Inappropriate Comment
Are you sure you would like to report this comment? It will be flagged for our moderators to take action.
Thank you for taking the time to improve the content on our site.