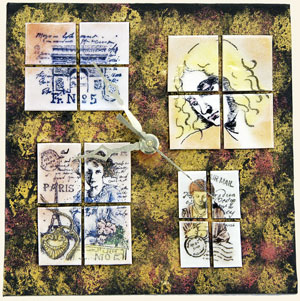
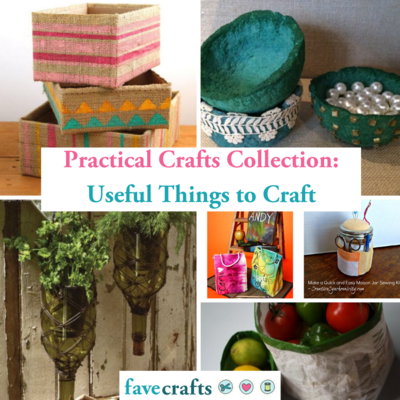
How To Make Your Own Clock With Tiles
Always know the time with this snazzy craft that shows you how to make your own clock using ceramic tiles. This mosaic craft idea from Jacquard Products is a winner.
Materials:
- Clock mechanism kit from Walnut Hallow
- Jacquard Lumiere paints in Sunset Gold and Metallic Russett
- Lisa Pavelka’s Poly-Glaze
- "Fr. No 5" and "Buddha" stamps from Stampin’ Up! Travels Abroad set
- Medium thickness artist paint brush, sea sponge, clay-dedicated pasta machine, clay blade, craft knife, and ruler
- 2 blocks block Kato black polymer clay
- 1 1/2 blocks Kato pearl polymer clay
- "Paris" stamp from Stampin’ Up! Friendship’s Journey set
- Kato liquid polymer clay
- "Thoughtful" stamp by JudiKins
- 8" x 8" piece of black illustration board
- Jacquard Pearl Ex Stamp Pad Black
- Jacquard Pearl Ex powders in the following colors: Brilliant Yellow, Blue Russet, True Blue, Spring Green, Duo Green-Yellow, Flamingo Pink, Misty Lavender, Aztec Gold, and Antique Copper. Note: All colors are sold together as the "PearlEx Series 2" kit.
Steps:
- Condition all clay.
- Cover the illustration board lightly with a thin coat of polymer clay.
- Roll out two pieces of black clay on the third-largest setting on the pasta machine that are at least 8" in length. Lay these pieces of clay side by side on the book board, smoothing down the clay carefully to avoid air bubbles. Smooth the seam where the two pieces touch. Turn the piece over and trim the excess clay from the illustration board.
- Using sea sponge, lightly dab Lumiere paints on clay, one color at a time, until desired effect is reached.
- Roll out the pearl clay on the largest setting of the pasta machine.
- Using StazOn ink, stamp images on clay. Use a light touch when stamping – you do not want the image embedded in the clay.
- Trim around the stamped images, leaving a 1/4" to 1/2" border.
- Using paint brush, brush PearlEx powders onto clay.
- Using ruler and clay blade, cut stamped images into four equal pieces.
- Bake stamped tiles in oven using manufacture’s recommendations for time and temperature.
- After tiles have cooled, arrange tiles on base, leaving room for clock movement. To preserve tile effect, leave 1/8" between each stamped tile. When the desired layout is reached, firmly press tiles into polymer clay base to secure.
- Bake entire piece again at manufacture’s recommendations for time and temperature. Let the piece cool completely.
- With ruler, locate center of box lid. With craft knife or drill, cut opening large enough for clock mechanism to fit through.
- Carefully cover the surface of every stamped tile with a thin layer of Poly-Glaze. Let tiles dry until glaze turns clear.
- Attach clock mechanism to piece according to manufacturer’s instructions.
Read NextHow to Make a Floating Tea Cup


Thanks for your comment. Don't forget to share!
Report Inappropriate Comment
Are you sure you would like to report this comment? It will be flagged for our moderators to take action.
Thank you for taking the time to improve the content on our site.