This project was submitted by one of our readers, just like you.
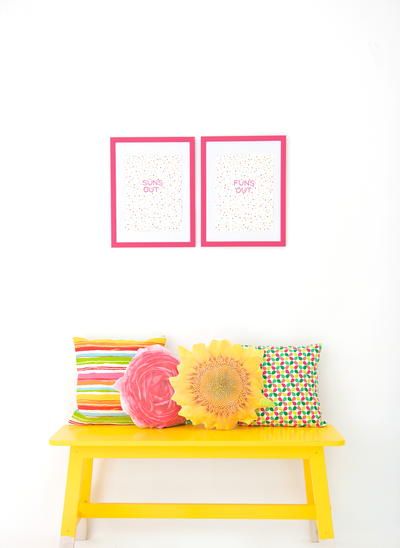
Fancy Flower Photo Pillow

Fancy Flower Photo Pillow
In the Designer's Words: "Don't be intimidated by Photo Transfer Medium. It's easy to use and can transform a plain piece of fabric into a vibrant floral image that can be sewn into a springtime, colorful pillow."
Bright and beautiful home décor is essential to creating a happy home and a joyful space. This DIY craft idea is extra special, because it allows you to place giant, blooming beauties in your home. These homemade pillow patterns are created out of flower photo transfers, allowing you to display daisies or show off sunflowers in a cuddle-worthy way. The Fancy Flower Photo Pillow is one of those unexpected Mod Podge crafts that is going to add so much sun to your life. Make these gorgeous DIY pillows for your sun room or your little girl’s room.
Estimated Cost$11-$20
Time to CompleteIn an evening
Primary TechniqueDIY Craft

Project TypeMake a Project
Materials List
- Mod Podge Plaid Crafts Photo Transfer Medium
- Fairfield Poly-Fil
- Scissors
- Large Laser print print-out of a flower image
- White cotton fabric
- Kitchen sponge
Instructions
-
Use a pair of detail scissors to cut right along the edge of the flower image
-
Once you’ve cut it out, squeeze photo transfer medium directly onto the printout and use the foam brush to create an even thick coat of the transfer medium over the entire image. Be sure that you go edge to edge. Once you’re done, the photo transfer medium should be opaque without any of the image showing through.
-
Gently lift the paper image off your work surface, being careful not to touch the edges much
-
Place the image face down directly onto the fabric and tap into place so that the entire image is making contact with the fabric.
-
After allowing the image to sit for a full 24 hours, dampen the sponge with water and moisten the entire image surface. You’ll see the image begin to come through a bit. TIP: At this stage, work on top of a tarp or plastic garbage bag. This will protect your work surface from getting too wet.
-
Once the entire image is wet, begin working the sponge in small circles. The pulp of the paper will begin to peel back and the image will be revealed beneath. Continue doing this around the entire image and then allow it to dry. Once dry, you will be able to work with the image just like you would fabric. It’s like magic!