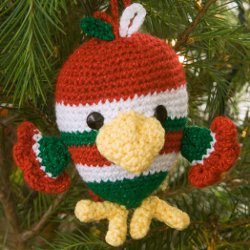
Adorable Holiday Bird Ornament
This is one of the cutest crochet patterns you will ever see. Make an adorable holiday bird ornament for your Christmas tree. The bird is worked in rounds using four different colors for a fun ornament. This sweet and adorable crochet Christmas pattern would also make a great gift tag or stocking stuffer. Perfect for a quick 2-hour project, this crocheted ornament is a must-have for those who love to decorate their tree with handmade ornaments. This cute crocheted bird can also be kept out throughout the season, adding a touch of the natural elements to your indoor decor.

Materials:
- 1 ball Red Heart® “Holiday” yarn in Green/Green (A)
- 1 ball Red Heart® “Holiday” yarn in White/Silver (B)
- 1 ball Red Heart® “Holiday” yarn in Red/Red (C)
- 1 skein RED HEART® “Super Saver®" yarn in Cornmeal (D)
- 4mm [US G-6] crochet hook
- Split-ring stitch marker
- Yarn needle
- Polyester fiberfill
- 2 buttons for eyes
- Sewing thread and needle
Gauge: 20 sc = 4”; 20 rows = 4”. CHECK YOUR GAUGE. Use any size hook to obtain the gauge.
Special Abbreviation:
- Sc2tog = [draw up a loop in next st] twice, yo and draw through all 3 loops on hook.
Notes:
- Unless otherwise indicated, do not join rounds; instead, place marker in first st of round and move up as work progresses. When changing colors, work last st of old color until 2 loops are left on hook, drop old color, yo with new color and complete st. Fasten off old color. This ornament is not intended for small children.
- If making Ornament for a baby or small child, do not use buttons for eyes; instead, use embroidery floss to stitch eyes.
Instructions:
Ornament is 7” tall.
Body
- With A, ch 2.
- Round 1: 6 sc in 2nd ch from hook – 6 sts.
- Round 2: 2 sc in each st around – 12 sts.
- Round 3: * 2 sc in next st, sc in next st; repeat from * around – 18 sts.
- Round 4: Sc in each st around.
- Round 5: * 2 sc in next st, sc in next 2 sts; repeat from * around – 24 sts.
- Round 6: Repeat Round 4.
- Round 7: * 2 sc in next st, sc in next 3 sts; repeat from * around – 30 sts.
- Round 8: Repeat Round 4, changing to B in last st.
- Round 9: With B, * 2 sc in next st, sc in next 4 sts; repeat from * around – 36 sts.
- Round 10: Repeat Round 4.
- Round 11: * 2 sc in next st, sc in next 5 sts; repeat from * around; change to C in last st – 42 sts.
- Round 12: With C, repeat Round 4.
- Round 13: * 2 sc in next st, sc in next 6 sts; repeat from * around; change to A in last st – 48 sts.
- Round 14: With A, repeat Round 4.
- Round 15: Repeat Round 4, changing to B in last st.
- Rounds 16-18: With B, repeat Round 4.
- Round 19: Repeat Round 4, changing to C in last st.
- Rounds 20-23: With C, repeat Round 4.
- Round 24: * Sc2tog, sc in next 6 sts; repeat from * around – 42 sts.
- Round 25: * Sc2tog, sc in next 5 sts; repeat from * around – 36 sts.
- Round 26: * Sc2tog, sc in next 4 sts; repeat from * around – 30 sts.
- Round 27: * Sc2tog, sc in next 3 sts; repeat from * around – 24 sts. Add stuffing.
- Round 28: * Sc2tog, sc in next 2 sts; repeat from * around – 18 sts. Finish stuffing ornament firmly.
- Round 29: * Sc2tog, sc in next st; repeat from * around – 12 sts.
- Round 30: Sc2tog around – 6 sts. Fasten off, leaving a long tail. With yarn needle, weave tail through remaining sts and pull tight. Weave in ends.
Beak
- With D, ch 20; join with a slip st.
- Round 1: Ch 1, sc in each ch around – 20 sts.
- Round 2: * Sc2tog, sc in next 3 sts; repeat from * around – 16 sts.
- Round 3: * Sc2tog, sc in next 2 sts; repeat from * around – 12 sts.
- Round 4: * Sc2tog, sc in next st; repeat from * around – 8 sts.
- Round 5: Sc in each st around.
- Round 6: Sc2tog around – 4 sts. Fasten off, leaving a long tail. Weave tail through remaining sts and pull tight.
Feet (Make 2)
- With D, ch 2.
- Round 1: 4 sc in 2nd ch from hook – 4 sts.
- Rounds 2-36: Sc in each st around.
- Round 37: [Sc2tog] twice. Fasten off, leaving a long tail. Weave tail through remaining sts and pull tight.
Wings (Make 2)
- With A, ch 10; join.
- Round 1: Ch 1, sc in each ch around – 10 sts.
- Round 2: Sc in each st around; change to B in last st.
- Round 3: With B, sc in each st around; change to C in last st.
- Round 4: With C, 2 sc in each st around – 20 sts.
- Round 5: Ch 2, 4 hdc in same st, [slip st in next st, skip next st, 5 hdc in next st] 4 times; slip st in last st. Fasten off, leaving a long tail. Use tail to tack Wing closed. Weave tail from beginning through ch and pull tight.
Top Knot
- [Using A, ch 10. Fasten off.] 6 times.
- Repeat with B and C.
Tail
- With A, ch 10, join.
- Round 1: Sc in each ch around – 10 sts.
- Round 2: Sc in each st around.
- Round 3: Repeat Round 2, changing to B in last st.
- Round 4: With B, repeat Round 2, changing to C in last st.
- Round 5: With C, 2 sc in each st around – 20 sts.
- Round 6: Ch 2, 4 hdc in same st, [slip st in next st, skip next st, 5 hdc in next st] 4 times; slip st in last st. Fasten off, leaving a long tail. Use tail to tack Tail closed. Weave tail from beginning through ch and pull tight.
Finishing
- With the wider part of the Body at the top, sew Wings, Beak, and Tail to Body as pictured. Fold Top Knot chains in half and sew in a cluster to top of Body. Fold each Foot in half and tack to bottom of Body. Attach Eyes securely with sewing thread and needle.
- With A, ch 25. Sew into loop at top of Ornament.
- Weave in ends.
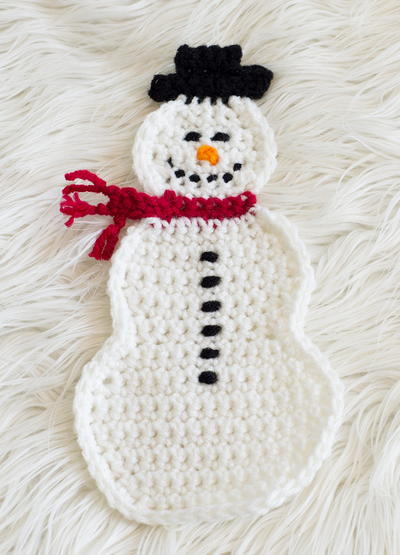
Read NextSnowman Pot Holder Pattern

Thanks for your comment. Don't forget to share!
lcarr
Oct 17, 2017
This is such a cute ornament Changing your yarn thickness and hook size will allow you to make different sized birds. Using worsted and a 4.5 mm hook (as suggested in the pattern), my finished bird is 6 inches tall and 13 inches around. It is too big and too heavy to hang on a tree.
DKG
Jan 09, 2017
I am not understanding how to make the feet. Will I be working in a circle or flat?
Editor Dana
Jan 11, 2017
Hi there! It looks like you'll be working in a circle and essentially crocheting a long tube to make the feet, then folding the feet in half when finishing. I hope that helps! -Editors of FaveCrafts
memi19692002 84933 40
Dec 02, 2017
Does this mean we need to tack the feet together before sewing on, or as we're sewing them on?
Editor Dana
Dec 04, 2017
It looks like you can do it either way! I imagine tacking the feet together with a stitch or two before sewing on will be easiest. I hope that helps!
loganartdirect65 8 275638
Oct 29, 2012
Cute idea. I will use this as a little add on gift for all my grdkids christmas packages in their school colors.
cowgirlnow12 13723 77
Oct 05, 2012
I love this pattern, but isn't there I way I can save it in my pdf file on my computer instead of just in this web site? I don't want to have to get online every time I want to make one.
snowflake82414
May 12, 2012
What do you think?I have made several christmas projects.they are so cute.Thanks for all the neat projects.
teresacook 8562453
Dec 04, 2011
This is my first online comment about any project I have seen but this little guy is just so cute I could not resisit. I plan to start working on one first thing in the morning. Thanks for all the great ideas. You guys are great. Merry Christmas and May God Bless You!
Report Inappropriate Comment
Are you sure you would like to report this comment? It will be flagged for our moderators to take action.
Thank you for taking the time to improve the content on our site.