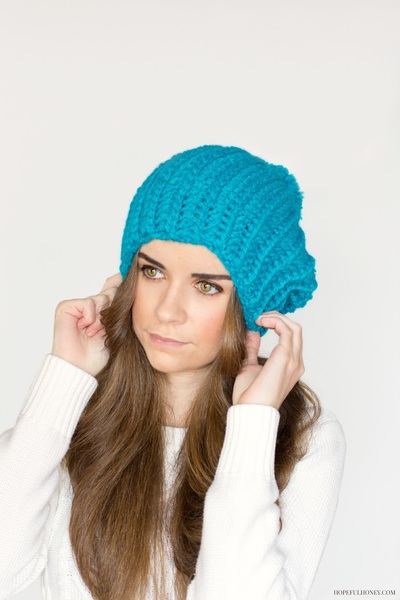
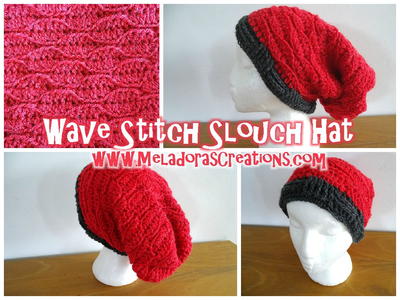
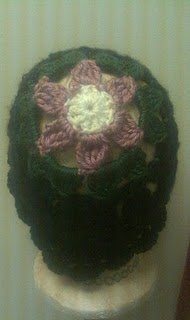
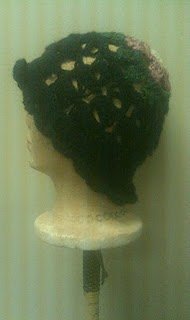
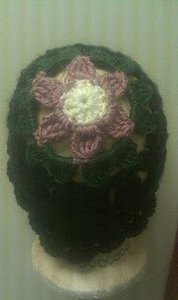
Vintage Broomstick Lace Hat
This beautiful crochet hat is just what you need to give your outfit a vintage flair. Make your own Vintage Broomstick Lace Hat using these simple directions.
Materials:
- 2 ounces of worsted weight yarn or 3 oz cotton worsted weight (includes brim shown)
- Scraps for Flower (if in different color at top)
- 5.0 mm crochet hook
- two– 1.0" inch Jiffy sticks, broom sticks or knitting needles
- sewing thread and needle to sew brim to hat (optional)
- millinery wire (optional)
- yarn needle
Special Stitches:
Treble Petal Cluster–TPC:
Make 1 tr st, leaving last lp on hook (2 lps on hook total when done). Repeat 3 more times, each time leaving a lp on hook for 4 sts in each petal and then pull thru all 5 lps and join together with ch 1.
beg Treble Petal Cluster– begTPC:
chain 3 to count as first tr in petal cluster, make 3 more tr stitches in desired space leaving last lp on hook. Yo and join all 5 lps on hook (1st petal made)
Instructions:
Changing Colors-Russian Join
Color changes may be done with “Russian Join” which produces a seamless join with no ends to weave in and looks like your yarn color changed as if by magic. Russian joins mean your hat can be completely reversible. How great is that?
- Mark where color change begins with needle and thread or “joining point”. Tie thread securely so it will not fall out during the next step.
- Pull out two stitches of ending color or length desired.
- Cut ending color approx. 2 inches beyond joining point;
- Lay new color across joining point leaving a tail of approx. 2 inches.
-
Put yarn needle ½” from tail end of ending color and then insert threaded needle at marked joint and back down interior of ending yarn for at least 1",
pull thru and trim end. - Make joint on new color by repeating step 5. Remove thread.
-
Re crochet last two stitches. Works on any type yarn, from thread to bulky weight. Don’t get it? See videos on Youtube.com under “russian join”.
Using FCC, Chain 4 and join with sl st OR make magic loop. Instructions for a magic loop can be found on www.youtube.com
Row 1: ch2 (counts as 1st dc), 11 dcs in ring. Sl st to complete ring (12 dc ring, flower center made)
Row 2: change to FPC. *ch3, sk 1 st, sl st*, repeat * to * to end. (6 ch-3 spaces made)
Row 3: make begTPC in next ch3 sp, ch 5, *make TPC in next ch 3 space, ch 5*. Repeat * to * to end. (6 flower petals made). Join with sl st to top of begTPC.
Row 4: change to LC. Make beg TPC, ch4, TPC, c4–all in next ch 5 space (2 petals made in first ch5 sp), *TPC, ch4, TPC, ch4 in next ch5 sp*, repeat * to * to end, join with sl st to ptop of beg TPC. (12 leaf petals made.)
Row 5: change to MC. Make 4 sc in each ch4 space between each of the 12 petals. At end, join with sl st to first sc. (48 sc’s made).
Row 6: using 1" Jiffy stick or broom stick, loop up 5 loops for each set of 4 sc’s by looping up first stitch in back, and then in front, and then the rem 3 sts thru the back loop only. (60 loops made on large sticks). Loop up as far as is comfortable on first stick and then change to second stick. Only an approximate count is necessary to split up loops between first and second sticks. Remove sticks. I like to use bobbie or hair pins to keep groupings of 5 loops neat and tidy. You don’t have to do that if you are careful. In each grouping of 5 loops, make 5 scs per loop. Join at end to first sc with a slip st. (60 st made). Remember not to turn when doing broomstick lace. The front always faces you.
Row 7: Increase again by looping up thru front and back of first st in each group of 5 scs. (72 large loops made). Make 6 sc in center of 6 large loops. Join last st with sl st to first sc. (72 scs made)
Row 8: Make one more row of broomstick lace in groups of 6 sc’s. (72 scs)
Row 9: Note that the edge is uneven due to the broomstick lace stitches. To even out these stitches, ch 2 (counts as 1st dc), *1 hdc, 3sc, 1 hdc, 1dc*–all over next broomstick lace grouping. Repeat * to * to end and join with sl st.
Row 10: (change color yarn if desired to FPC). Ch2, *sk next 2 sts, sl st, ch2*. Repeat * to * end and join with sl st.
Row 11: (make scallops) ch2 (counts as 1st dc), 4 dc in same ch2 sp, sl st next sp, *5 dc in next ch2 sp, sl st in next ch 2 sp*, repeat * to * to end and join with sl st to beg ch2. Fasten off and weave in ends.
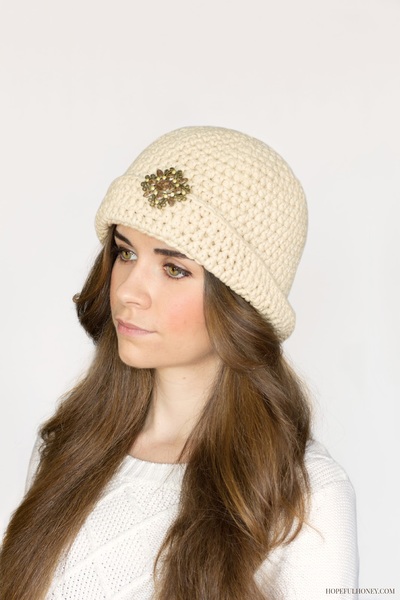
Make a brim if desired to keep that hat on snug. Using a contrasting color of scrap yarn, ch 7, turn, hdc in 3rd ch from hook, back loop only. Make 5 more hdc’s in row, back loop only, ch2 and turn for next row. Keep on making rows 6 st wide of hdc’s in back loop only until length is approx. 21" to 23" or so it fits your head just a teeny bit snug. Remember that the hat body will make the brim even tighter. Finish off leaving approx. 6" for a tail. Sew ends together using yarn needle and tail. Using sewing needle and thread sew bottom of brim only to edge of hat where desired using a whip stitch that is mostly invisible, that is, only catch the bottom lower edge of brim. Brim will keep your hat snug and secure on windy days. Make a crochet flower or flowers for your brim.
Big Floppy Brims
For an extended floppy style brim for a summer hat, try the following cluster stitch.
End pattern at Row 9
Row 10: make a beg dc cluster (begDCl), ch2, dc leaving 1 st on hook (2 sts total, dc again leaving st on hook (3 sts on hook), yo and draw thru all 3 stitches.
Horizontal cluster (Hcl): Ch3 from top st of last cluster st, *yo and draw up a loop from top st, yo and draw thru 1 lp, yo and draw thru 2 lps* (2 lps on hook), repeat * to *, yo and draw thru all 3 lps on hook. An Hcl is basically a chain 3, dc leaving a lp on hook, dc leaving a second lp on hook, then yo and draw thru all 3 lps.
In next 3 sts make a dc cluster(DCl) by making 3 dcs, each leaving a loop on the hook, for a total of 4 loops left on hook. Yo and draw thru all 4 loops.
Continue the pattern all around by making a Dcl, an Hcl, then another Dcl. Join last stitch to begDcl.
Row 11: make a beg Dcl fan stitch by: ch2, in same st dc twice, Hcl, *3dc in sa stitch (top of Dcl of last row), Hcl.* Repeat from * to * to end and join with sl st.
If you are even more ambitious, continue the pattern to a desired circumference, even out the scalloped edging with the pattern (dc, hdc, 3sc, hdc) and then purchase some light millinery wire (18 to 20 gage), join with a piece of cotton yarn by wrapping overlapped ends together and making sc’s over the millinery wire, and voila! You will have a wide floppy brimmed hat perfect for the beach.


Thanks for your comment. Don't forget to share!
joanne denison
Mar 16, 2011
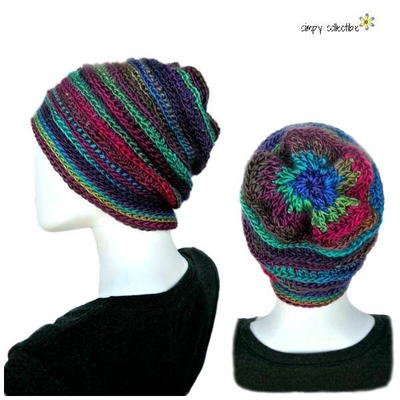
For more pictures and versions of this hat, see my blog at http://norwoodgsa.blogspot.com/2011/03/broomstick-lace-hat-with-flower-crown.html. this hat is very pretty in cotton for summer, and it can be made with a large brim
Report Inappropriate Comment
Are you sure you would like to report this comment? It will be flagged for our moderators to take action.
Thank you for taking the time to improve the content on our site.