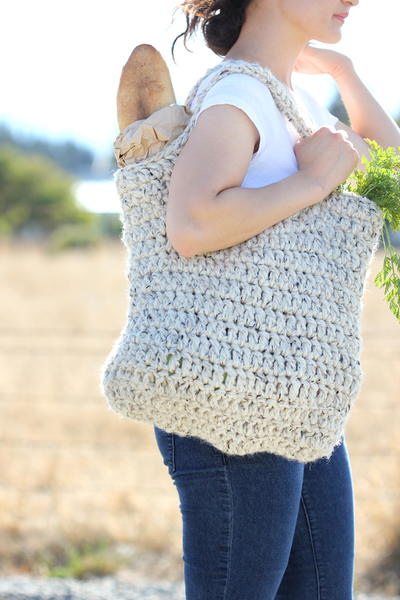
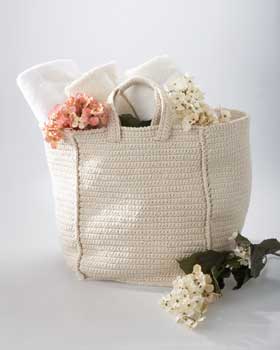
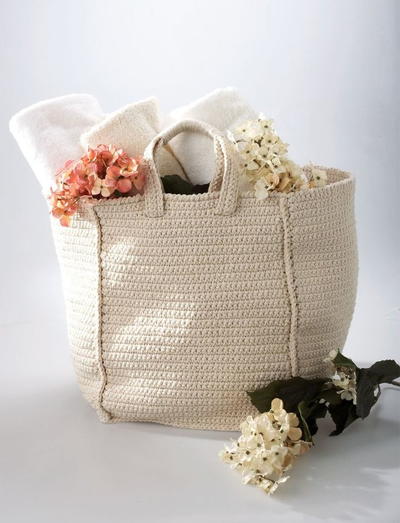
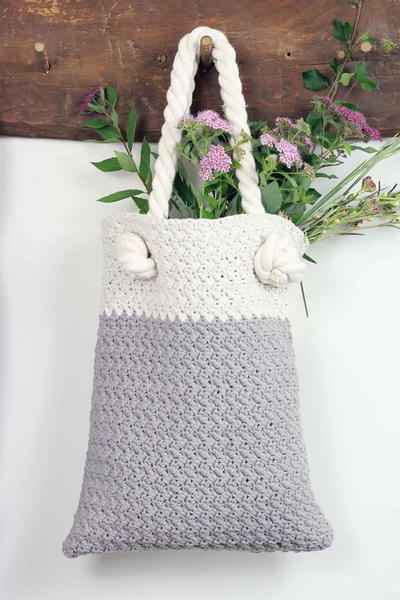
Crochet Tote Bag
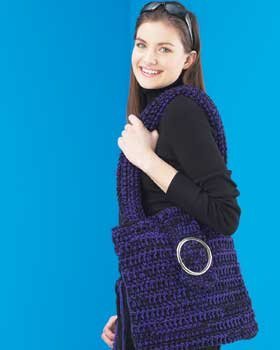
Crochet your own tote bag to go with any outfit with this free pattern from Bernat Yarns. This quick and easy bag is both adorable and practical because it is strong, durable, and large enough to hold all of your essentials.
Measurements:
12" [30.5 cm] wide x 15"
[38 cm] high x 12" [30.5 cm] deep.
Materials:
- Bernat® Handicrafter Cotton or yarn of your choice.
- 22 balls of #00002 (Off White).
- Size 4 mm (U.S. G or 6) crochet hook or size needed to obtain gauge.
Gauge:
13 1/2 sc and 16 rows = 4" [10 cm] with 2 strands of yarn.
Pattern:
Note: Bag is worked with 2 strands of yarn tog throughout.
FRONT and BACK Panels (make 2):
With 2 strands of yarn tog, ch 41.
1st row: (RS). 1 sc in 2nd ch from hook. 1 sc in each ch to end of ch. Turn. 40 sc.
2nd row: Ch 1. 1 sc in each sc across. Turn.
Rep last row until work from beg measures 15 ins [38 cm], ending with a WS row. Fasten off.
Side Panels (make 2).
Work from to as given for Front and Back Panels.
Rep last row until work from beg measures 14" [35.5 cm], ending with a WS row.
Next row: (RS). Ch 1. 1 sc in each of first 11 sc. Ch 4. Miss next 4 sc. 1 sc in each of next 10 sc. Ch 4. Miss next 4 sc. 1 sc in each sc to end of row.
Turn.
Next row: Ch 1. 1 sc in each of first 11 sc. 4 sc in next ch-4 sp. 1 sc in each of next 10 sc. 4 sc in next ch-4 sp. 1 sc in each sc to end of row. Turn.
Work a further 2 rows in sc. Fasten off.
Join Panels: Arrange Panels to form a box, having Side Panels opposite each other.
With WS of 2 Panels tog, join 2 strands of yarn with sl st at top left corner. Ch
1. Working through both thicknesses, work 1 row of sc evenly along side edge. Fasten off.
Rep for rem Panels.
Base: Work from to as given for Front and Back Panels.
Rep last row until work from beg measures 12 ins [30.5 cm], ending with a WS row. Do not fasten off.
Join Base to Panels:
With RS of Base facing, place lower edge of joined Panels behind Base with WS of work tog, aligning corners of Base with joining rows of Panels.
Next rnd: Ch 1. Working through both thicknesses, work 1 rnd of sc evenly around all 4 sides of Base. Join with sl st in first sc. Fasten off.
Top edging:
With RS of work facing, join 2 strands of yarn with sl st to any
corner of top edge. Ch 1. Working from left to right instead of right to left as usual, work 1 rnd of reverse sc evenly around top edge. Join with sl st in first sc. Fasten off.
Handles (make 2):
With 2 strands of yarn, ch 95 loosely.
1st row: 1 sc in 2nd ch from hook. 1 sc in each sc across. Turn. 94 sc.
2nd row: Ch 1. 1 sc in each sc across. Turn.
Rep last row once more. Fasten off.
With RS of Basket facing, push ends of Handle through slits on Side Panel to WS. Sew ends tog. Bring halves of Handle tog and taking 2 strands of yarn tog, wrap center 4" [10 cm] of Handle as shown in picture. Fasten ends securely.
For other fantastic picnic essentials, be sure to check out our collection of 7 Picnic Accessories and Essentials!
Read NextCrochet Market Tote Pattern
Your Recently Viewed Projects

Thanks for your comment. Don't forget to share!
ffpaws
Apr 05, 2018
Here is the whole sentence for those who have been trying to get this figured out -- "Work from to as given for Front and Back Panels." In other words, follow the written instructions that have already been written out for the Front and Back Panels to make the Side Panels. Then you just repeat the last row until the Sides are 14 inches wide. I hope this helps. I, too , like bags with longer wider handles so as to wear as a crossbody messenger bag. but also like the short sturdy handles. So I may be as libbing on my bag.
princess6860504
Feb 14, 2017
A very nice and roomy market bag, which of course is constructed in 100% cotton. Worked using 2 strands of yarn held together, it makes a more heavy and beefed up design. If you want it to be super thick and strong you could certainly use 3 strands but don't forget to allow for using the next bigger hook size.
Lynn K
Feb 11, 2017
Oh my, such a beautiful tote! I have some raw, organic, undyed cotton yarn that is going to be so perfect for this pattern. Bags are one of my favorite things to crochet and I just love it when Im using one of the many beautiful bags I have made for myself. I will probably make the strap handles longer but only because I prefer shoulder bags. Can not wait to get started.
Dagger9
May 24, 2015
I made this bag and it is beautiful but is there no way to make it stand on its own? It is very floppy and I am new to crocheting and wonder if there is a way to make it stiff enough to stand up.
princess6860504
Feb 14, 2017
Have you ever heard of a trick of using pipe cleaners from the craft department?
Sharon M
May 04, 2018
Why dont they include pipe cleaners under the supplies needed? Plus instructions on how to use them. Besides not everybody "knows that trick". I know i haven't.
arriealtos 1027994
Jan 13, 2020
no need to be rude, people voluntarily offer tips, she isnt the company that posted this, just a viewer LIKE YOU
laraled 4925899
Feb 10, 2014
Does anyone know how many skeins is needed for this project? 22 skeins? What size skeins?
daisytops2000 9093 329
Sep 19, 2013
Where it says "work from to as given" and you follow the instructions where it says "click the link where it says Click here for diagram. It will give you the directions from Bernat." This link goes nowhere except to an ad. Could someone please give more explicit, concise directions on how to do the side panels?? Thank you.
Crafter 8957389
Dec 16, 2010
I love this pattern, crocheting bags are one of my favorite projects. I'm going to try this one after xmas.
lrblss
Jul 15, 2010
to find out what "work from to as given" means, click the link where it says Click here for diagram. It will give you the directions from Bernat.
margb963 6241014
Mar 02, 2013
Thanks for your info!! Just what I was looking for since the directions on this page made no sense :)
creativity2infinit y
Jun 30, 2010
Helpful notes on this pattern, it appears that some words were left out of the directions for the sides. When it says "work from to" I am pretty sure it should say, "work from row 1 to row 2 as for front/back." The bag is 12" wide and 12" deep so the sides and front/back are the same size, only difference is the sides have the handles worked into them, so you would chain 41 as you did for front/back. The abbreviations are all standard so if you need help you could look them up in any crochet book. sc=single crochet, sl st= slip stitch, tog=together, rs=right side, ws= wrong side. Some one asked it this could be converted to a knitting pattern, I don't think it would be suitable for knitting because there would be to much stretch. Hope this helps.
Crafter 7145000
May 29, 2010
Beautiful bag, but there is no way to follow these directions. What on earth does "Work from to as given" mean?
moondarlin
May 23, 2010
crafter 9461532: most patterns will tell you what the "jargon" is, like someone asked what rs means, which means "right side" meaning when you crochet, the side that is facing you is the right sight, when you turn it over and the crochet patterns seems to be going the other way, that is the "ws", or wrong side. pick up a beginners book on crocheting and in there it will tell you all the abbreviations.
luckysea13
May 17, 2010
I want this to be my summer project. This is a great tote bag, can't wait to get started!!!
Crafter 9461532
May 16, 2010
Hi there i would love to be able to crochet this beautiful bag but i dont know the jargon ie (rs) and sc etc. can anyone help me please
chelle3
Mar 22, 2010
Is there any way this can be changed to knitting? I don't know how to crochet and really love this bag and the Stars and Stripes bag also. If there is no knitted pattern what is a good book or guide to learn how to crochet. Thanks for your help Michelle Duff
margee
Oct 26, 2009
Hello, my printer is acting up, so i handwrote this pattern off computer. Phew! I really wanted to make this bag because it's large! I need to take my contineing crochet projects EVERYWHERE. I'M sending my 2nd laprobe tomorrow to a soldier in wheelchair overseas for ''SOLDIERS ANGELS'' group. thanks for great patterns. Marge Jonaway
Report Inappropriate Comment
Are you sure you would like to report this comment? It will be flagged for our moderators to take action.
Thank you for taking the time to improve the content on our site.
![Battenberg Crochet Granny Square Bag Pattern [Free]](http://irepo.primecp.com/2022/08/532101/Battenberg-Bag-02_Category-CategoryPageDefault_ID-4857588.png?v=4857588)