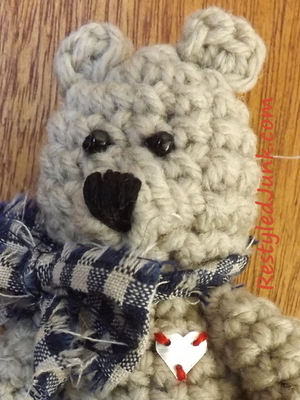
Mini Teddy Bear Crochet Pattern
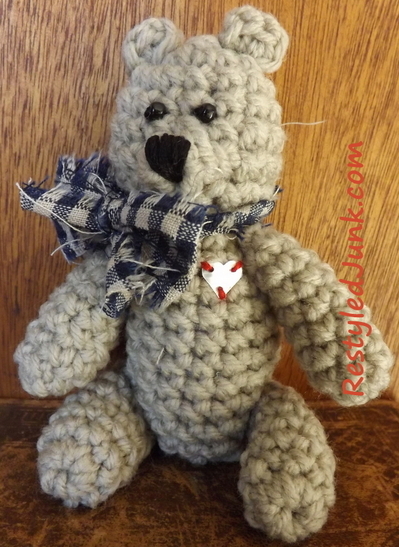
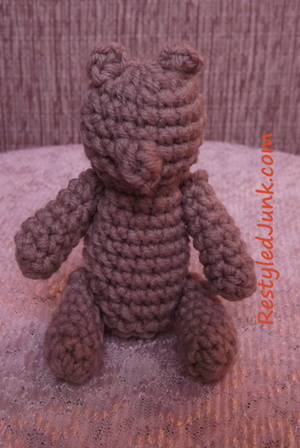
Little ones will fall in love with this mini Teddy Bear Crochet Pattern. The vintage look of this free crochet pattern makes it a true one-of-a-kind creation. This little guy will remind you of your favorite stuffed animals from childhood. Follow this crochet bear pattern and add it to a gift basket before heading out to a baby shower. This is also a great birthday present for a one year old. Baby's received tons of hats, sweaters and blankets, but they toys are often store-bought and generic. Your homemade teddy bear is sure to become a keepsake and a comfort to any upset child. This bear will be saved forever and will turn into a family heirloom.
Primary TechniqueCrochet

Yarn Weight(4) Medium Weight/Worsted Weight and Aran (16-20 stitches to 4 inches)
Crochet HookF/5 or 3.75 mm hook
Materials:
- Tan 4-ply worsted weight yarn
- Crochet hook-size F
- Stuffing
- Scissors
- Yarn needle
- Black and red embroidery floss
- Embroidery needle
- 2 black 4mm beads
- Beverage can
- Household scissors
- 3/8-inch heart paper punch
- Blue and white check homespun fabric, scrap
Abbreviations:
sc=single crochet
pcs=popcorn stitch
sl st=slip stitch
hdc=half double crochet
Instructions:
*Do not join rounds. Work in continuous rounds.
Head and Body
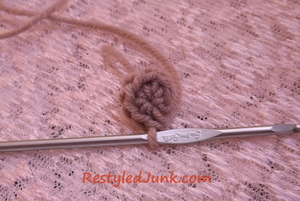
Round 1: Form a magic ring. 8 sc in the ring. Pull the tail to close up the center. (8 sc)
Round 2: 2 sc in each sc around. (16 sc)
Rounds 3-5: Sc in each sc around.
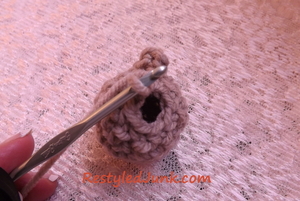
Round 6: 4 dc in first st. Remove the hook and insert in the finished loop of the first dc. Hook the empty loop on the 4th dc and pull through the finished loop of the first dc. Popcorn stitch made. The pcs forms the bear's nose. Sc in the remaining sc around. (1 pcs, 15 sc)
Round 7: Sc in each sc around. (16 sc)
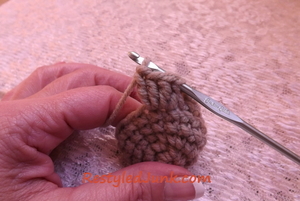
Round 8: Sc in every other sc around. Stuff. (8 sc)
Round 9: 2 sc in each sc around. (16 sc)
Rounds 10-18: Sc in each sc around. Stuff.
Round 19: Sc in every other sc around. (8 sc)
Round 20: Sl st in every other sc around. (4 sl st)
Fasten off and weave in the end.

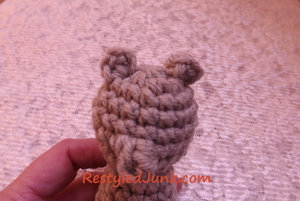
Ears (make 2)
With the nose facing you, sl st to the first round on one side of the head. 3 hdc in the same st. Sl st in the same. Fasten off and weave in the ends. Repeat on the opposite side of the head.
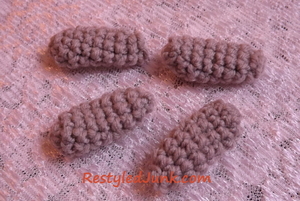
Arms and Legs (make 2)
Round 1: Form a magic ring. 8 sc in the ring. Pull the tail to close up the center. (8 sc)
Rounds 2-8: Sc in each sc around.
Round 9: Sl st in every other sc around. (4 sl st)
Fasten off and weave in the end. Do not stuff the arms and legs.
Finishing
- Thread a yarn needle with tan yarn. Position an arm on each side of the body with the top of each arm just below the neck. Insert the needle 1/2 inch down on one arm, through the body and out through the other arm. Pull the yarn through leaving a 4-inch tail. Insert the needle back through the second arm and out the first. Clip the yarn leaving a 4-inch tail. Tie the tails together in a knot. Weave in the ends and clip off the excess.
- Place the legs on each side of the body with the top of the legs over the fourth round from the bottom of the body. Attach the legs in the same way as the arms.
- Thread an embroidery needle with black floss. Insert the needle through the back of the neck to the front of the head. Attach the bead eyes 1/4 inch above the nose and 1/4 inch apart. Take a couple of whip stitches over the tip of the nose to define the nose. Insert the needle back through the head to the back of the neck. Knot and cut the floss.
- Pierce the side of an empty beverage can using household scissors. Cut off the bottom and the top of the can. Cut the remainder of the can open from top to bottom. Lay the metal out flat. Using a 3/8-inch heart paper punch, punch one heart. Pierce three holes evenly around the heart using an embroidery needle. Pull the needle all the way through to provide a large enough hole for sewing.
- Thread an embroidery needle with red floss. Position the heart on the upper left side of the bear's chest. Insert the needle into the back of the neck to the heart on the front. Stitch the heart to the body through each hole on the heart. Insert to needle back through the body and out the back of the neck. Knot and clip the floss.
- Rip a 1-inch-wide by 15-inch long strip from blue and white homespun fabric. Wrap the strip around the neck and tie in a bow. Trim the ends.
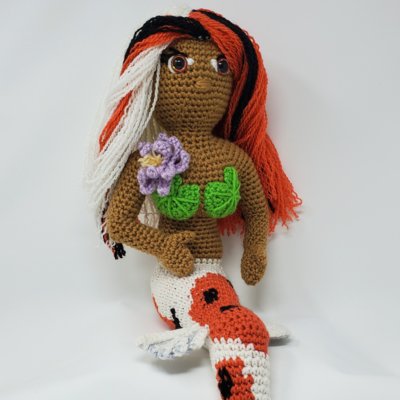
Read NextKoi Mermaid

Thanks for your comment. Don't forget to share!
Morehouse17
Jan 30, 2018
No matter the size, you cannot go wrong with a Teddy Bear. No matter how many new toys hit the market, I know every child has had at least one teddy bear. What better way to express love than to make it yourself. This is a cute one that seems really easy to make.
Delphine Bryant
Jan 27, 2018
So the directions of the mini teddy bear crochet pattern required the use of a beverage can. I was really confused until I read through the directions. The little heart attached to the bear is made from the beverage can. I suppose, I would have purchased heart buttons or better yet, made it from thread. Great idea though.
Crafter 6013
Mar 15, 2015
I just looked at it and plan on making it soon. Thank you for the pattern it is so easy to read and follow
Report Inappropriate Comment
Are you sure you would like to report this comment? It will be flagged for our moderators to take action.
Thank you for taking the time to improve the content on our site.