Daisy Clipboard Chalkboard
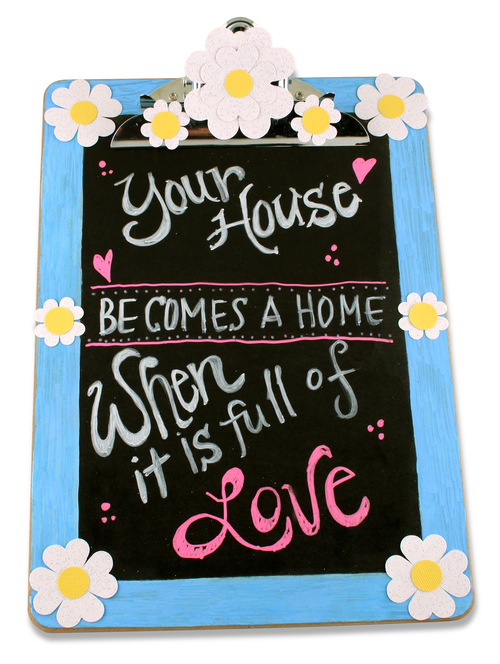
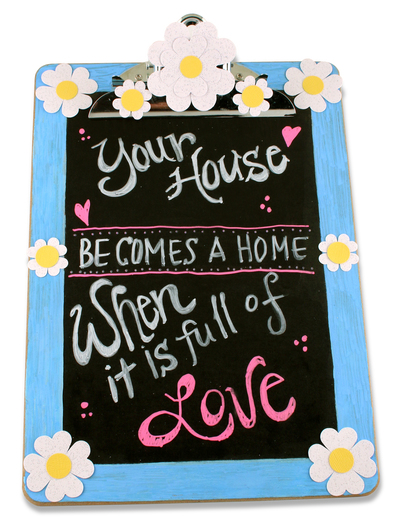
Leave inspirational messages for family and friends with this Daisy Clipboard Chalkboard. Easy to customize and decorate, this clipboard is great for your living room or classroom! Kids can even get in on the fun of making this clipboard. It would make a wonderful teacher's gift and you can make the message on the board say whatever you'd like. Decorate it with sweet spring flowers to help bring a touch of beauty into your home. This is a fun and easy project that kids and adults will love to make.
Primary TechniqueGeneral Crafts

SeasonSpring
You can find this project, and many more, in our new eBook, 13 Spring Crafts: Easter Craft Ideas, Spring DIY Home Decor, and More! Download your own free copy today!
Materials:
- Marvy®/Uchida Easy Chalk Board Marker
- Marvy®/Uchida Bistro Chalk marker jumbo - white
- Marvy®/Uchida Bistro Chalk marker chisel tip - white, fluorescent pink,
- Marvy®/Uchida Clever Lever Craft Punch
- Extra Jumbo, item # LVEJCP– Heart
- Jumbo, item # LVJCP – Heart
- Craft Punch item # LVCP – Heart, Circle
- Marvy®/Uchida DecoAcrylic Marker, item# 315 – light blue
- Core’dination Core Couture Glitter cardstock – white
- Core’dination Cardstock Brights - yellow
- Wood clip board
- Masking tape
- Glue
- Pencil
- Ruler
Instructions:
- Using the ruler, draw a one inch border around your wood clip board with the pencil.
- Put masking tape all around the border to cover it. Make sure the tape is on securely by pressing down hard on the inside edges. This will keep the paint from bleeding into the border.
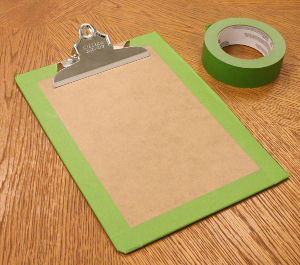
- Paint the middle of the clipboard with the Easy Chalk Board Marker. Let it dry and then apply another coat. For better results, paint a third coat.
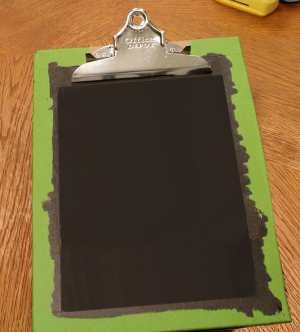
- Once the chalkboard is dry, you will be seasoning the surface. To season the surface, take the white jumbo Bistro Chalk marker and cover the entire chalkboard. Let it dry. Then take a damp cloth and wipe it all off. Now your chalkboard surface is seasoned. Note: seasoning your chalkboard will prevent any ghosting from the chalk markers.
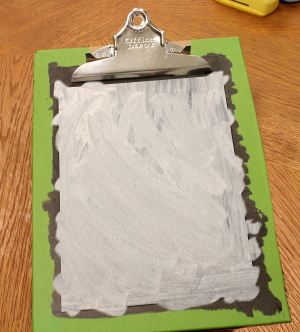
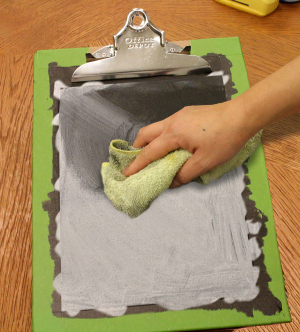
- Now carefully remove the masking tape covering the borders.
- Take your light blue DecoAcrylic marker and paint the borders. Don't worry if it is streaky. It adds to the affect. Let it dry.
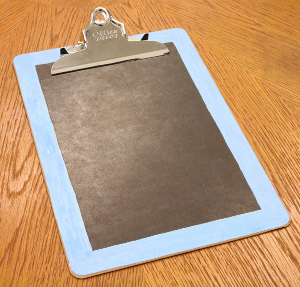
- Flowers for the borders:
- Hearts, white glitter card stock: punch out 4 extra jumbo, 20 jumbo, 16 craft punch
- Circles, yellow cardstock: punch out 9 craft punch circles
- Assembling flowers:
- Large flower – 4 extra jumbo hearts, 4 jumbo hearts, 1 circle
- Place the hearts in a circle with the bottom tip facing in. It will look like a four leaf clover. Add glue to the bottom of the jumbo hearts and glue it between each heart. Then glue the circle in the center.
- Medium flower – 16 jumbo hearts, 4 circles
- Place the hearts in a circle with the bottom tip facing in. It will look like a four leaf clover. Add glue to the bottom of the circle and place it on the center. Repeat steps for the other three flowers.
- Small flower – 16 craft punch hearts, 4 circles
- Place the hearts in a circle with the bottom tip facing in. It will look like a four leaf clover. Add glue to the bottom of the circle and place it on the center. Repeat steps for the other three flowers.
- Place the hearts in a circle with the bottom tip facing in. It will look like a four leaf clover. Add glue to the bottom of the circle and place it on the center. Repeat steps for the other three flowers.
- Now glue the large flower in the center of the clip at the top and add one small flower to each side of it.
- Glue one medium flower to each corner of the clipboard.
- Glue one small flower in the center of the clipboard side and one on the other side.
Celebrate National Craft Month All Month Long!
Read NextFamily Portrait Planters

