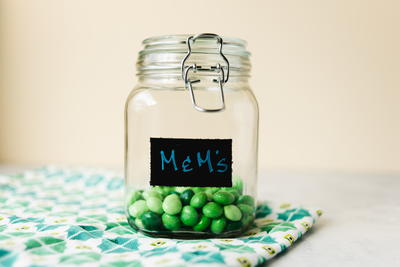
Quick and Easy DIY Label

Looking for a way to organize your kitchen? Try this Quick and Easy DIY Label project to get you started. This super cute and fun chalkboard label craft will make is astonishingly easy for you to sort through your flour, salt, sugar, or anything else you might put into a jar. There is nothing worse than accidentally adding salt to a recipe instead of sugar of vice versa, but this craft video will show you just how easy making your own jar label is so that you never have to worry about that again!
Estimated CostUnder $10
Time to CompleteUnder an hour
MaterialsPaint
Primary TechniquePainting

Project TypeMake a Project
Materials List
- Chalkboard Paint in any color you choose
- Jar
- Foam paint brush
- Painters tape
- Paper plate
How to Create a Chalkboard Label
DIY Jar Label Instructions
-
Make sure you are starting with a clean jar.
-
Use your painting tape to tape off where you want your label to be. When you are pressing the tape onto the jar make sure to really push down on the side of the tape that is where the edge of the paint is going to be to keep it from bleeding through.
Tip: Use a cutting matt or a ruler to make sure your tape line is completely straight. -
Repeat this process with the rest of the sides of whatever shape label you are creating.
-
Read the instructions on the brand of paint you bought.
-
Grab your foam brush and dab it into your paint and begin coating your jar with the paint. Try and use back and forth wiper motions for a smoother paint job.
-
Let that dry, and your chalkboard label is complete!
Tip: Be sure to read the instructions on the paint bottle you purchased for how to prime your chalkboard before you start writing on it.
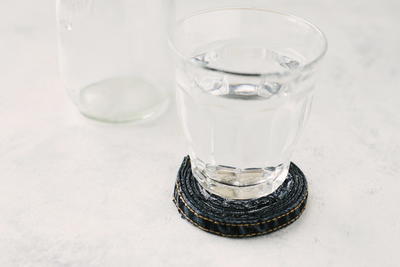
Read NextNo Sew Upcycled Jean Coaster
Your Recently Viewed Projects
Thanks for your comment. Don't forget to share!
Delphine Bryant
Jul 13, 2018
I have never used the chalk board paint. I like the idea of painting on the side of a glass jar but could the paint to applied to other mediums like if I were to use a plastic milk jug?
Morehouse17
Jun 30, 2018
Now how simple was that?! I was not aware until I read this post that the chalk board paint came in other colors. I love to recycle glass jars and what a quick and easy way to indicate the contents!
EditorLP
Apr 26, 2017
Chalkboard labels like this can be so pricey, but they are undeniably handy. I've tried this freehand and will definitely be using painter's tape for crisper lines next time I try this project.
bustedinnc 0512678
Jan 27, 2017
Could you use some scrap-booking frames and a temporary adhesive for different shapes? I've never used chalkboard paint, is it washable? I never would have thought to use a mat underneath to align them. I want to make a set for a housewarming gift, or baby shower. How sweet, with some ribbon and bows.
EditorLP
Apr 26, 2017
I've made a few of these jars and I don't think chalkboard paint is dishwasher safe, but I hand wash the jar and can just use a damp rag or paper towel to clean off the old chalk. If you do make this project, be sure to buy chalkboard paint made for glass, otherwise it will not stick on the glass!
flowergirl
Jan 22, 2017
I love this idea! Its super cute plus it adds a stylish touch to your kitchen while being very cost effective. Anyone who walks into your kitchen will feel like they're in their favorite coffee shop. I love it when my recipes turn out wonderful because I didn't accidentally put coffee into my chocolate milkshake.
Marilyn B
Jan 14, 2017
This chalk board paint project is really trendy! I have seen it used on kitchen cupboard doors and even sections of walls! Why not add it to jars in the kitchen! Easy erase to change when contents do! I could see this for sewing supplies, beads, nails in the tool box, for easy identification! Clever and practical and also decorative!
Report Inappropriate Comment
Are you sure you would like to report this comment? It will be flagged for our moderators to take action.
Thank you for taking the time to improve the content on our site.