
This project was submitted by one of our readers, just like you.
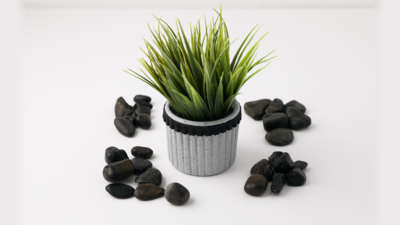
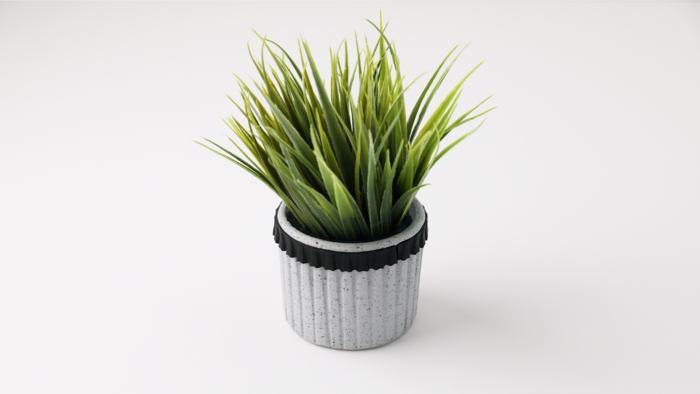
Original Sculpey® And Liquid Sculpey® Fluted Planter

Original Sculpey And Liquid Sculpey Fluted Planter
"Create this great little planter in just about an hour. Add a real or artificial plant and you have a great home accessory for yourself or give it as a great gift! It's easy to create using the Original Sculpey Granite in the 1lb package, and you'll be pleased with the impressive results when you finish this project. Who would you give this gift to? It's easy enough to create one for yourself, as well! Try it today!"

Materials List
- Original Sculpey® 1 lb Granite
- Sculpey Tools™ 8-Inch Acrylic Clay Roller
- Sculpey Tools™ Clay Blades
- Sculpey Tools™ Etch 'n Pearl
- Liquid Sculpey® Black 1 oz
- Small glass vase approximately 3”-4” tall
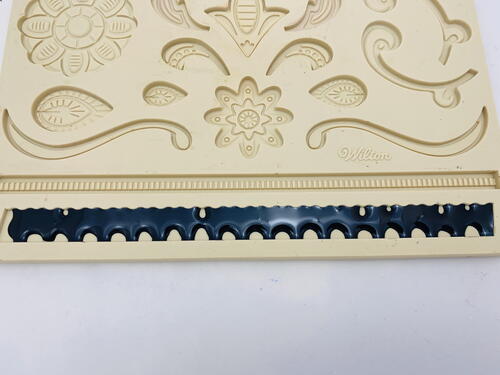
- Fondant mold with thin strip design
- Scissors
- Rubber band
Getting Started:
Please make sure your work area is covered and you are not working on an unprotected surface. We recommend working on the Sculpey® Oven-Safe Work Mat, wax paper, metal baking sheet, or disposable foil. Uncured clay may damage unprotected furniture or finished surfaces. Be sure to cover your crafting area appropriately.
Start with clean hands, unwrap and knead clay until soft and smooth, or condition by running clay though a Pasta Machine. We recommend using a designated machine for clay purposes only. When working with multiple colors, clean hands with soap and water or baby wipes (we have found that baby wipes work best) before switching colors. Shape clay, pressing pieces firmly together. Wash hands after use.
Baking:
Begin by preheating oven to 275 °F (130 °C). After you are done creating; for best results bake clay on an oven-proof surface such metal, aluminum foil, an index card or the Sculpey® Clay Mat at 275°F (130 °C) for 15 minutes per 1/4" (6 mm) thickness according to package directions. Oven safe glass or ceramic surfaces are also acceptable for baking; however please note that the baking times may take longer as the glass or ceramic surfaces take longer to heat up. For best baking results, use an oven thermometer. DO NOT USE MICROWAVE OVEN. DO NOT EXCEED THE ABOVE TEMPERATURE OR RECOMMENDED BAKING TIME.
Instructions
-
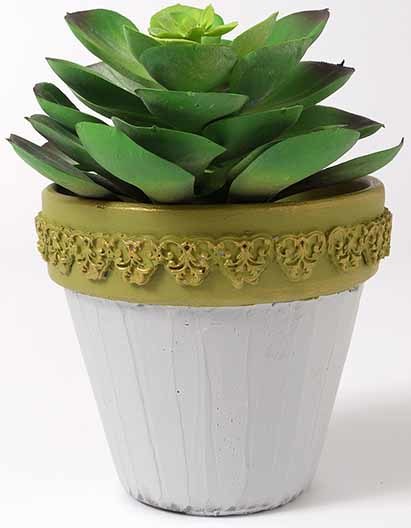
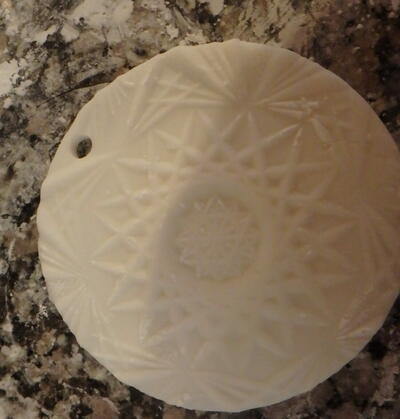
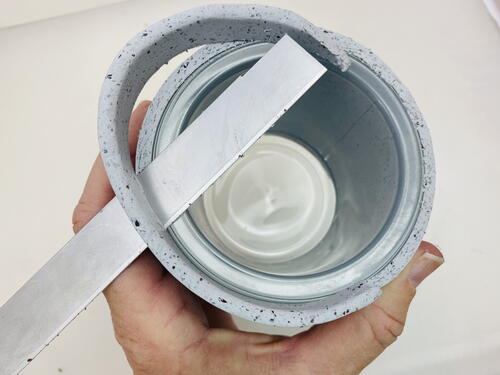
We will make the decorative strips that go around the top edge of the vase first. Stir Black Liquid Sculpey® well before using. Select a silicone mold that has a narrow and thin design. Fill the design with a layer of Black Liquid Sculpey® (LS). Tap the mold several times to release air bubbles. Then fill the mold to level with more Black LS and tap again.
Bake the mold following the baking instructions for LS. Allow to cool completely before handling. While the mold is baking you can go ahead and start on the next steps for wrapping the glass vase with Original Sculpey.
After making one of the Black molded pieces, I de-molded it by peeling it out of the mold. Then I made a second one to make sure I had enough of the design to go all the way around the vase. -
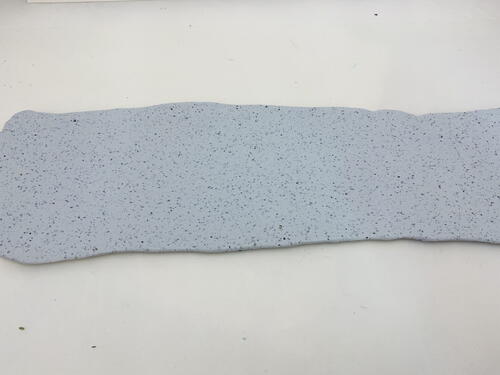
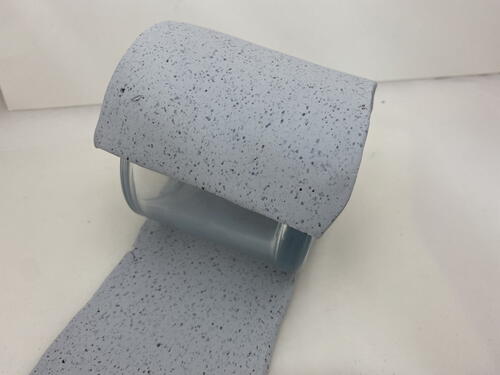
Roll one half package of Original Sculpey Gray Granite to a thick sheet that is large enough to completely wrap around the vase one time.
-
Cut a straight edge along one of the short ends of the clay sheet. Starting with the straight edge first, wrap the clay around the glass vase.
-
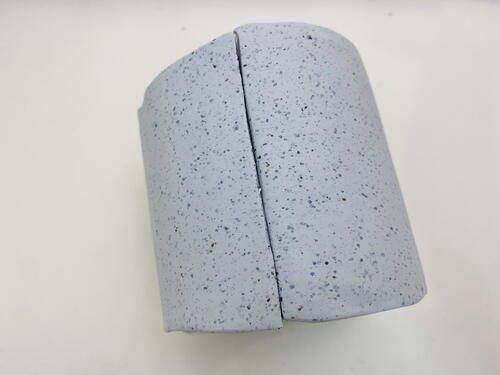
Trim the sheet so that you can butt the ends of the clay together in a straight seam. Press the clay to the glass as tightly as possible, pressing air bubbles out from between the clay and the glass. Smooth the seam with your fingers
-
Trim away excess clay from both the top edge and the bottom of the vase with a Clay Blade.
-
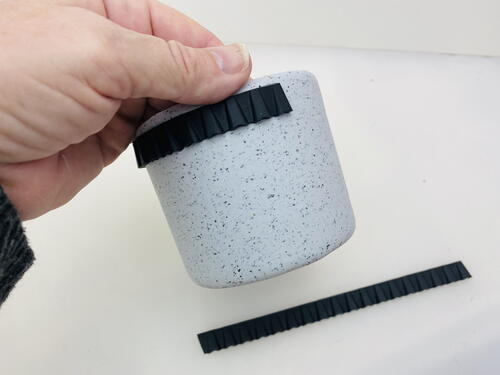
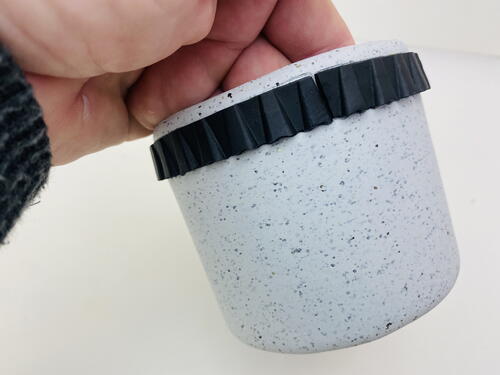
Now it’s time to wrap the top edge of the vase in the Black LS pieces that we made in Step 2. Position the first one about 1/4” away from the top edge. Wrap it as far around as possible. Apply pressure to the molded piece so that it sticks to the Sculpey®. One of the molded pieces was not long enough to go all the way around the vase, so I made two of them.
-
Next wrap the second piece around the vase butting it to the first piece and trim the end with scissors so that you have one continuous design going all the way around.
-
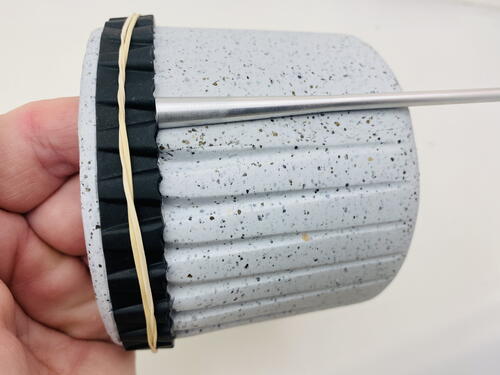
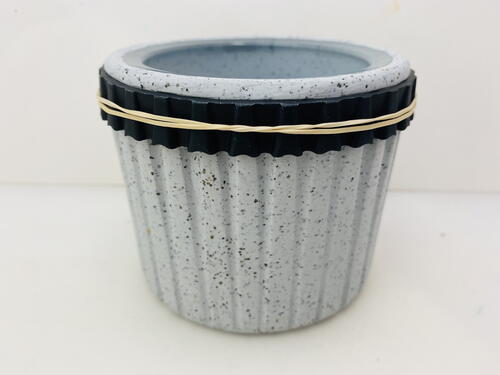
To keep the LS pieces firmly in place, I carefully wrapped a rubber band around the outside of the design.
-
Insert your hand inside the vase so that you could hold it sideways. Then use the Large Etch ‘n Pearl to emboss a fluted pattern from the LS design to the bottom.
Line the large end of the Etch ‘n Pearl up to the LS design and then press all along the tool to emboss a line in the clay. -
Repeat the lines all the way around the vase.
-
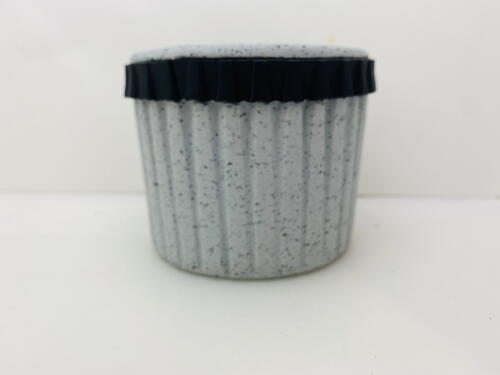
Before baking the vase, make sure the top and bottom edges are still very smooth. Cure any inconsistencies with your fingers. Bake the vase following the baking instructions for Original Sculpey and allow to cool completely before handling.

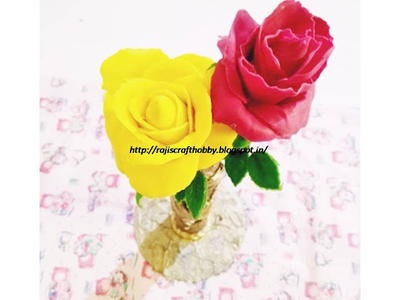
Read NextThai Clay Rose