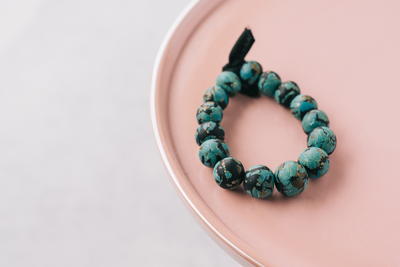
How to Make Faux Turquoise Beads

Creating your own beads seems like it would be extremely complicated. However, this How to Make Faux Turquoise Beads is a great video tutorial to show you just how easy it is to make a stunning marbled bead. Plus, this DIY bead tutorial is showing you how you can make a great knock off for a very expensive turquoise bead. You can use this wonderful clay craft to make beads, pendants, bowls, or anything you think this turquoise pattern will look amazing on!
Estimated Cost$11-$20
Time to CompleteIn an evening

Project TypeMake a Project
Materials List
- 1/4 of a block of Polyform Clay in turquoise
- 1/32 of a block of Polyform Clay in white
- 1/32 of a block of Polyform Clay in Wasabi
- 1/32 of a block of Polyform Clay in antique gold
- Polyform Clay in black
- One piece of gold leaf paper
- Razor
- Clay matt
How to Make Faux Turquoise Beads
How to Make Faux Turquoise
-
Mix your turquioise, white, and wasabi clay up into a ball with your hand. However, stop way before the clay become a new color.
-
Place the antique gold block on top of your new clay mixture, take your razor and begin randomly chopping up your clay.
-
Take your gold leaf sheet and place it over the top of your newly chopped clay pile.
-
Work the gold leaf sheet into your clay by pressing it down into all of the crevices. Remove any of the excess gold leaf sheet once you have finished tapping it in.
-
Take your polymer clay and roll it into a thin square shape. (In the video she ran it through her pasta machine one the 4th thickest setting).
-
Lay your black sheet on top over the gold leave and begin tapping that clay in a similar fashion as you did with the gold leave.
-
Using your blade cut through into your clay in a random fashion. Don't cut all of them all the way across, but instead, make some come in from the side.
-
Push it all together againa nd flatten the top.
-
Have some filler color ready to go, we used a rod of black for this tutorial.
-
Roll your rod of filler color from large to small if you would like to make different sized beads.
-
Cut your rod into different sections, and roll each section roll into a ball.
-
Horizontally slice through your slab of the turquoise mixture, taking thin slice until your beautiful turquoise is revealed.
-
Once you find a piece that you like take that and begin wrapping it around your bead.
-
Once the ball is covered with the turquoise as much as you would like, roll it in a ball to smooth out all the edges.
-
Poke a hole through your bead so that you can string it later. Poke through both sides to create an even sized hole.
Tip: Be sure that the hole you are creating will accomodate the string you will be putting the bead on. -
Repeat steps 12-15 until you have made all of your beads.
-
Position your beads on a bead baking rack so that they can be held up and not get any shiny spots.
-
Once your beads are out of the oven and cooled down you can go ahead and string them up into your jewelry pattern.
Read NextFresh Faced Bookend
Your Recently Viewed Projects
Thanks for your comment. Don't forget to share!
Weberme
Apr 02, 2017
What a great looking bracelet and I love the teal,black,wasibi and gold together. How very pretty. I saw this before as the tutorial but not with the video. The video cleared up a lot of questions I had and I think it is done beautifully and now I see how it is suppose to be done. I have never made beads out of polyform before but I think I can do it now. I like that you can make these beads any color you want and any size you want to make a very pretty necklace or bracelet and maybe even some earrings. This will make a great gift too.
ridiculosity 67303 43
Mar 20, 2017
Really great look. Interesting technique. Understandable presentation. Strong desire to win goodies! #NationalCraftMonth2017
Sue LD
Mar 17, 2017
I like the colors you used to make the turquoise.. #NationalCraftMonth2017
tracee
Mar 16, 2017
This looks really good. When I try to mix colors, they tend to lump in chunks of color rather than blend seamlessly. #NationalCraftMonth2017
Ma1030
Mar 16, 2017
I've always loved the look of turquoise, I tried making it before and it didn't come out right, time to try again, with your recipe.#NationalCraftMonth2017
RhiRowland
Mar 16, 2017
That's great! I love the turquoise look, so I am a fan! #NationalCraftMonth2017
Report Inappropriate Comment
Are you sure you would like to report this comment? It will be flagged for our moderators to take action.
Thank you for taking the time to improve the content on our site.