This project was submitted by one of our readers, just like you.
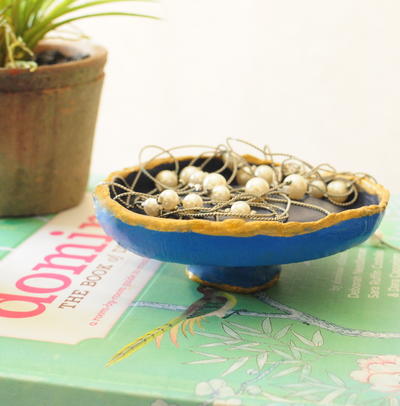
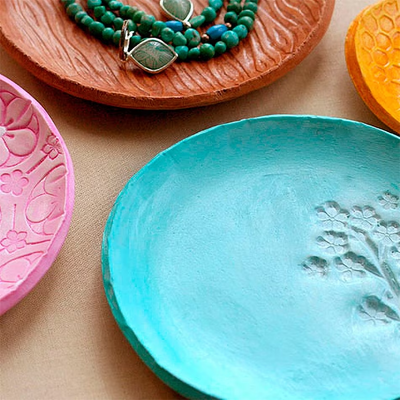
Marbled Bowls with Glitter

Marbled Bowls with Glitter
From the Designer: "Marble clay to make mini bowls perfect for jewelry. Finishing them with glitter adds a little something special. These make great gifts and are easy enough for kids to make! Mix different colors of clay to create gorgeous effects within the bowl. Your favorite colors can combine in a one of a kind creation in just minutes. You can also add liquid leaf to finish off the edge and give your projects even more sparkle!"
MaterialsClay

Project TypeMake a Project
Materials List
- Sculpey Souffle Clay in three colors
- Clay tools
- Testors Intense Glitter Brilliance
- Plaid Liquid Leaf
- Paint brush
- Oven
- Mason jar ring or small oven safe bowl
Instructions
Video Tutorial:
-
Start with three colors of clay. About 1/3 of a block for the first color, 1/4 of the block for the second color, and a small pinch for the third.
-
Flatten these pieces into a round circle and stack.
-
Flatten slightly then cut into four strips with the plastic knife tool. Stack these strips.
-
Roll this piece into a ball and then flatten once again.
-
To get maximum marbling, flatten again and cut into four strips. Stack the strips.
-
Roll once again into a ball then flatten once more. This time flatten enough to get your circle to create the bowl.
-
To make a bowl with a ruffled edge, use a wide mouth mason jar ring. Use the outer edge to cut a circle. Take this circle and put into the inner ring making the ruffles as you go. Use the mason jar ring to hold the bowl in place as it bakes according to the package directions.
-
To make a simple bowl shape with no ruffles, you the outer edge of a small oven safe bowl to cut a circle. Drape the circle over the back of the bowl and smooth out. Bake according to the package directions.
-
Once baked and cooled, finish the inside of your bowl with one coat of the glitter paint.
-
Then finish the edge if desired with the liquid leaf. Allow everything to dry and give as a gift or keep for yourself.

Read NextDIY Clay Jewelry Dish