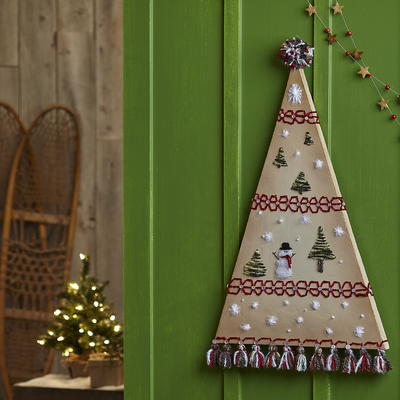
Scandinavian Tree

Make this Christmas a DIY Christmas with this Scandinavian Tree decoration from Floracraft. This gorgeous tree is made of craft foam, but you would never know it. The quality of this foam gives this tree a very professional look. This tree has such a beautiful, rustic, European design it looks like it could have been passed down for generations. This tree would be stunning above a mantle or hanging on a door. This tree would also make a perfect DIY Christmas gift for friends or family.
HolidayChristmas
Materials List
- FloraCraft Make It: Fun Foam Sheet 1" x 12" x 36"
- ( 2) FloraCraft Smooth Finish®
- Design Master® Tint It™: Sepia
- Acrylic Paint: Cream
- Chunky Yarn: Assorted Holiday Colors
- Thin Yarn: Brown
- Buttons: Assorted Sizes Cream or White
- Toothpicks
- Make It: Fun® Foam Tools
- Low-Temp Glue Gun
- Scissors
- Pallet Knife
- Flat Paint Brush
- Serrated Knife
- Fine Sandpaper
Project Instructions
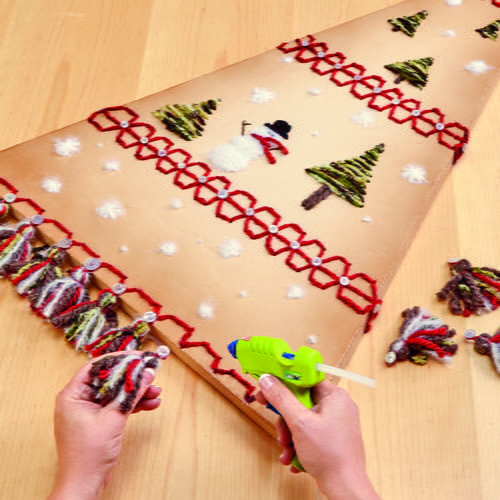
-
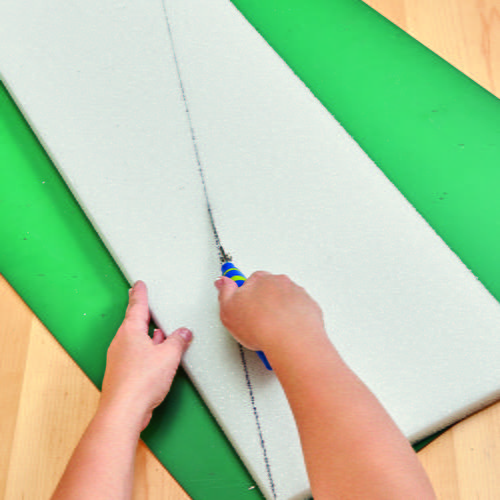
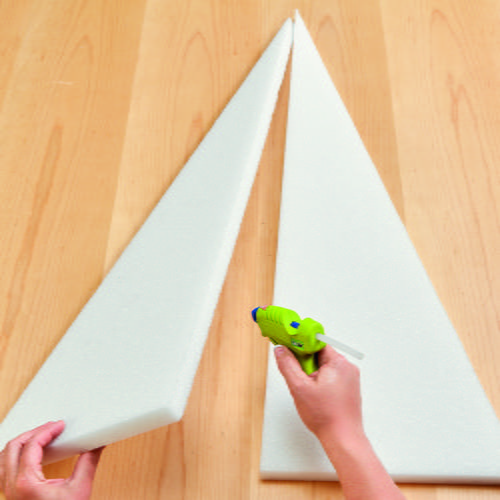
Draw a straight line from opposite corners across the length of the sheet. Cut the sheet in half. Lay the two halves together along the factory edges to create the tree shape. Glue the pieces together. Insert toothpicks in between for a stronger hold.
-
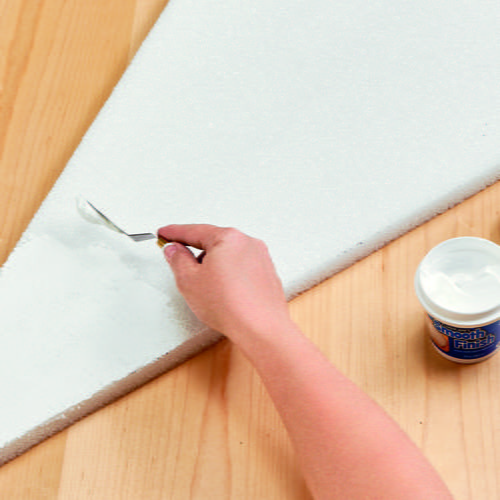
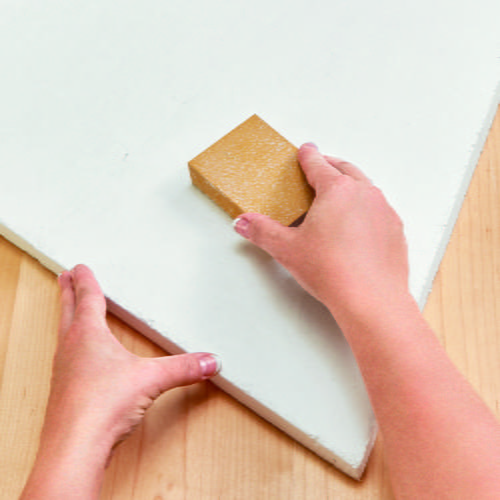
Use the pallet knife to apply an even coat of Smooth Finish® to the front and sides of the tree. Let dry and sand lightly to smooth as needed. Apply a second coat. Let dry and sand smooth.
-
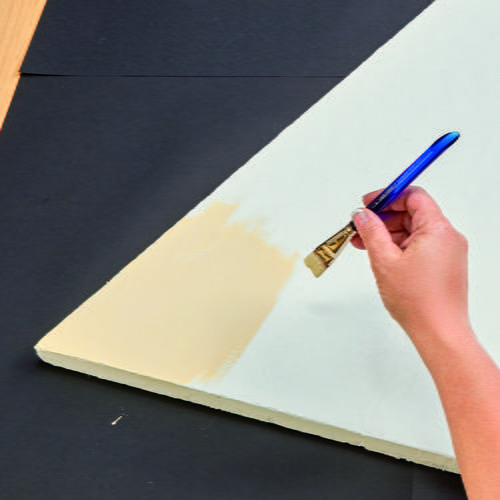
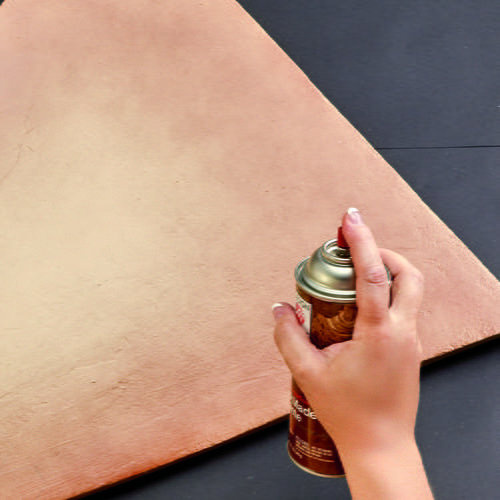
Brush on a coat of cream paint and let dry. Spray Tint It™ Sepia around the outside edges of the tree. Apply heavier coverage towards the outside edge to create an aged look. Let dry.
-
Draw your desired design in pencil on the tree. Draw very lightly so you do not indent lines into the tree. Lay the end of the yarn at the beginning of the design. Use the tuck tool to tuck the end of the yarn into the foam. Do not push the tuck tool in very far or you will create too big of a hole. If the yarn doesn’t stay when you remove the tool, tuck in a little more until it stays. Follow the stitching along the design, tucking the yarn for each stitch. Zigzag stitch the yarn back and forth within a shape to fill in solid with yarn.
-
Make a large pompom from all the yarn colors and glue to the top of the tree. Make several small tassels from the yarn and glue them hanging from the bottom of the tree. Embellish the tree with buttons

Celebrate With More Christmas Craft Ideas
If you loved creating the Scandinavian Tree, you're sure to enjoy these other festive Christmas craft projects:
1. Handmade Paper Snowflakes: Add a touch of winter wonderland to your home with handmade paper snowflakes. All you need is white paper, scissors, and a dash of creativity. Cut out intricate designs and hang them from your ceiling or tape them to your windows for a beautiful snowy effect.
2. Felt Christmas Ornaments: Create your own personalized Christmas ornaments with felt and a few embellishments. Cut out shapes like Christmas trees, stars, or snowmen and then decorate them with beads, sequins, and embroidery floss. These ornaments make great gifts or can be used to decorate your own tree.
3. DIY Christmas Wreath: Put your crafting skills to the test by making a one-of-a-kind Christmas wreath. Use a wire wreath form as a base and then attach various elements like pinecones, berries, and ribbons. You can also add in some personal touches like miniature ornaments or wooden cutouts. Hang your wreath on your front door to welcome guests with holiday cheer.
We hope you enjoy these Christmas craft ideas as much as you did creating the Scandinavian Tree. Happy crafting!