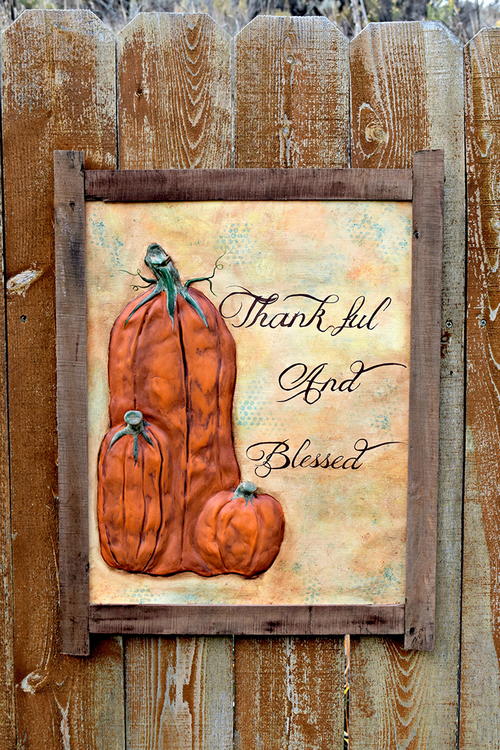
Thankful and Blessed Harvest Pumpkin Sign

Autumn crafts for adults have never looked lovelier. Create a Thankful and Blessed Harvest Pumpkin Sign to welcome guests to your home. This gorgeous wooden Thanksgiving sign works for the holiday of thanks as well as the entire fall season. Learn how to add dimension to your sign with paper clay for a base. The painting techniques used in this tutorial are absolutely beautiful. The pumpkins have lovely texture and the background is painted with beautiful soft fall colors. The script for "Thankful and Blessed" is so pretty and seems to just announce fall. Last, the wood frame is a stunning rustic touch! If you're looking for a new fall decoration to make, give this beautiful sign a try.
Time to CompleteWeekend project
Primary TechniquePainting
SeasonFall
HolidayHalloween
Project TypeLearn a Technique
Materials List
- Testors Craft Paint in French Vanilla, White, Orange, Stop Sign, Ruby, Avocado, Turquoise, Sunshine, Earthy, and Brownie
- 1 – 16” X 20” Wood Panel
- 1 – Pack of Creative Paperclay®
- Gesso
- Testors Paint Brushes
Instructions
-
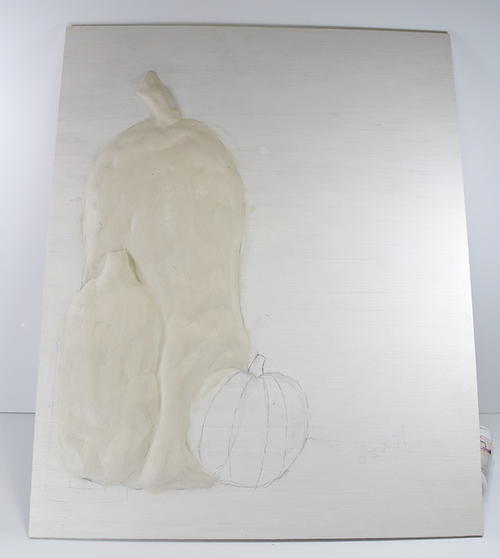
Lightly sand board and apply gesso to whole board and let dry.
-
Sketch out your design onto board.
-
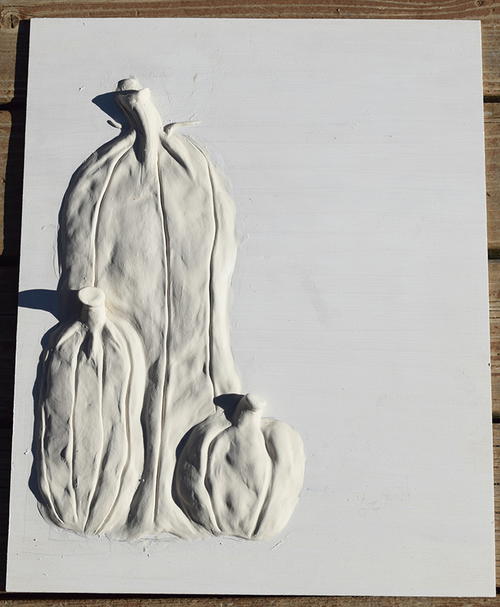
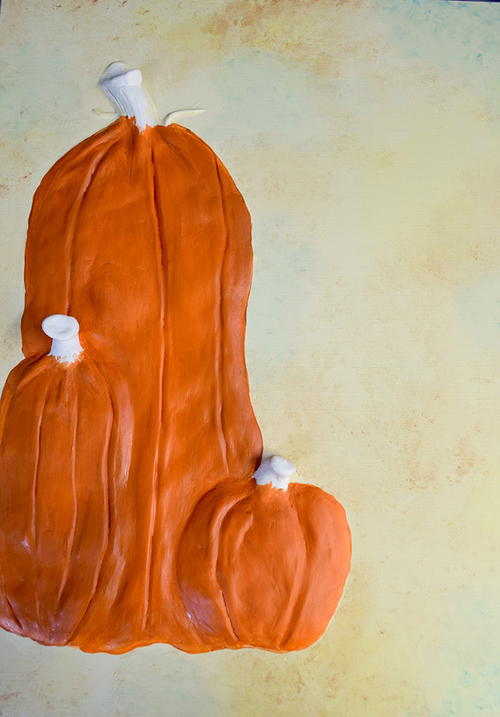
Start applying Creative Paperclay® to fill in design.
-
Once filled in start to add details. Stems, lines, bumpy areas. Let dry.
-
Once dry, if any cracks occurred fill them. You can learn more about Creative Paperclay® here at www.creativepaperclay.blogspot.com
-
Lightly sand pumpkins with a fine sandpaper and dust off.
-
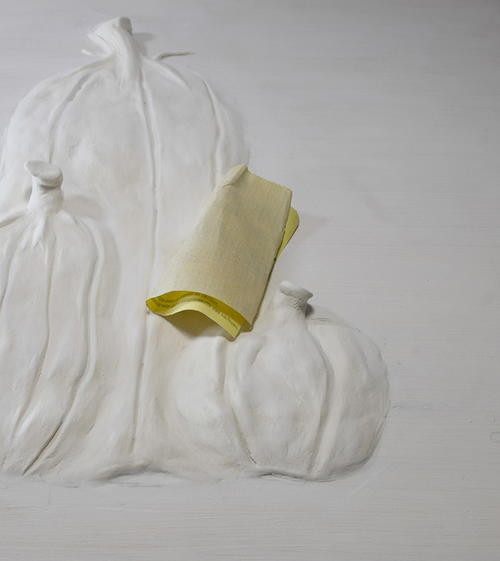
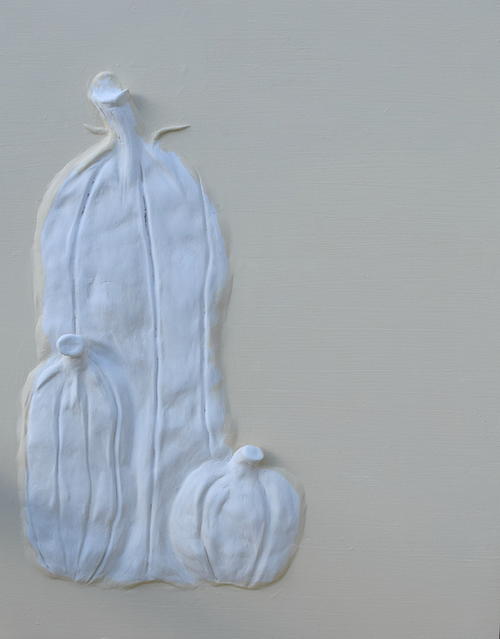
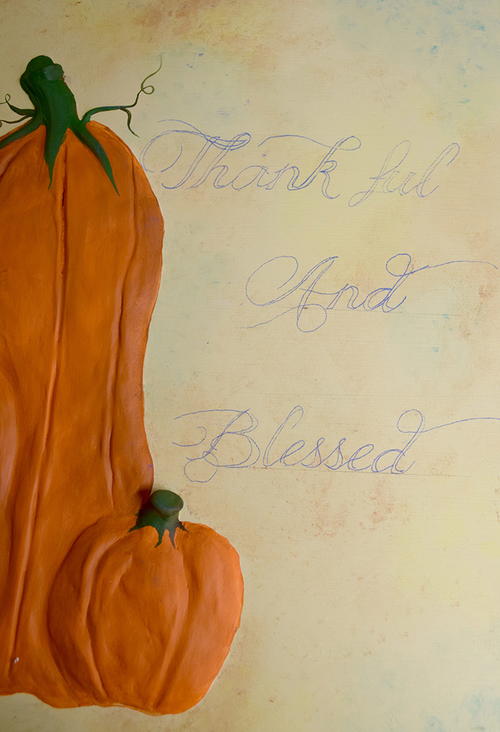
Paint background with a basecoat of French Vanilla. Start layering colors over the French Vanilla using stencils, pouncing paper towels into paint and then onto board. Paint pumpkins Orange and stems Avocado.
-
Using your handwriting or computer generated letters transfer saying onto board using Saral transfer paper.
-
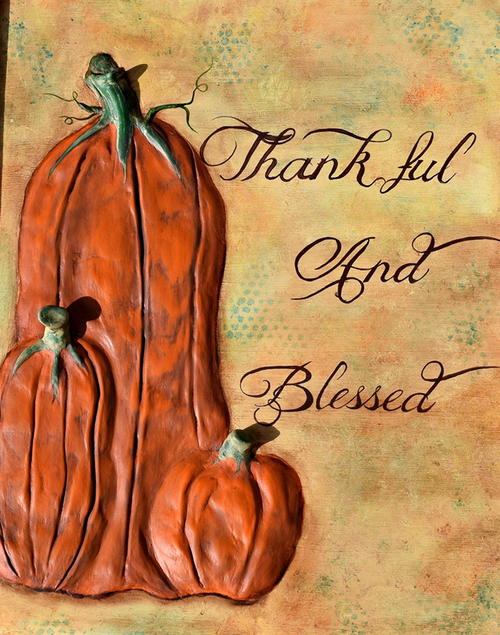
Paint saying using the color Brownie.
-
Add shading to pumpkins and stems, add more color to background as desired.
-
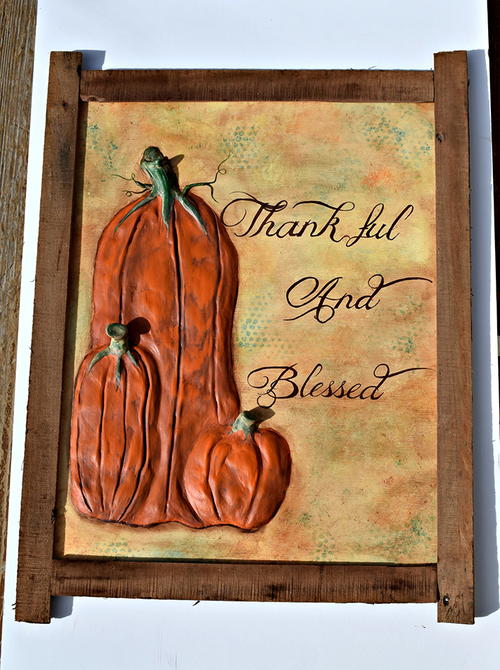
Frame – optional. I used cut down pallets to frame for a more rustic look.
-
Varnish with your favorite varnish.

Read NextDIY Toilet Paper Pumpkins
Your Recently Viewed Projects

Thanks for your comment. Don't forget to share!
Keithana Bradleigh
Oct 18, 2017
I love this, going to make it this weekend! Like that I can use it for both Halloween and Thanksgiving decor.
Report Inappropriate Comment
Are you sure you would like to report this comment? It will be flagged for our moderators to take action.
Thank you for taking the time to improve the content on our site.