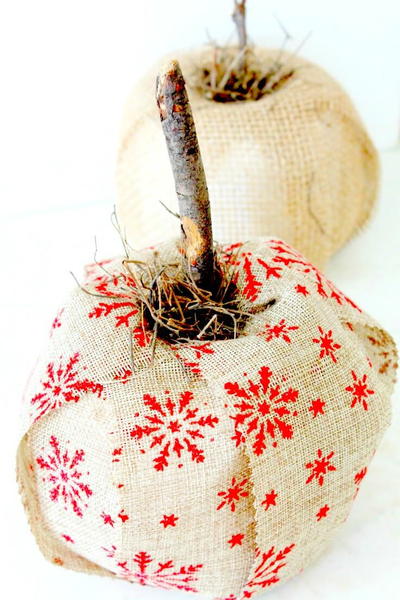
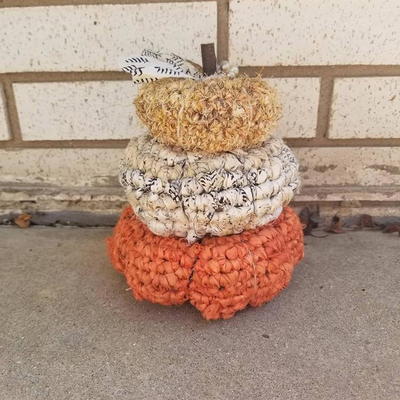
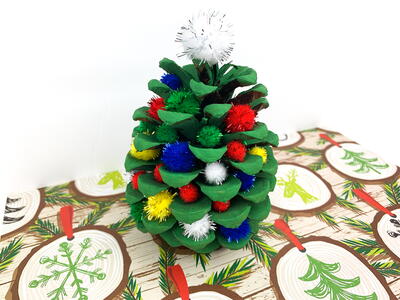
Rustic Ribbon Crochet Pumpkin Stack
This crochet pumpkin pattern is shabby chic and so lovely!

Learn how to crochet pumpkins that stack on top of each other for your new favorite entryway decoration! These pumpkins are taken to the next level with the unique yarn used to make them. Worked up with sari ribbon, this Rustic Ribbon Crochet Pumpkin Stack is the perfect autumn decoration for Halloween, Thanksgiving, or to keep on display for the entire fall season. The different colors used make this a dynamic decoration that's as fun to crochet as it is to display. If you love the rustic aesthetic of these pumpkins, definitely give this project a try today!
NotesPattern Notes: This pattern is worked in a spiral. Do not join unless instructed to. Each pumpkin is worked separately and then attached together in a stack.

Materials List
- 1 skein of Neon Sari Silk Ribbon (Large Pumpkin)
- 1 skein of Block Printed Sari Silk Ribbon(Medium Pumpkin)
- 1 skein of Banana Fiber (Small Pumpkin)
- Hook L/11 8.00mm
- Hook K/10.5 6.50mm
- Hook J/10 6.00mm
- Stuffing
- Scissors
- Yarn Needle
Instructions
Are you ready for fall? Decorate your home with a Darn Good Pumpkin Stack made from our Sari Silk Ribbon and Banana Fiber.
Large Pumpkin
-
Rnd 1: Make a magic ring, sc 6 in magic ring
-
Rnd 2: sc 2 in ea st (12)
-
Rnd 3: sc in next st, sc 2 in next st, rep (18)
-
Rnd 4: sc in next 2 sts, sc 2 in next st, rep (24)
-
Rnd 5: sc in next 3 sts, sc 2 in next st, rep (30)
-
Rnd 6: sc in next 4 sts, sc 2 in next st, rep (36)
-
Rnd 7-9: sc in ea st (36)
-
Rnd 10: sc in next 4 sts, dec, rep (30)
-
Rnd 11: sc in next 3 sts, dec, rep (24)
-
(begin to stuff the pumpkin)
-
Rnd 12: sc in next 2 sts, dec, rep (18)
-
Rnd 13: sc in next st, dec, rep (12)
-
Rnd 14: dec in ea st (6)
-
(finish stuffing the pumpkin)
-
Finishing Instructions: Tie off leaving a long tail for sewing and shaping. Grab your needle and use the yarn tail to weave in and out of the last 6 sts and cinch shut.
To form the lines, take your needle (with your yarn tail) and feed it from the top through the center and out of the bottom of the pumpkin. Bring your needle back up to the top and feed it through again. Gently tug in the yarn to shape this section of the pumpkin. Repeat for each section. I normally do 8 but you can do more or less. After you have completed your last line, secure with a knot at the bottom. (I work mine as close to the center as possible.) Then just weave in your yarn tail.
Medium Pumpkin
-
Rnd 1: Make a magic ring, sc 6 in magic ring
-
Rnd 2: sc 2 in ea st (12)
-
Rnd 3: sc in next st, sc 2 in next st, rep (18)
-
Rnd 4: sc in next 2 sts, sc 2 in next st, rep (24)
-
Rnd 5: sc in next 3 sts, sc 2 in next st, rep (30)
-
Rnd 6-8: sc in ea st (30)
-
Rnd 9: sc in next 3 sts, dec, rep (24)
-
(begin to stuff the pumpkin)
-
Rnd 10: sc in next 2 sts, dec, rep (18)
-
Rnd 11: sc in next st, dec, rep (12)
-
Rnd 12: dec in ea st (6)
-
(finish stuffing the pumpkin)
-
Follow the finishing instructions from the large pumpkin.
Small Pumpkin
-
Rnd 1: Make a magic ring, sc 6 in magic ring
-
Rnd 2: sc 2 in ea st (12)
-
Rnd 3: sc in next st, sc 2 in next st, rep (18)
-
Rnd 4: sc in next 2 sts, sc 2 in next st, rep (24
-
Rnd 5-7: sc in ea st (24)
-
Rnd 8: sc in next 2 sts, dec, rep (18)
-
(begin to stuff the pumpkin)
-
Rnd 9: sc in next st, dec, rep (12)
-
Rnd 10: dec in ea st (6)
-
(finish stuffing the pumpkin)
-
Follow the finishing instructions from the large pumpkin.
Joining the Pumpkins
-
Cut a piece of yarn approx 24 in long. Starting with the large pumpkin, feed the yarn through the center from bottom to top. Do the same with the medium and small pumpkins. Go back through the top of the small pumpkin in a different area near the center. Feed the yarn through the medium and large pumpkins. Repeat these instructions once more. Secure at the bottom of the large pumpkin and weave your ends.
-
Add a craft stick or twig on top of the small pumpkin for a stem. Embellish as desired.
Abbreviations
- rnd
- round
- sc
- single crochet
- ea
- each
- rep
- repeat
- st(s)
- stitch(es)
- dec
- decrease
Contest Rules:
- There is a maximum of one extra entry per person. The extra entry will be based upon a comment left on this post. Duplicate comments are not tallied.
- The winner will be selected at random from the comments on this page and the entries on the contest page.
- The winner will be contacted on the morning of November 19th, 2018.
- Email Address provided in their account (please do NOT leave your email address in the comments--you already provided it when you created your account)
- You have until November 18th, 2018 at 11:59pm EST to leave your comment on this post. Comments posted after that will not be counted.
- Contest open to anyone 18+ in US and/or Canada. Excludes Quebec and Puerto Rico.
Where would you display this adorable pumpkin stack?
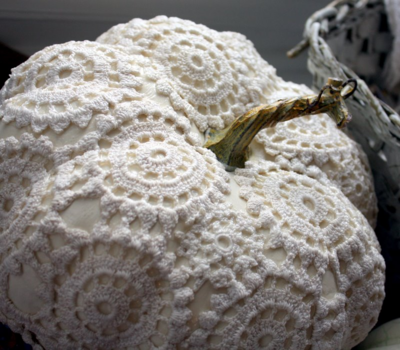
Read NextVintage Doily Pumpkins
Your Recently Viewed Projects
Thanks for your comment. Don't forget to share!
kimlennie 9336847
Nov 09, 2019
I would place them outside by my front door for everyone to see and enjoy.
clsteinbeck 1969
Nov 12, 2018
I would use this as a centerpiece on my dinning table. It is just beautiful!
Knittingdancer on Ravelry
Nov 08, 2018
I would display this stack of pumpkins on my mantle or my hearth depending on the size of it.
ridiculosity 67303 43
Nov 05, 2018
This would look cute in a lot of places, but I think around my place, the patio table would be the best spot.
aketch
Nov 05, 2018
This would look great by my front door. My door is green blue and a nice contrast would be created with the orange pumpkin. The other pumpkins would complement my creamy yellow brick.
princess6860504
Oct 23, 2018
Where would I display this rustic ribbon pumpkin stack? On the front porch, covered porch on my kitchen counter even in my foyer on the buffet table. What makes this trio of pumpkins special is the premium silk yarn that is used! I say, don't skimp on the yarn with this one!
Report Inappropriate Comment
Are you sure you would like to report this comment? It will be flagged for our moderators to take action.
Thank you for taking the time to improve the content on our site.