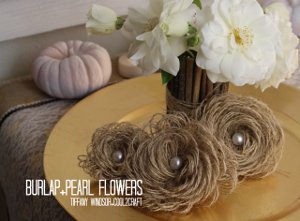
Chic Burlap and Pearl Flowers
If you're looking for subtle fall decorations, then check out these Chic Burlap and Pearl Flowers. These burlap flowers are the perfect way to add an autumn accent to your DIY home decor without wrecking that simple and chic vibe you've worked hard to accomplish. Create a few and scatter them across your mantel or group them together in a fall tablescape. Full of rustic charm, these are the perfect way to get your home ready for autumn.
Materials:
- Burlap by the yard
- Scissors
- Ruler
- Aleene’s Original Tacky Glue
- Pearl stickers (or pearl finish buttons)
- Optional – 18 gauge stem wire or wooden skewers (for flower stems)
Instructions:
-
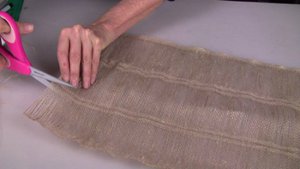
Most burlap yardage is stitched along the sides to keep it from unraveling. If your burlap in stitched, cut away stitch line with scissors.
-
Cut burlap into 20″ width.
-
Measure and mark at 4″ intervals (for large flowers), 3″ intervals (for medium flowers) and 2-1/2″ intervals (for smaller flower).
-
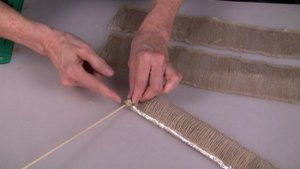
Find one thread at mark line and pull out completely. (Set aside to use for twine accents.)
-
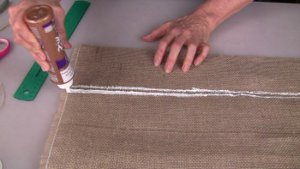
Apply glue along each side where you have removed the thread. Spread glue wide enough to cover two rows of burlap threads. This will help to keep burlap from unraveling during next step. Let glue dry completely.
-
In this next step, you will need to pull out all the threads between your glue lines. Just pull out each thread one-by-one (and set those threads aside for another project).
-
Once you have removed the threads, you can now cut the burlap apart between the glue lines. You should now have several pieces that will be used to create individual flowers. Please note that if you want smaller, less bulky flowers, you can cut your 20″ pieces into 10″ pieces.
-
Apply glue along one long edge of burlap strip. Fold over to glue the two straight edges together. You should now have a looped edge and an edge with two layers.
-
You are now ready to start rolling the burlap strip. Apply glue along the straight edge. If you are creating a flower on a stem, you will want to lay the wire (or skewer) perpendicular into the glue at the end of the burlap strip. If you are not using a stem, just begin rolling the strip, pressing to keep the roll tight and keep the cut edges even. When you are finished rolling, you will have the shape of a flower bud. To create a fully-blooming flower, press the flower face down on work surface to spread out the loops.
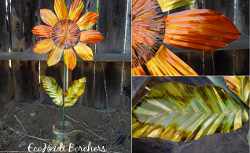
Read NextEmbossed Aluminum Sunflower