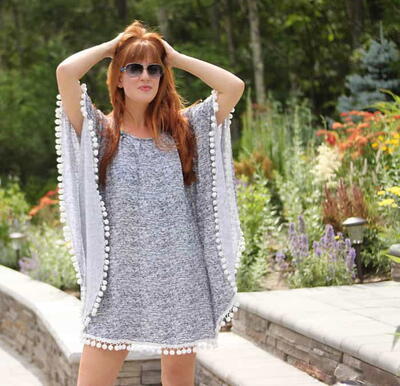
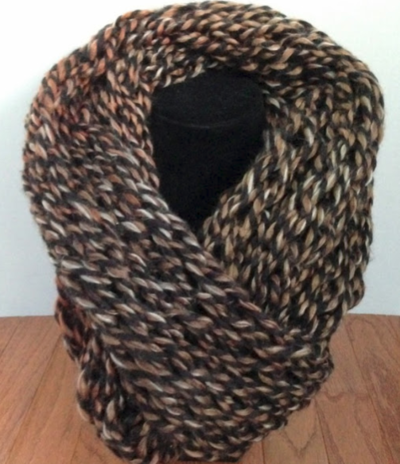
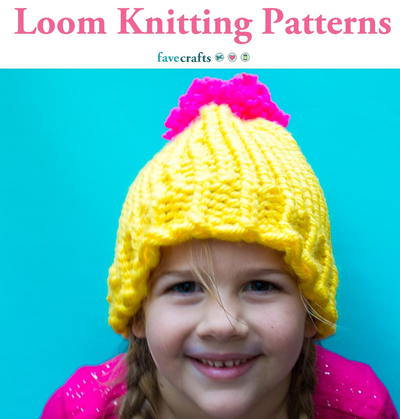
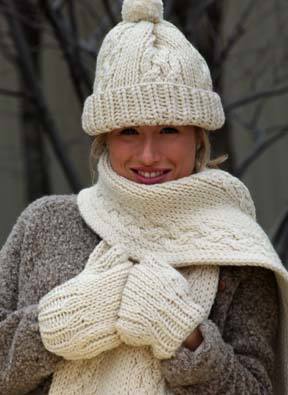
Cable Hat, Scarf and Mittens
This beautiful free knitting pattern from Authentic Knitting Board to make a matching hat, scarf and mittens involves smooth stockinette, ribs, and cables. Bulky wool makes it all very warm and cozy.

Gauge 3st=1” 3rows=1”
Scarf- Finished size aprox 10” x 68”
Hat fits most
Mittens size small (med-lge)
Our scarf is knit in Stockinette and Rib stitch. Two rows of cables are on one side, while the other side remains in ribbing and stockinette. The ends are crocheted off for neat finish.
Materials:
- Brown Sheep wool yarn, bulky weight. (5) skeins all sizes
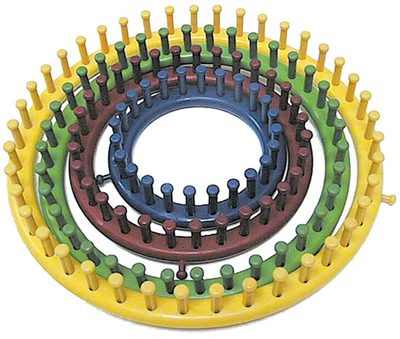
- Knitting Board
- Knitting hook
- Crochet hook for cables
- Large eyed needle for sewing
REMINDER: KNIT WITH LOOSE HAND WHEN CABLING.
Instructions:
Scarf:
- Start by casting on (30) stitches. This is done by starting with loop knot on top needle. Weave the yarn back and forth on the boards covering every other needle. Turn board around, and continue to cover the open needles. You now have one loop on all (30) needles on each board. Lay your anchor yarn across stitches.
- Repeat the process, so that there are (2) loops on (30) needles on each board.
- Now loop the bottom loop over the top all around board, lifting from outside of board. Pull gently on anchor yarn to secure the stitches. Don’t be concerned if stitches appear loose. You’re now ready to knit your scarf.
- Knit (1) row of Stockinette stitch.
- Next row-knit (4) sts Stockinette, (8) sts Ribbing , (6) sts Stockinette, (8) sts Ribbing, (4) sts Stockinette. Repeat this row for 2 additional rows. (hint-on the return weave, concentrate on covering the empty needles and you won’t get mixed up or miss a needle.)
- Cable Row-You will be twisting only the (8) rib rows for the cables. With your crochet hook or knit hook, slip loop 5 and 6 off of front board closest to you. Lift loops 7 and 8 onto another needle or hook. Place loops back on board in reverse order. (hint-Place 7-8 in on board first, so that your cable is crossed to left) This creates your 1st cable. Repeat this process with next (4) loops.
- Lift loops 9 and 10 onto hook. Lift loops 11 and 12 onto different hook or needle.
- Place 11-12 on board on 9-10 needles. Place 9-10 on 11-12 needles. Next (6) sts are your center stockinette stitches. Now do the cable twist to the next (8) loops by reversing 19 and 20 with 21 and 22. Reverse 23-24 with 25-26. The last (4) stitches are stockinettte.
- Knit 2 rows in stockinette and ribbing.
- Middle Cable Row-With hook, lift sts 7-8 and reverse with sts 9-10, only this time place sts on your left onto the needles first so that it crosses to right. Do same thing to center of next cable, reverse sts 21-22 with 23-24 and place sts to left (21-22) on needles first.
- Knit (2) rows in stockinette and ribbing.
- This is your pattern. You can make your scarf as long as you’d like. Our scarf is 200 rows. End your scarf with (2) rows of stockinette and rib after cable row. Bind off your stitches. Crochet sts for finished edges. Remove anchor yarn.
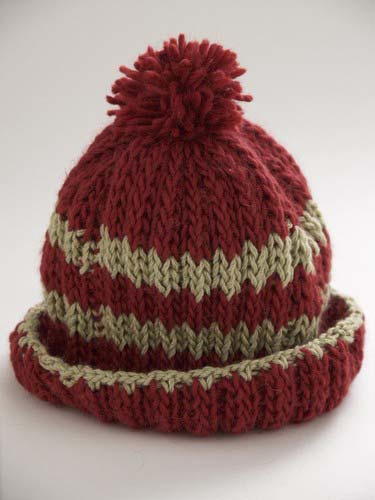
CABLE HAT TO MATCH SCARF WITH 4 CABLES
- Cast on 58 sts. Place anchor yarn across sts, with tails dangling at each end.
- Knit in stockinet/rib st for 28 rows. The sequence will be 4 sts of stockinet, 8 ribbing, 6 stockinet, 8 ribbing, 6 stockinet, 8 ribbing, 6 stockinet, 8 ribbing, 4 stockinet. You will repeat the cable process on the rib sts starting with row 2.
- Remember when doing the twist of the 2 sets of 4 sts, this is done by taking the sts on left to new needles and then moving the sts to right. When doing the middle cable twist, do it the opposite way, that is moving the sts on right first.
- Always do 2 rows of weaving between twists rows.
CHANGING TO ALL RIBBING FOR THE BRIM OF HAT
- Once you have completed 28 rows of cables, you are ready to start weaving the entire row in the rib stitch. This is your brim. Your hat will be a total of 40 rows unless you would like a deeper or thinner brim rolled over.
- Once complete, bind off the sts for the brim edge. Remove the piece from board.
- Sew the 2 ends (short edges) of hat with whip stitch for a neat invisible seam. Be sure to knot up from edge so that the knot does not show. Now pull the anchor yarn snug for the top of your hat. Knot the ends, and weave the ends of the yarn in and out of the hat a couple times to be secure. Tie ends of yarn, but do not cut as you will use these yarn tails to tie on the pompom.
POM-POM
- Wrap yarn around 4 fingers about 35-45 times. Slip off fingers and tie center tightly, as you would when making a bow. Snip with scissors all the loops. Now, to create a smooth ball, trim to desired length approximately 2“ in diameter. Shake to fluff. Tie the pompom to top of hat with tail ends of yarn from anchor yarn. Finish by drawing ends of yarn to inside of hat. Knot again to secure pom-pom to hat.
- Roll the brim of hat up and its ready to wear.
Yummy, Warm Woolen Mittens:
- Rib Stitch cuffs and smooth Stockinette Stitch for mittens. Size adult small and (medium/large). Plymouth Encore Chunky. Requires 1-1/2 skeins.
- Knit in stockinette stitch with ribbing for the cuff.
- Cast on 22 (24) sts Remember the anchor yarn.
- Knit 12 rows of Ribbing.
- Knit 2 Rows of Stockinette
- Next row, increase one stitch each end. Knit row in stockinet.
- Knit 3 (4) additional rows in Stockinette.
- Increase Row:
- You will increase (6) times across row. This means you need to shuffle all the stitches on your needles to each side to create (3) open needles on each end.
- Knit the 28 (30) stitches for 2 (4) additional rows.
Thumb:
- Next row, increase one stitch each end. Knit row in stockinette.
- Knit 1 row stockinette
- Next row- Begin thumb
- You now have 28 sts on board
- Count 11 sts, then slip next 8 stitches off board onto st holder, or large safety pin. (both sides of board)
- Shift last 10 sts over on board to sit next to first 10 sts.
- With crochet hook, lift sts 9,10,11,12. Twist away from you, and place back on board . This twist will make the thumb area stronger.
- Knit the 20 sts for another 16 rows. (If you are wanting a smaller size mitten, or a child size, knit only 12 or 14 rows.
- Cut yarn off with about 12” left on to work with.
- With crochet hook, pull 12”yarn tail through all sts as you bind off board.
- Go back and pick up 8 sts of thumb. Place as they were on both sides of board.
- Tie on a new 48” piece of yarn for thumb.
- Knit 8 rows for thumb. Decrease both ends. Knit 1 row. Decrease again. Knit row.
- Bind off remaining 4 sts.
Finishing:
- Sew sides of mitten together. Sew securely around thumb.
- Draw sts together at top of mitten, and secure.
- Draw sts together at top of thumb, and secure.
- Crochet off the cuff edge loosely and remove anchor yarn.
- REPEAT ALL FOR 2ND MITTEN.
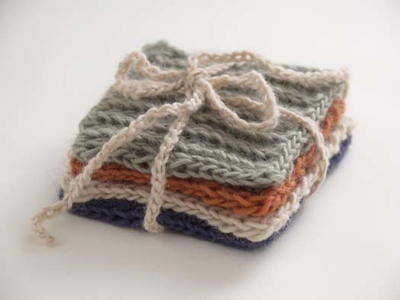
Up Next:
Read NextSet of Four Knitted Coasters


Thanks for your comment. Don't forget to share!
Tinkerbell64
Nov 27, 2014
If anyone would do this project and put it on a video, it would be perfect. I unfortunateley don't understand the english knitting language. I'm a visual person o) I love the hat and the scarf...wow! I want to do it.
liliamonty65 76841 90
Jan 16, 2013
Too difficult for me but I would love to do the hat with 2 needles only. Could you please help? Thank you
pwhite98270
Sep 26, 2010
I have not tried loom knotting but with these simple patterns it is time to try something new.
stefanescu lumini ta
Apr 14, 2010
Trebuie sa recunosc ca tot ce vad pe saitul dumneavoastra estefoarte frumos, dar eu sunt din Romania si traducerile pe care eu reusesc sa le fac nu sunt concludente , de aceia eu va rog daca se poate ca la orce model sa incercati sa-i faceti o diagrama cu o simbolistica necesara adica - A - ochi fata , B- ochi dos , C- ochi rasucit ,D - jeteu , .... si modelul ar veni asa de exemplu randul 1 adcbcbcd, randul 2 - bbbbbbb , randul 3 - bbaaccdd . M-ati ajuta foarte mult daca ati proceda asa. In rest toata admiratia mea pentru tot ce faceti , cu mult respect Luminita
Report Inappropriate Comment
Are you sure you would like to report this comment? It will be flagged for our moderators to take action.
Thank you for taking the time to improve the content on our site.