Julianne Fingerless Gloves
These knitted gloves from Authentic Knitting Board offer lots of warmth for the hands and wrists with the fingers free. This glove is shaped to fit comfortably around each finger.

Stitches: Rib and Stockinette
Size: One size
Materials:
- Yarn: Brown Sheep Lambs Pride-Bulky, wool and mohair. 1 skein or 125 yds of bulky yarn.
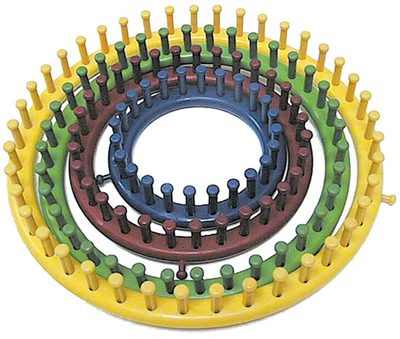
- Knitting Board (26 needles)
- Knit hook
- Crochet hook
- Large eyed sewing needle
Measurements: 8” bottom of fingers to cuff, aprox 10” around base of fingers, 12” at fullest point
Gauge: 2.5 sts=1”
Instructions:
- Start glove at cuff in rib stitch.
- Cast On 18 stitches in rib stitch. Lay anchor yarn of same yarn.
- Knit 10 rows in rib stitch.
- Change to Stockinette stitch for the remainder of glove.
- Knit 1 row in stockinette stitch.
- Increase 1 stitch each end of board. Knit row.
- Knit 1 row in stockinette stitch.
- Repeat these two rows a total of 2 additional times. You have added a total of 6 new stitches or now have 24 stitches on your knitting board.
- Knit 1 additional row.
- Thumb Shaping:
- Bind Off 3 stitches at each end of the knitting board. At yarn end, be sure to lay the working yarn between the 2 rows of needles. This way it will be in position for the next row. Place the last bind off loop onto the 4th needle on either board. Knit 2 rows in stockinette. Be sure to lift both lower loops at needles with extra loop. All
- needles will have just one loop.
- Increase row: You will do 3 increases in the same row.
- Shift all loops on left end of board over 1 needle till you get to center of knitting. This will leave an empty needle in center of knitting. Increase to empty needle from needle on right side of empty needle.
- Increase each end of board. You should now have 21 stitches on your knitting board.
- Knit 1 row across all stitches.
- Center Bind Off:
- You will shape the center of the knitting for the little finger.
- Go to center of stitches. (10 on one side and 11 on the other).
- Bind off from center to left, 2 stitches. Place the loop onto the next needle.
- Bind off from center to right, 2 stitches. Place the loop onto the next needle, same board. You now have 2 sections of knitting.
- Start at end with yarn attached. Knit 1 row of this section only.
- Decrease 1 stitch at beginning of next row. Knit this row.
- Bind Off loosely. Cut yarn.
- Work the other side of board. Start by tying on the yarn at beginning of section.
- Knit 1 row of this section.
- Decrease 1 stitch at end of next row. Knit this row.
- Bind Off loosely. Cut yarn.
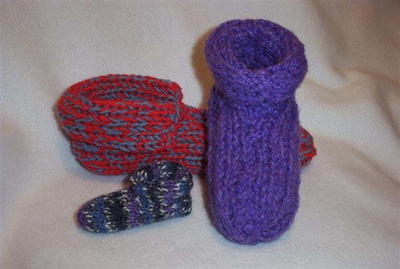
- This is how your knitted piece will look:
- Sewing and Finishing:
- Fold glove, matching the thumb shapes and the top and bottom of glove.
- Use invisible stitch to do the side seam.
- Sew from bottom of cuff to thumb shaping. Do not sew the bind off stitches as this is what wraps around the thumb.
- Knot the yarn. Sew from the top of the thumb to top of glove.
- Place glove on hand and mark the points that correspond to the space between the fingers.
- You can secure these points with a short piece of yarn by tying the two sides of glove together. It will be a ‘tacking’ of the 3 points between the fingers. If you want a more distinct finish around the finger openings, you can crochet the edge around each finger, securing the 2 sides of glove at each contact point. Either way, the glove is set to fit your fingers and thumb.
- Bottom at cuff: Your bottom edge is ready to finish off. It can be left as is by tying the anchor yarn loosely and leaving it in. Or you can bind off the edge with the crochet hook. To bind off, start at end opposite your yarn tail. Pick up 2 loops, pull loop closest to hook thru the other. Pick up 1 additional loop and pull one thru the other. Keep doing this until you have gone around the cuff. Pull yarn tail thru the last loop for a knot. Secure all yarn tails by pulling them into the knitting with the crochet hook. You may want to add extra stitch and knot at all stress points.
- Knit the 2nd glove.
Up Next:
Read NextKelly Colored Scarf


Thanks for your comment. Don't forget to share!
JMitchell
Jul 21, 2011
I don't knit so can't answer the questions... but I do have one of my own. I can see the practical aspect of having fingers free to maniuplate things such as keys and possibly other small objects, but how does one provide any warmth to the fingers and still have the practicality of fingerless gloves? I just can't see any continuous long-term use to such an item. My fingers would be cold in less than a minute, rendering them about as useless as wearing full gloves, but without being warm.
reedytk 8461750
Feb 07, 2011
Hi, i just stared loom knitting and i wanted to know what a rib stich is. Is it just when you pull the bottom loop over the top loop and over the peg?? please get back to me as soon as you can. I would love to get this done as soon as possible. It is for a bithday gift for a friend. So if you could help me that would be great!!! thanks for all your help Tiffany!
Report Inappropriate Comment
Are you sure you would like to report this comment? It will be flagged for our moderators to take action.
Thank you for taking the time to improve the content on our site.